Good day! We received a very interesting request to create SNOW BLUE preset with tanned skin, and this idea seemed to us very interesting, that is why we decided to implement it and share with you these wonderful refreshing and unusual presets.
Today we create SNOW BLUE preset. The preset is developed in three versions, for example we will analyze one of the options with you.
You can choose the option that is better for you below
- You can follow this step-by-step guide to create a preset
- You can edit photos by yourself, watching our videos
- You can download our presets for free, but for this you need to carefully watch the video and remember the password (****) for downloading the preset in DNG format. Attention! The password appears only if you watch the video on YouTube, on this website (only on computer’s browsers) or on YouTube app.
- You can also buy set of presets like this. Look at the items down below
How to create SNOW BLUE for mobile Lightroom | Guide
We recommend using photos with yellow, blue, purple, green, black, white, brown, orange details for SNOW BLUE preset.
1. Choose your photo
Choose photo with blue details for SNOW BLUE preset
Please select a photo, taking into account our recommendations above. How to add a photo, you can see here.
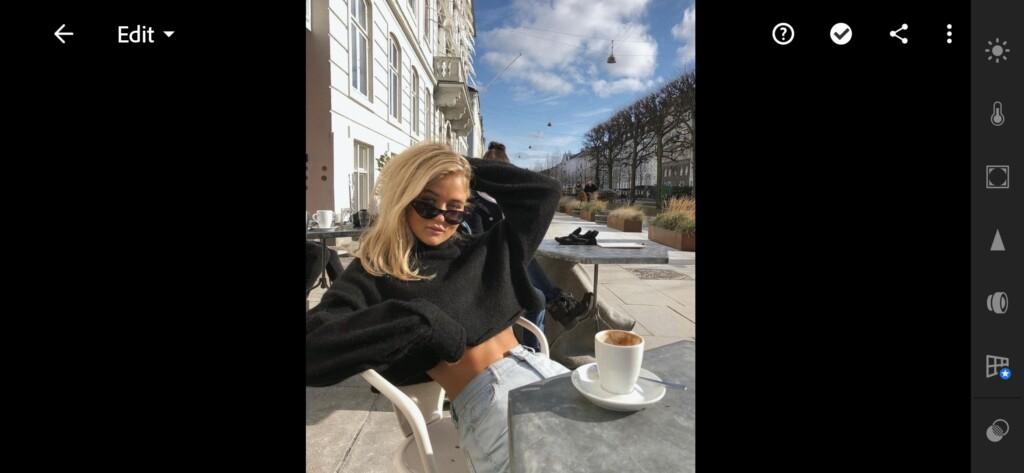
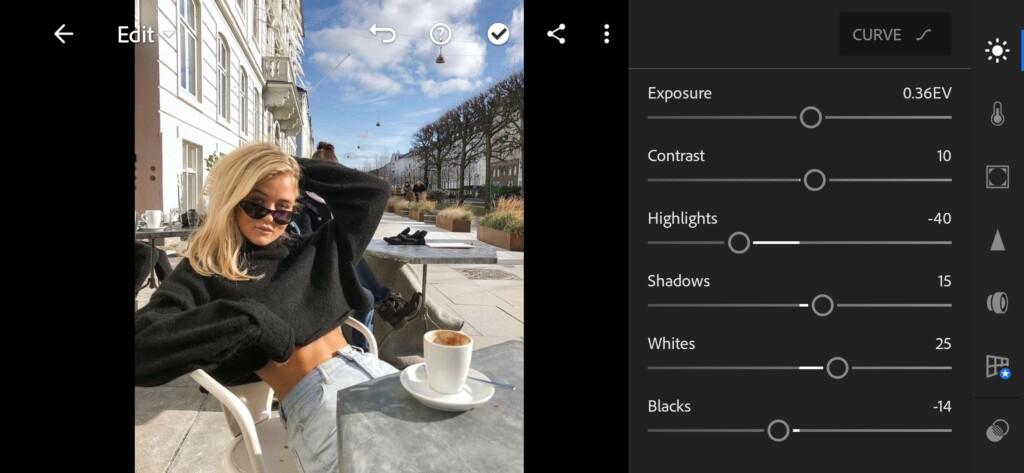
2. Light correction for SNOW BLUE preset
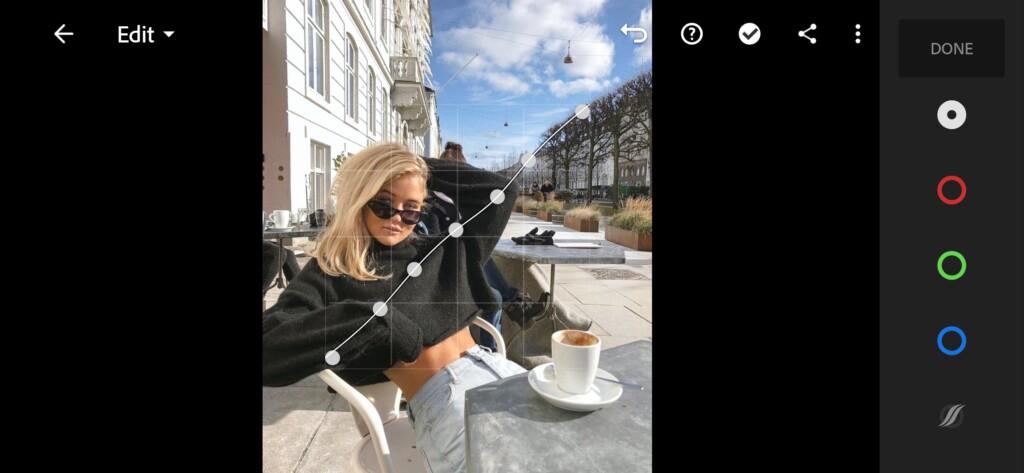
Let’s brighten up our photo a little. Add exposure, some contrast, shadows and whites. And adjust the highlights and blacks a little. Okay. Now let’s go to the curve tab and draw a white curve as shown in our example. The white curve is responsible for all colors.
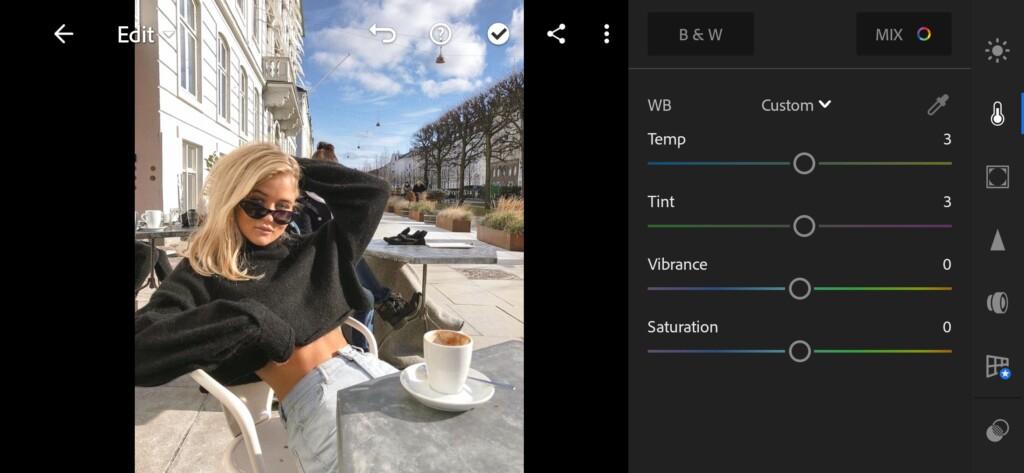
3. Let’s edit color correction for SNOW BLUE preset
Since our task is to make a slightly glowing photo, we will increase the luminance of almost every color, due to this we will make our dull colors lighter.
04 Snow Blue Lightroom Preset 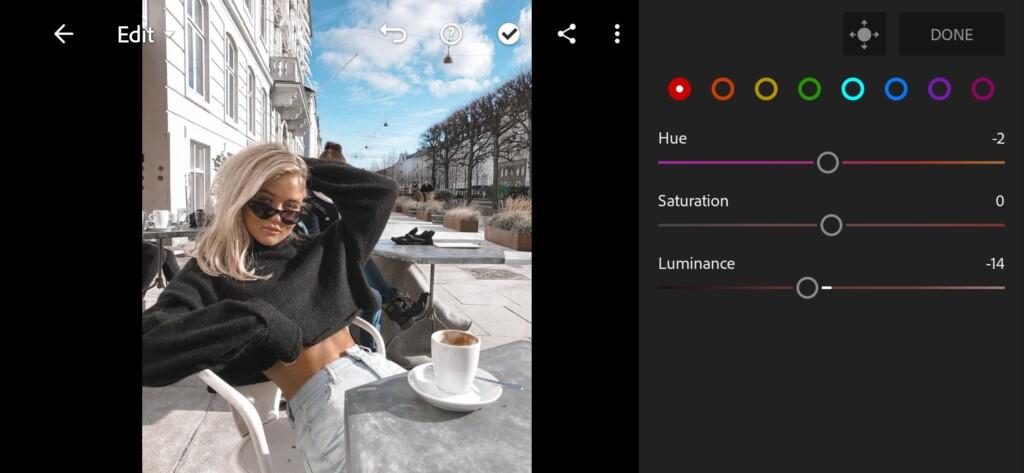
05 Snow Blue Lightroom Preset 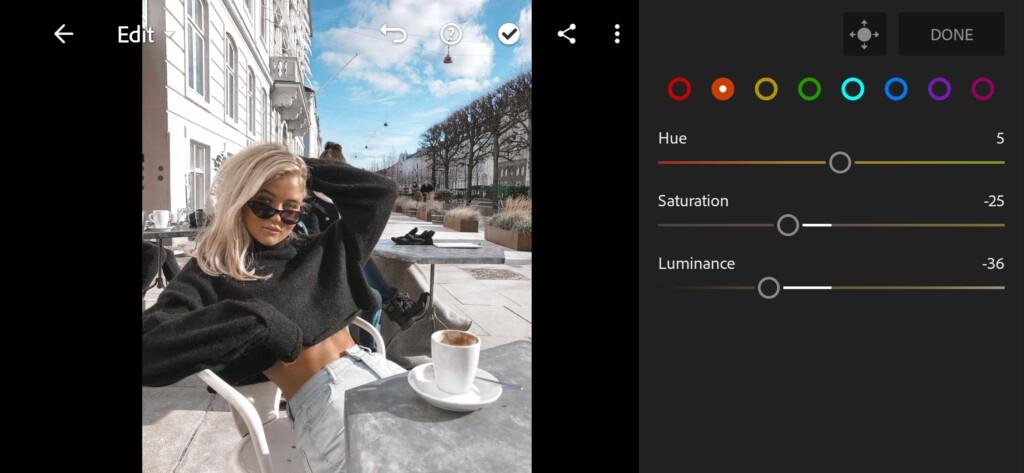
06 Snow Blue Lightroom Preset 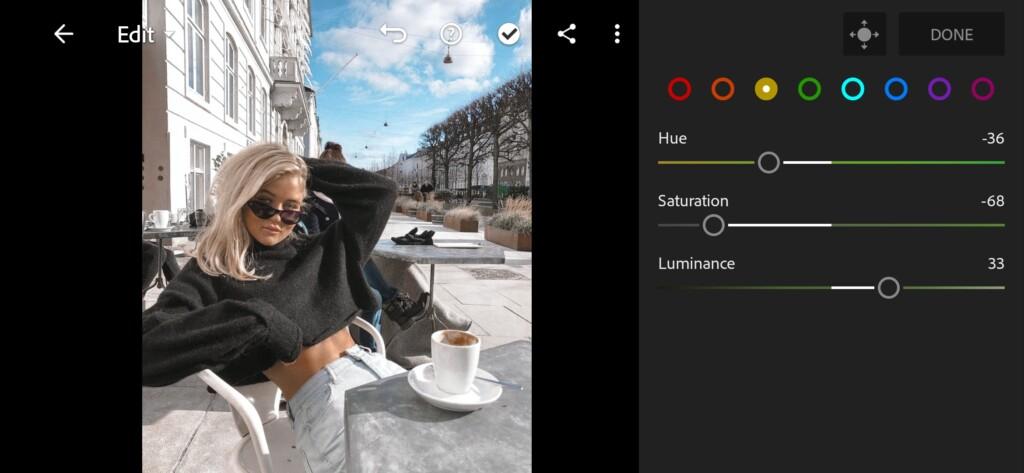
07 Snow Blue Lightroom Preset 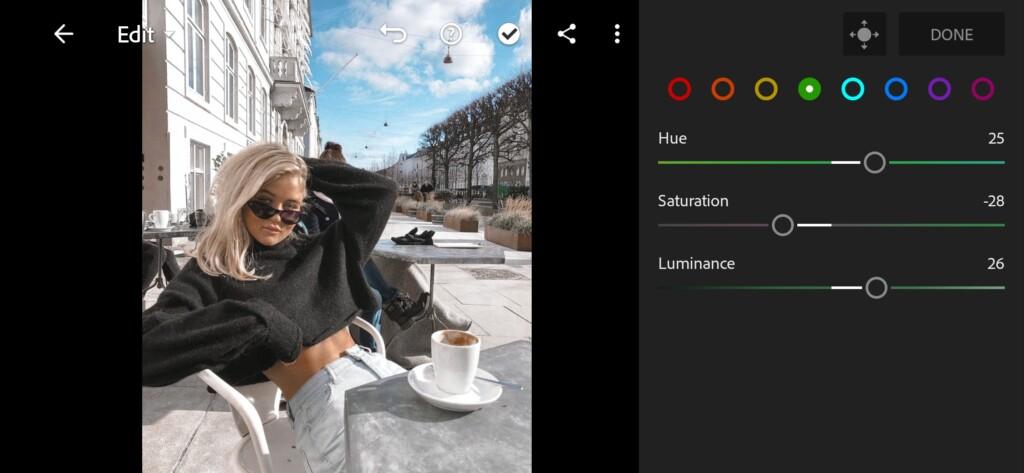
08 Snow Blue Lightroom Preset 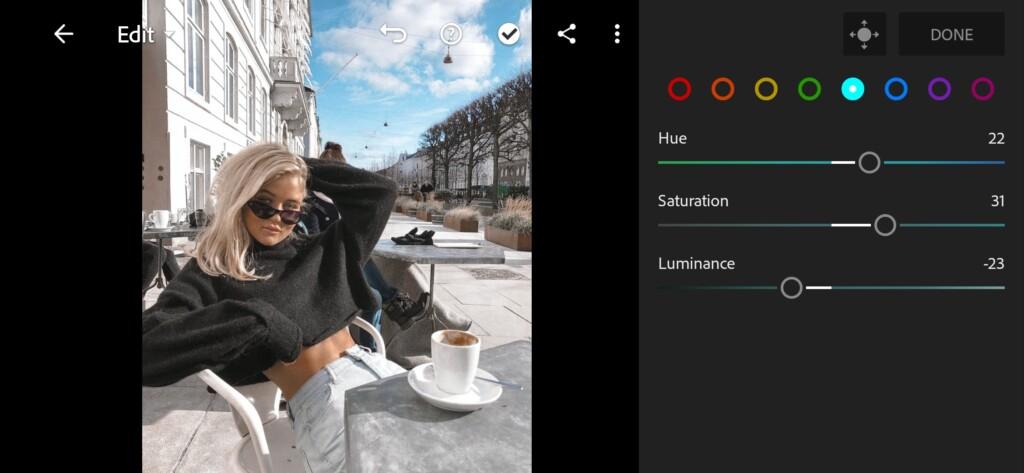
09 Snow Blue Lightroom Preset 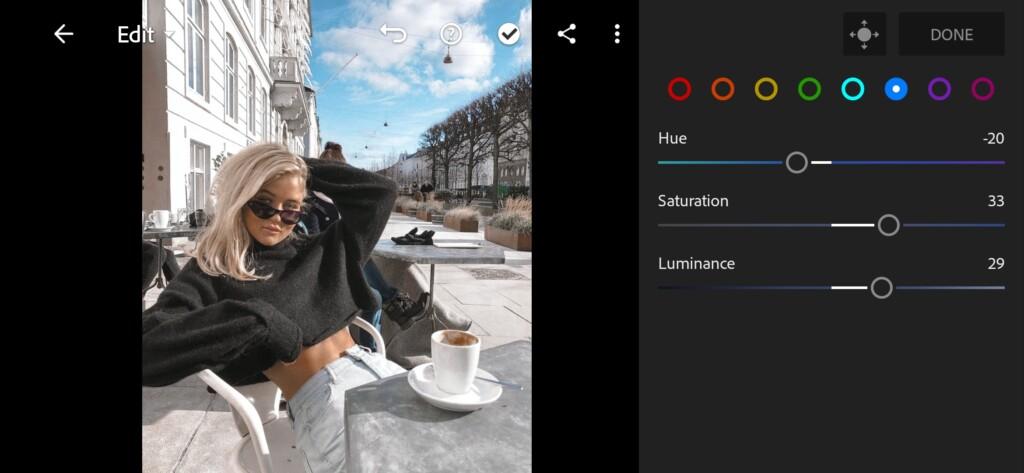
10 Snow Blue Lightroom Preset 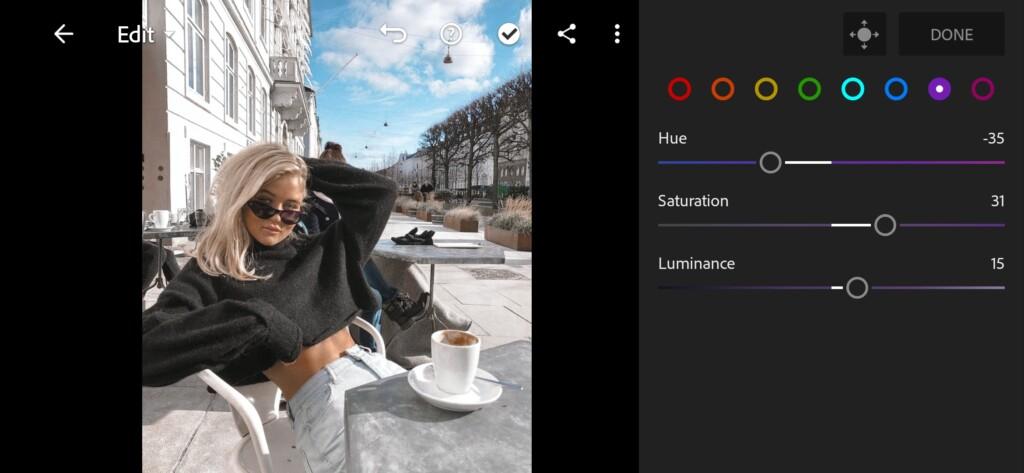
11 Snow Blue Lightroom Preset 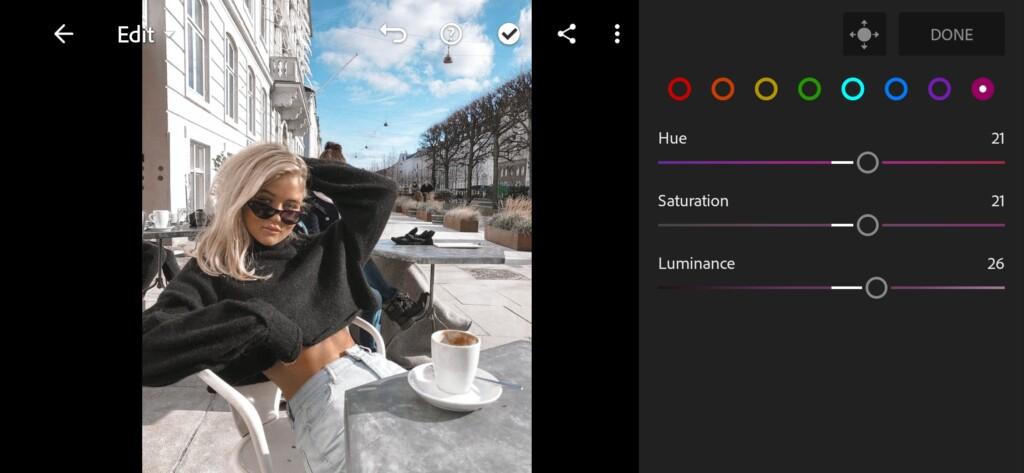
12 Snow Blue Lightroom Preset
4. Getting started with effects editing for SNOW BLUE preset
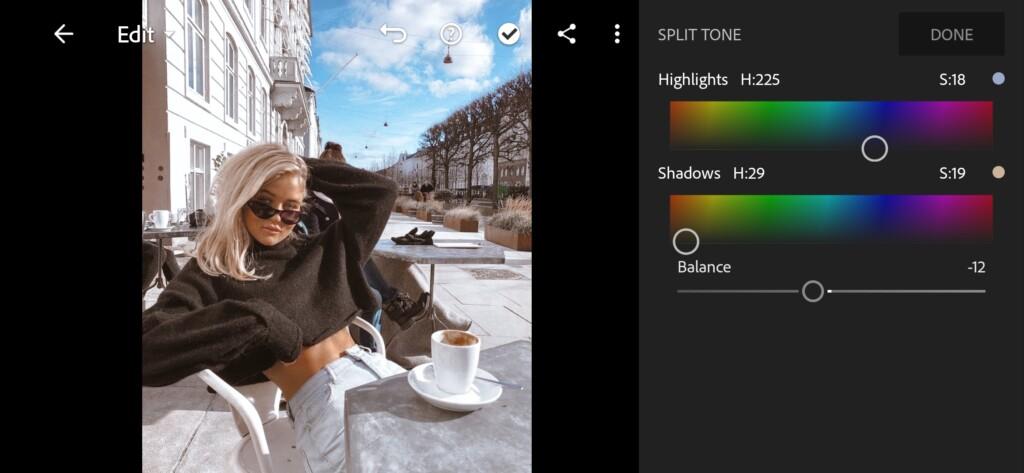
Go to the split toning tab. Here we will enhance the radiance of our photograph and make it truly magical and radiant.
5. Our next step – detail correction for SNOW BLUE preset
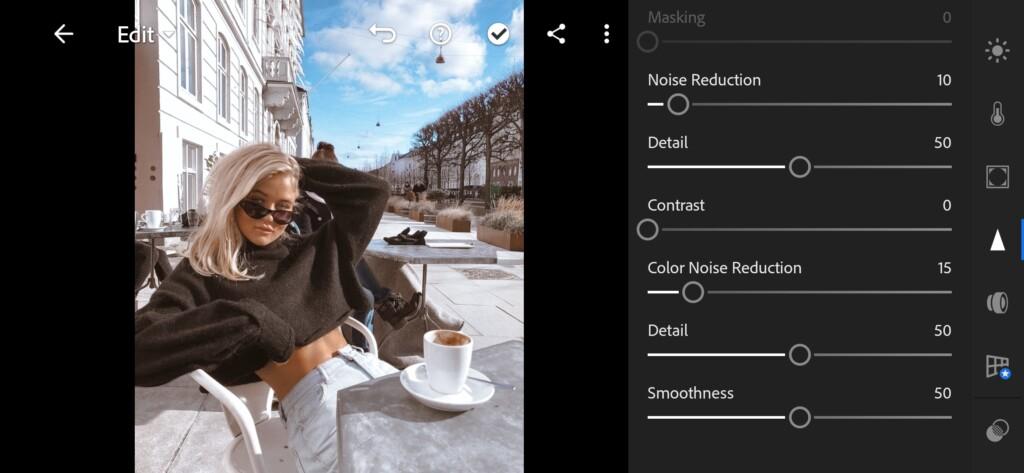
At this step, we will smooth out the color noise in the photo. All this can be seen in the screenshot below.
6. SNOW BLUE preset is ready
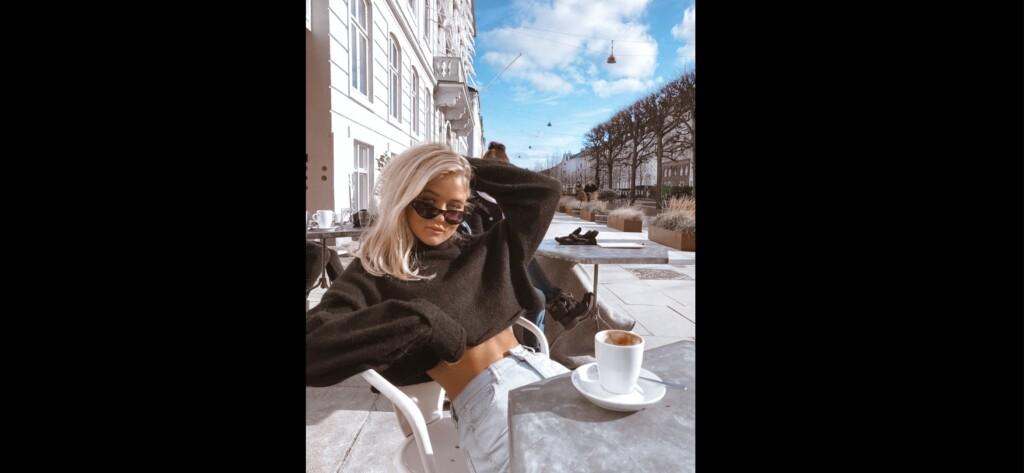
So we finished the transformation of our photo, we hope that this article was useful to you. See you soon!

7. Be sure to save SNOW BLUE preset
Don’t forget to save the preset, for further use the presets in one click on your photos.
If you still don’t know how to save a preset, see this article. If you have any questions, please contact us. We are always happy to help!
Thank you for being with us! Do not forget to subscribe to the channel to get the most top presets! ?
Watch the video how to create Snow Blue Lightroom preset | Tutorial
Download the Preset
To download the Preset for free you need to have a password which appears twice on the top right corner during the video


