Hello everyone! Today we will create a beautiful, dark, professional, cinematic PRIME TONE preset in the Lightroom mobile app and show you every step of creating this cool preset for indoor and outdoor photography. If you are interested in the topic of color correction, be sure to join us on social networks and stay tuned for new presets. Every week we share with our subscribers one version of a professional preset for Lightroom and Photoshop.
You can choose the option that is better for you below
- You can follow this step-by-step guide to create a preset
- You can edit photos by yourself, watching our videos
- You can download our presets for free, but for this you need to carefully watch the video and remember the password (****) for downloading the preset in DNG format. Attention! The password appears only if you watch the video on YouTube, on this website (only on computer’s browsers) or on YouTube app.
- You can also buy set of presets like this. Look at the items down below
How to create PRIME TONE preset for mobile Lightroom | Guide
For PRIME TONE you can choose any photos.
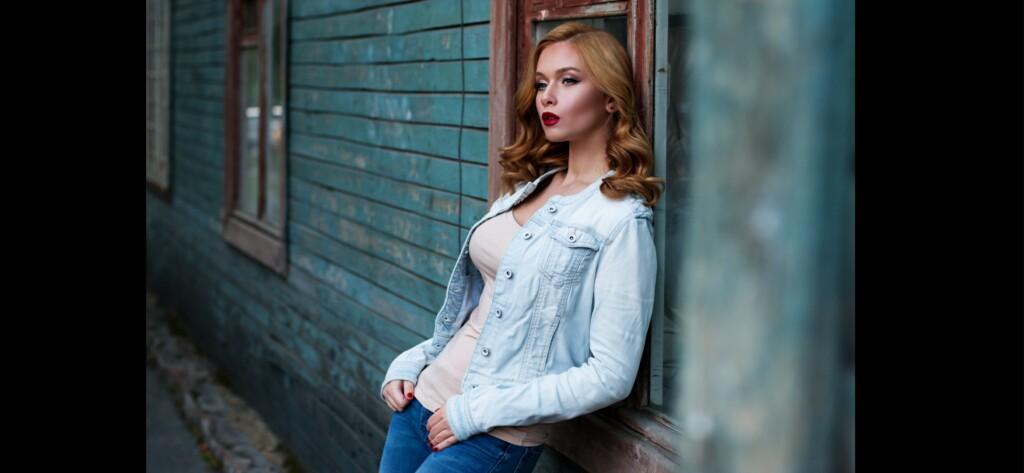
1. Choose your photo
Please choose a photo that you like.
2. Light correction
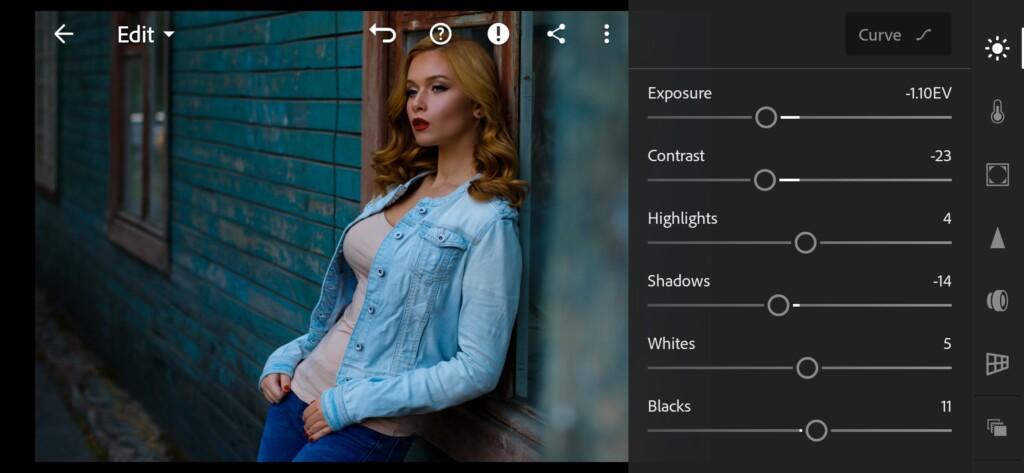
We start by building a white tone curve, and adjusting the exposure, contrast, highlights, shadows, blacks, whites. And let’s talk a little more about the white curve. We can create a beautiful skin glow effect, a matte photo effect, a contrast effect, all with a white curve. At the very bottom corner of the white curve we work with dark tones, in the middle we have midtones, and at the very top we have white tones. You can experiment with this curve yourself, or watch our tutorials and videos on YouTube.

3. Color correction
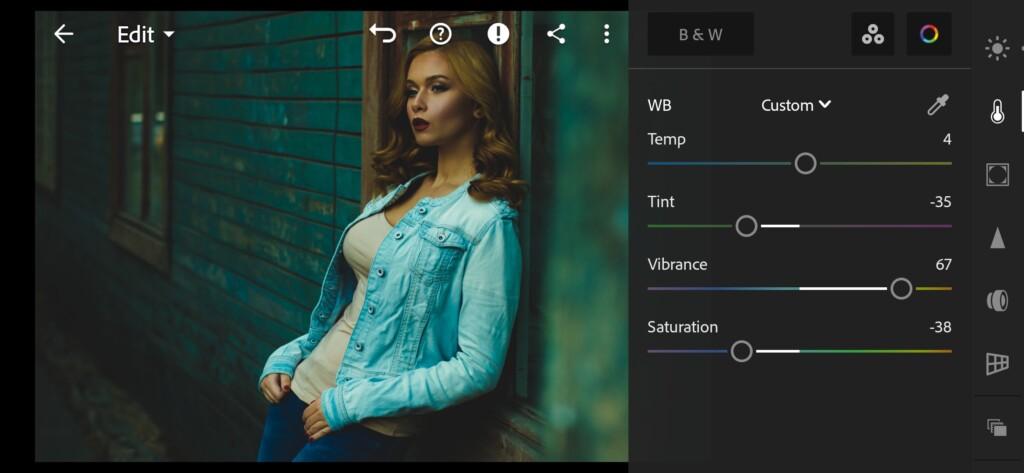
We focus on color matching when creating professional Lightroom and Photoshop presets. We decided to create a dark blue preset with orange tints, as these colors combine very well and harmoniously with each other.
04 Prime Tone Lightroom Preset 
05 Prime Tone Lightroom Preset 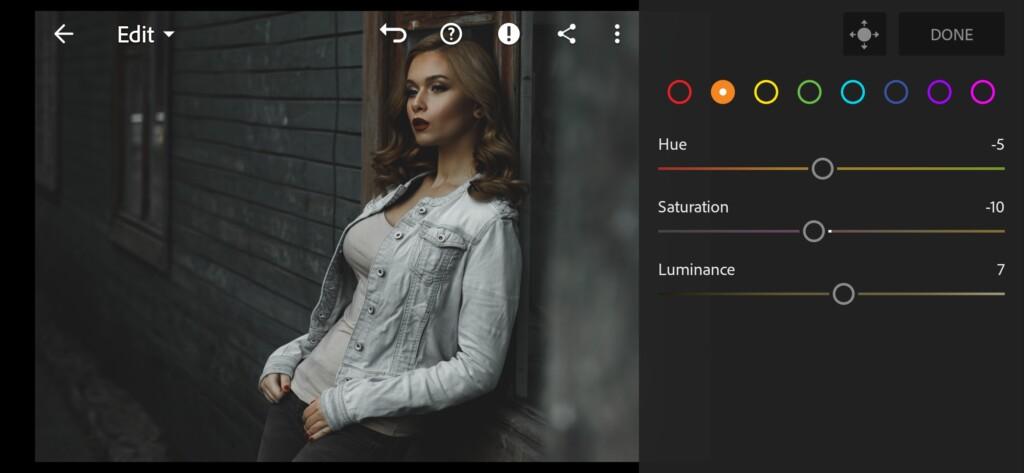
06 Prime Tone Lightroom Preset 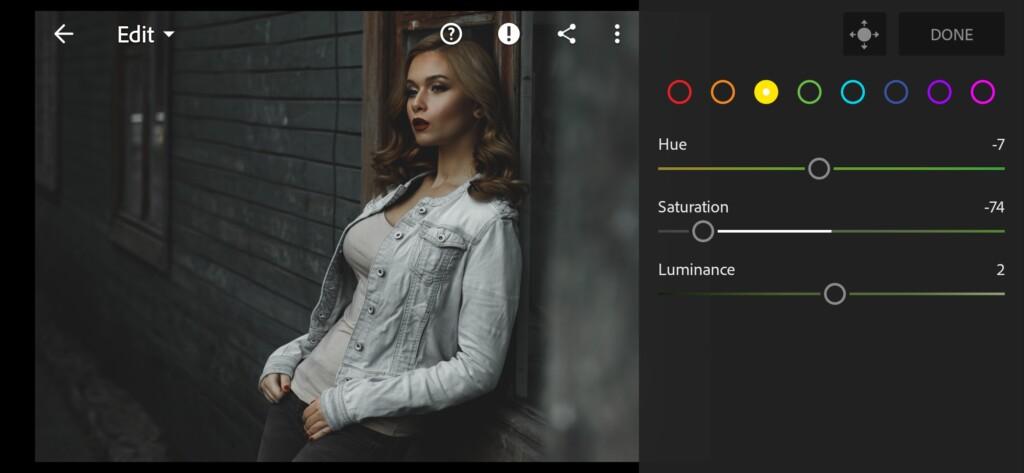
07 Prime Tone Lightroom Preset 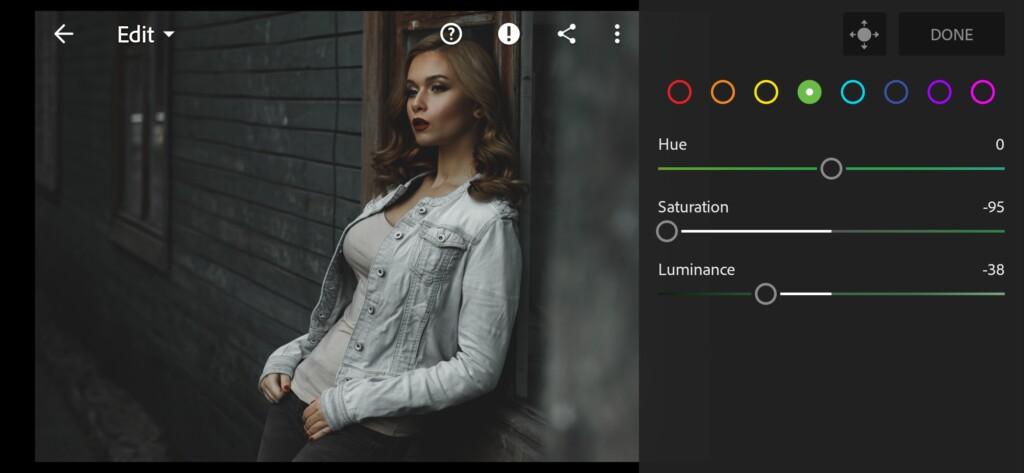
08 Prime Tone Lightroom Preset 
09 Prime Tone Lightroom Preset 
10 Prime Tone Lightroom Preset 
11 Prime Tone Lightroom Preset 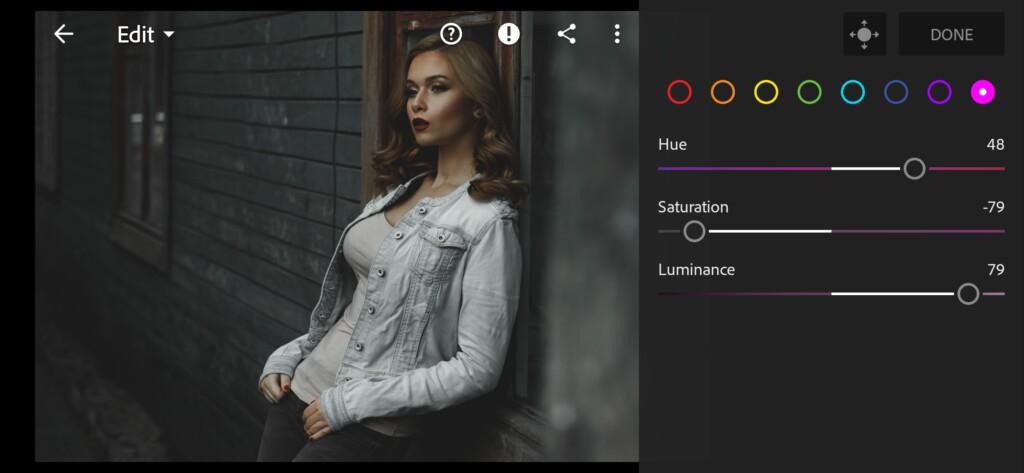
12 Prime Tone Lightroom Preset 
13 Prime Tone Lightroom Preset 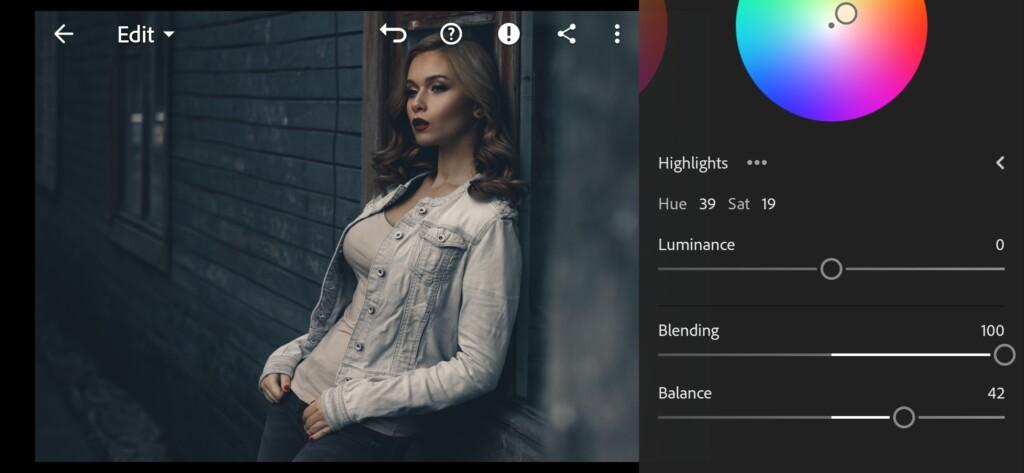
14 Prime Tone Lightroom Preset
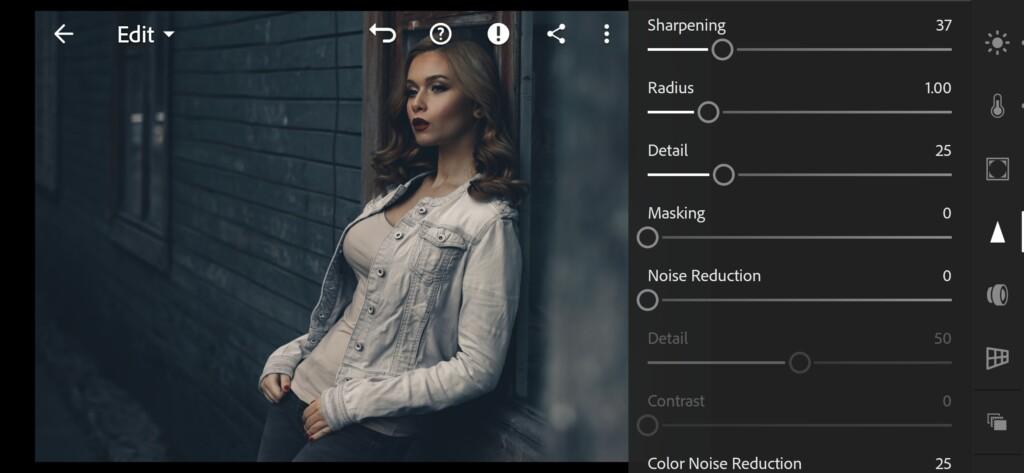
4. Detail correction
Add sharpening, color noise reduction.

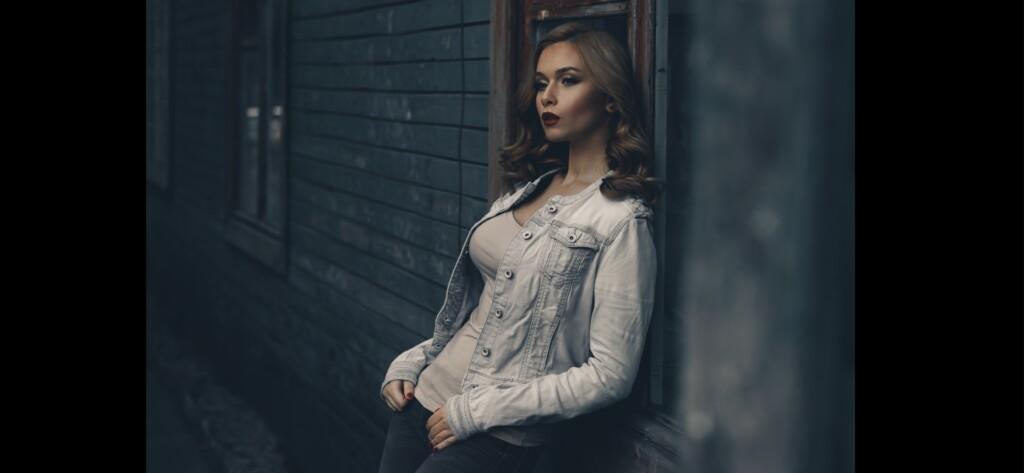
5. Preset is ready
PRIME TONE preset is ready.

7. Save this preset
If you still don’t know how to save a preset, see this article. If you have any questions, please contact us. We are always happy to help!
We have completed the creation of the first version of the preset, if you need more options for professional Lightroom presets, you can proceed to buying a whole set of six preset options, and you can also buy video loot in the same color scheme on our website.
Watch the video how to create PRIME TONE Lightroom preset | Tutorial
Download the Preset
To download the Preset for free you need to have a password which appears twice on the top right corner during the video


