In our last poll on Friday, the @MADDIEGREER preset won and today Sunday we show you how to transform your photos and make them look like Maddie Greer. We will analyze with you only Maddie Greer color correction options. All of her photos are somewhat similar to each other, but they are all processed differently, there are several presets in her profile. We will show color correction in the Lightroom mobile application, since we create all presets.
You can choose the option that is better for you below
- You can follow this step-by-step guide to create a preset
- You can edit photos by yourself, watching our videos
- You can download our presets for free, but for this you need to carefully watch the video and remember the password (****) for downloading the preset in DNG format. Attention! The password appears only if you watch the video on YouTube, on this website (only on computer’s browsers) or on YouTube app.
- You can also buy set of presets like this. Look at the items down below
How to create Ginger like @MADDIEGREER for mobile Lightroom | Guide
For Ginger preset we recommend using photos with red, orange, green, white, black details.
1. Choose your photo
Please choose a photo in green, or against a green background with orange, red or brown details, as in our example.
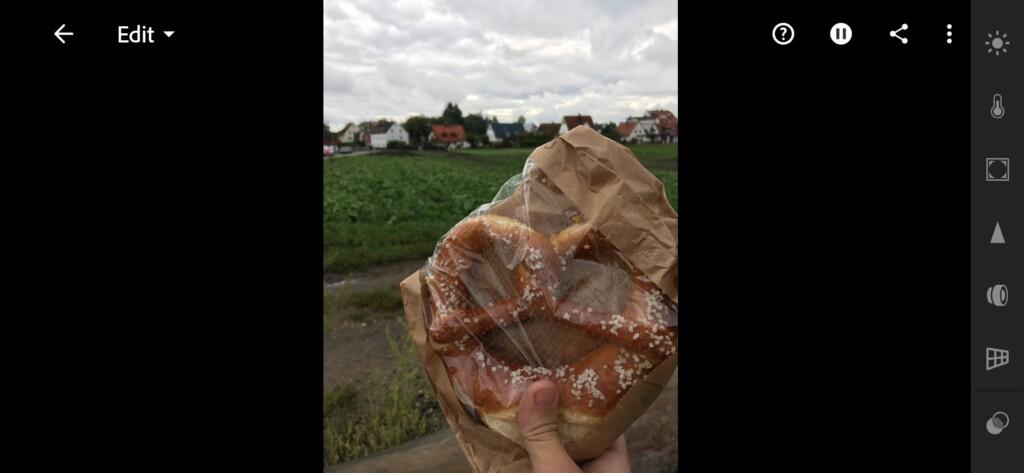
2. Light correction
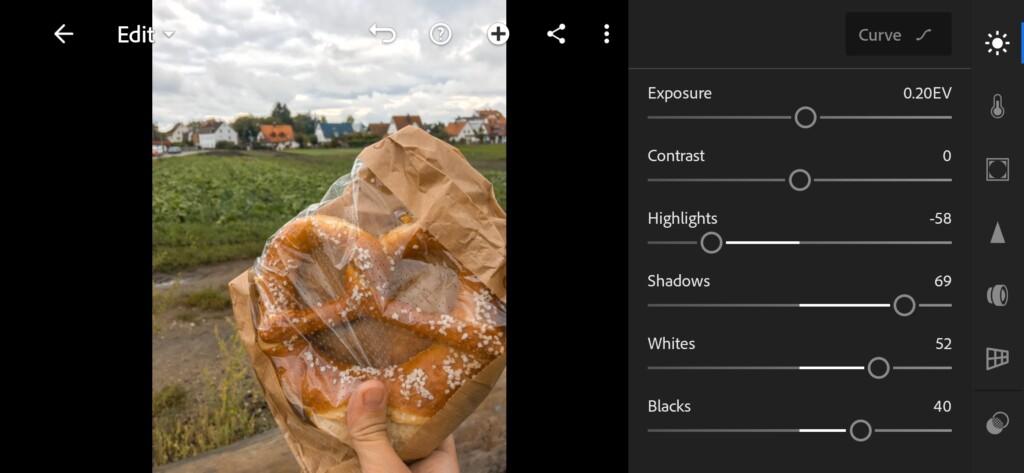
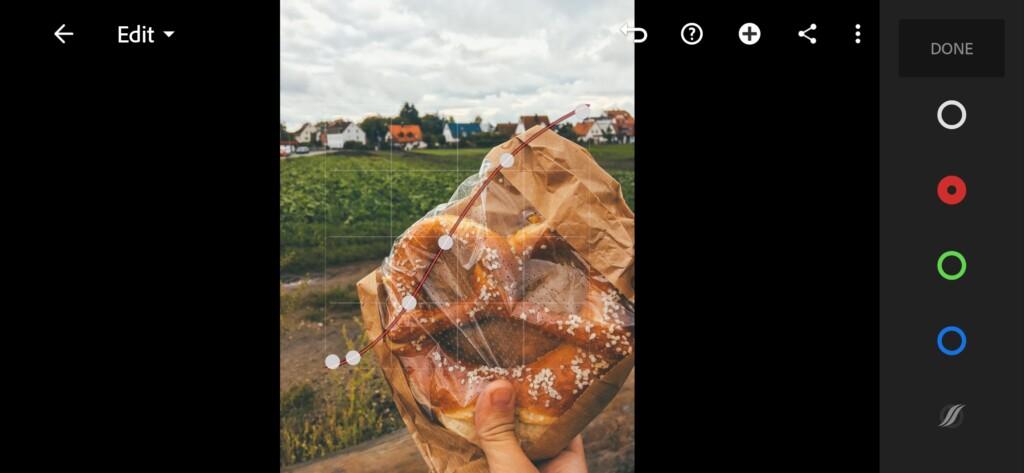
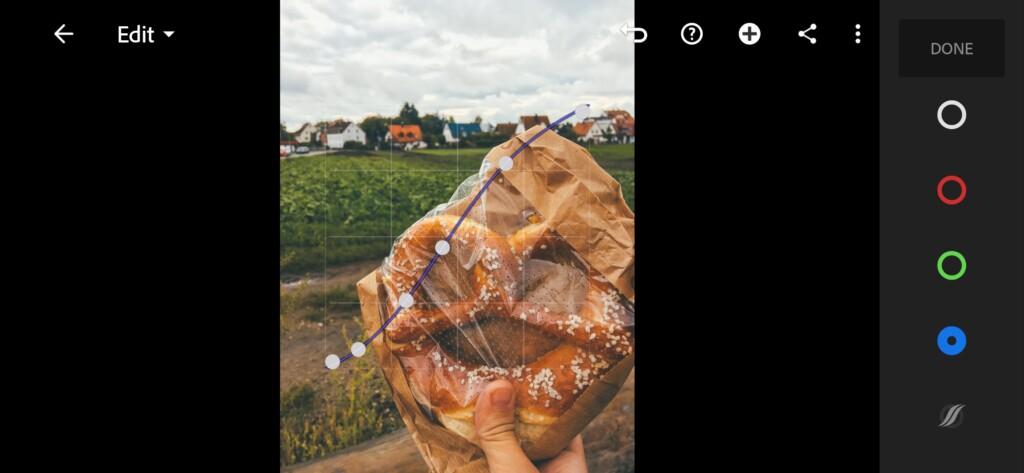
We start with exposure, then add contrast, highlights, shadows, whites, blacks. After that we move on to plotting curves.


3. Color correction
We’re now doing a Maddie Greer-style color correction. Our main colors are warm green, orange, brown. Also add some orange tint to the shadow.
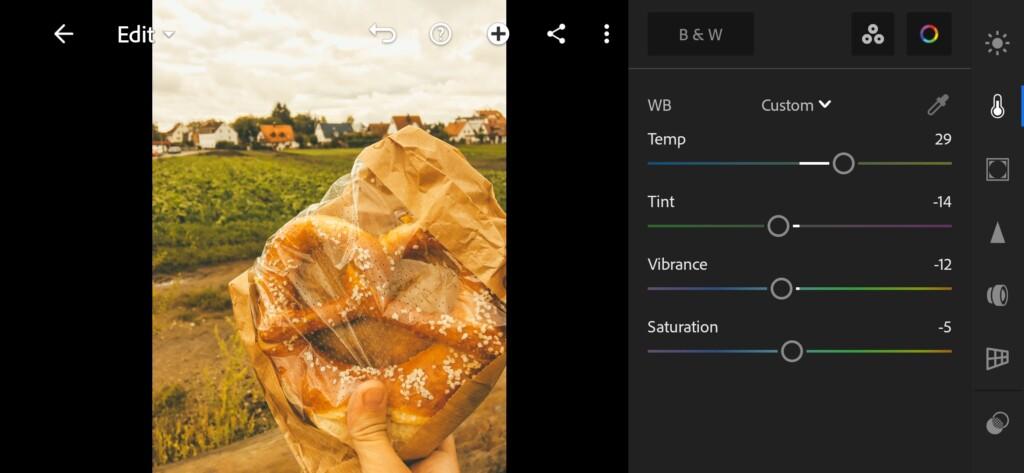
07 Maddiegreer Lightroom Preset 
08 Maddiegreer Lightroom Preset 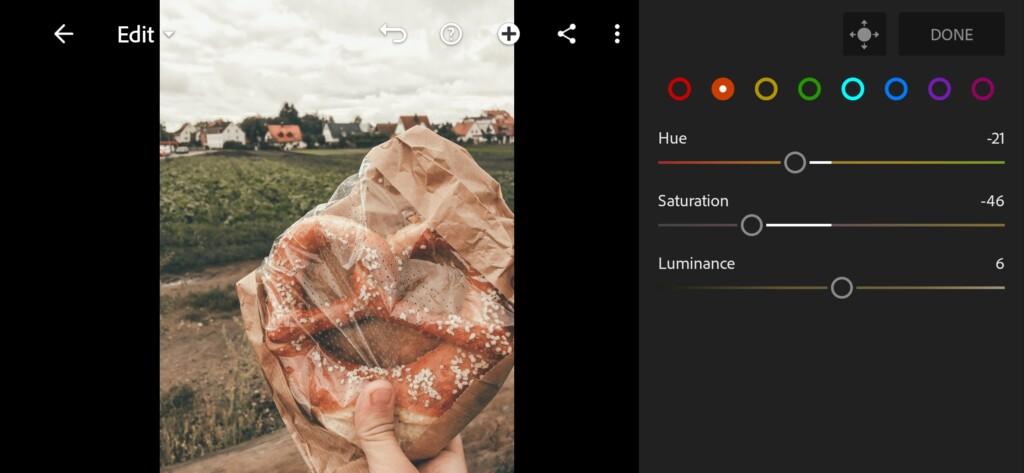
09 Maddiegreer Lightroom Preset 
10 Maddiegreer Lightroom Preset 
11 Maddiegreer Lightroom Preset 
12 Maddiegreer Lightroom Preset 
13 Maddiegreer Lightroom Preset 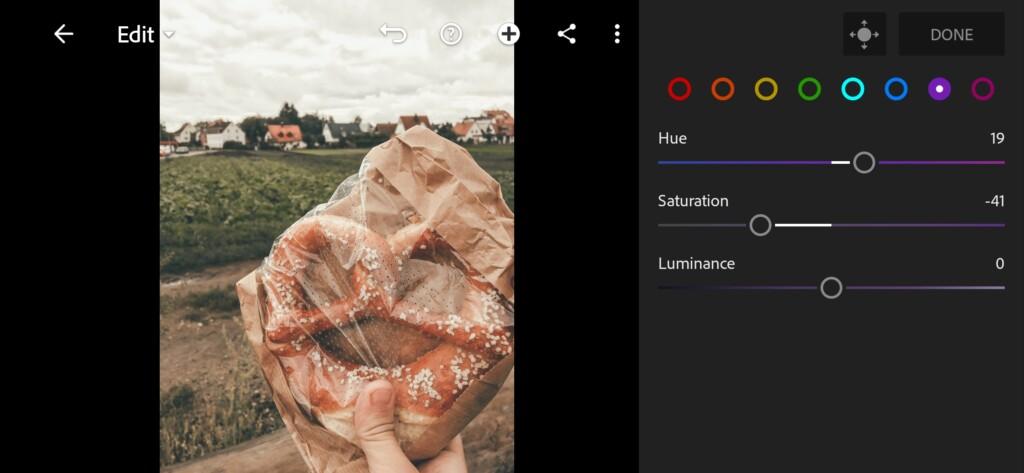
14 Maddiegreer Lightroom Preset 
15 Maddiegreer Lightroom Preset 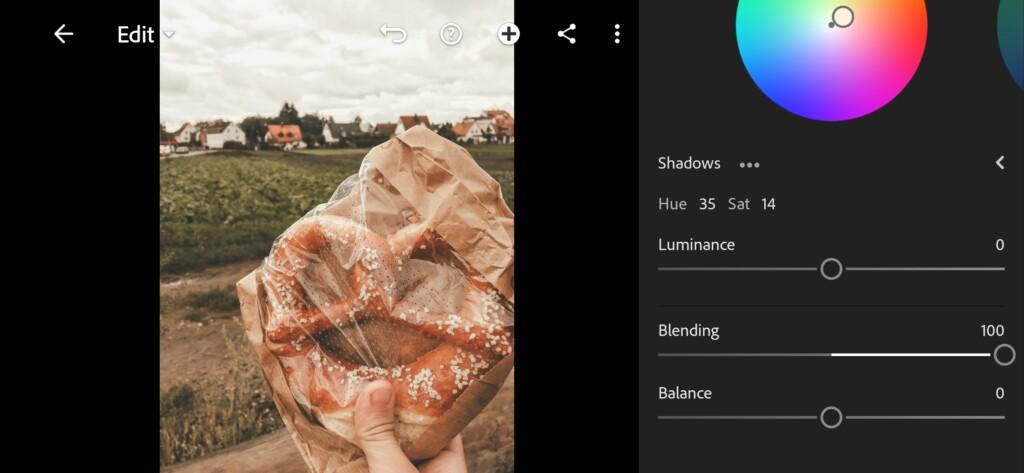
16 Maddiegreer Lightroom Preset
4. Effect Editing
Now we will see a little clarity in the minus and add a grain amount like Maddie Greer


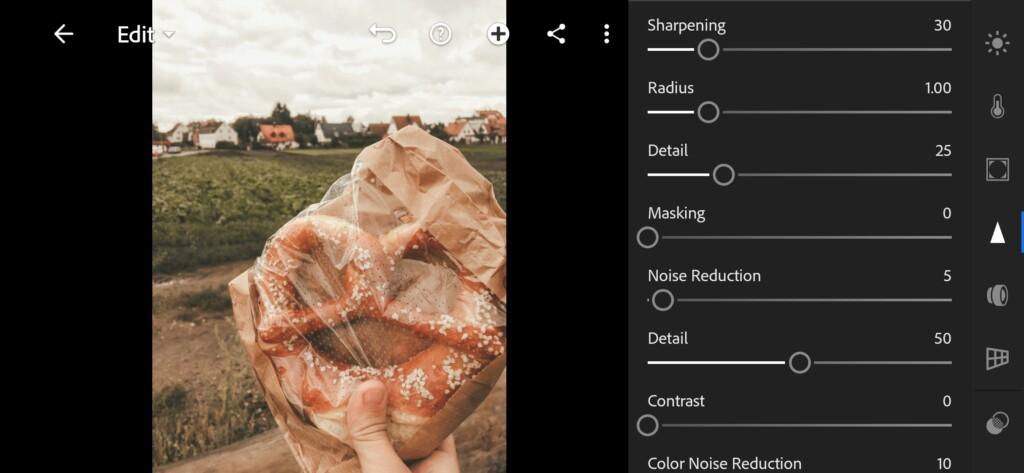
5. Detail correction
In the detailed correction, add a little sharpening, noise reduction, color noise reduction. This will highlight the details a bit and smooth them out.
19 Maddiegreer Lightroom Preset 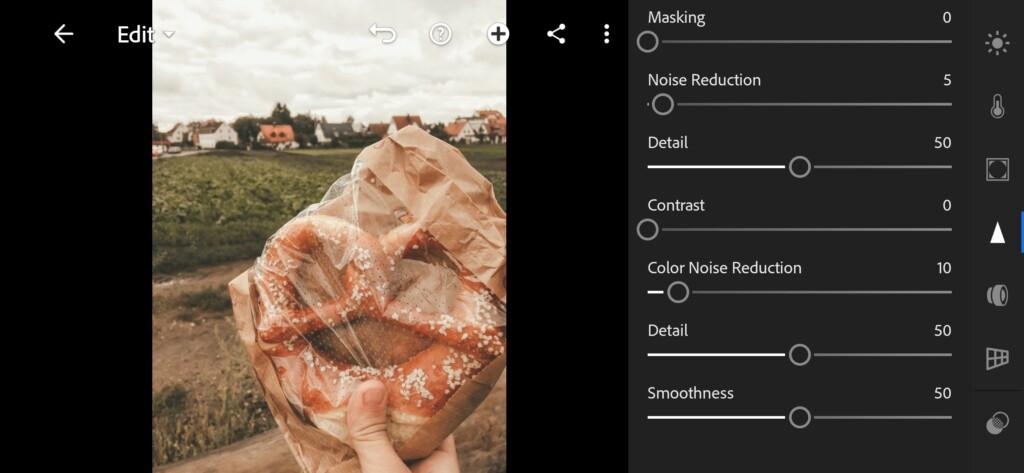
20 Maddiegreer Lightroom Preset
6. Preset is ready
Ginger like @MADDIEGREER preset is ready. Now you can transform your photos, and make them as close as possible to the style of Maddie Greer.


7. Save this preset
Did you like our preset? Be sure to save it.
If you still don’t know how to save a preset, see this article. If you have any questions, please contact us. We are always happy to help!
Today we showed you one Maddie Greer style color correction, and we hope this tutorial was helpful to you! Thanks for your preset ideas! We are pleased to create presets for you!
Watch the video how to create Ginger like @MADDIEGREER Lightroom preset | Tutorial
Download the Preset
To download the Preset for free you need to have a password which appears twice on the top right corner during the video


