Today we will show you one of the options for presets by blogger Katie Giorgadze. Her new presets are quite unusual, and at the same time fashionable and modern, as many people now focus on the negative clarity effect, with a little blur and haze. It looks magical somehow. In general, these presets by Katie Giorgadze will definitely not leave you indifferent. We are starting a transformation.
You can choose the option that is better for you below
- You can follow this step-by-step guide to create a preset
- You can edit photos by yourself, watching our videos
- You can download our presets for free, but for this you need to carefully watch the video and remember the password (****) for downloading the preset in DNG format. Attention! The password appears only if you watch the video on YouTube, on this website (only on computer’s browsers) or on YouTube app.
- You can also buy set of presets like this. Look at the items down below
How to create Dreamy Town for mobile Lightroom | Guide
For Dreamy Town preset we recommend using photos as in our example.
1. Choose your photo for Dreamy Town preset
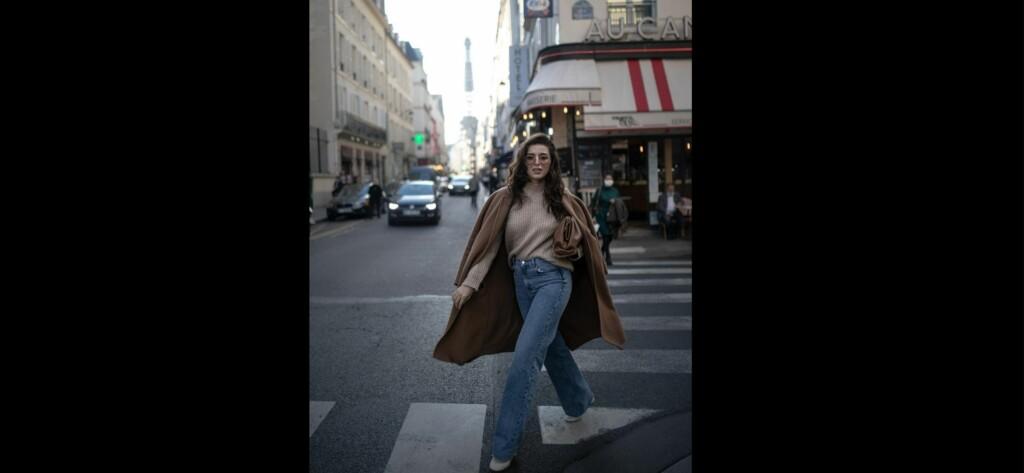
You can use a similar photo, as in our example: without correction, with greenery, flowers. In our example, we use the photo @KATIE.ONE.
2. Light correction
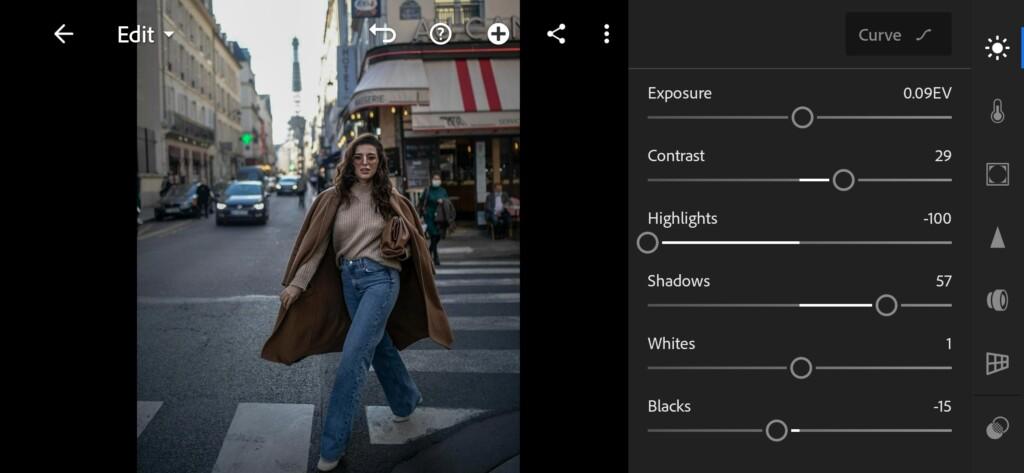
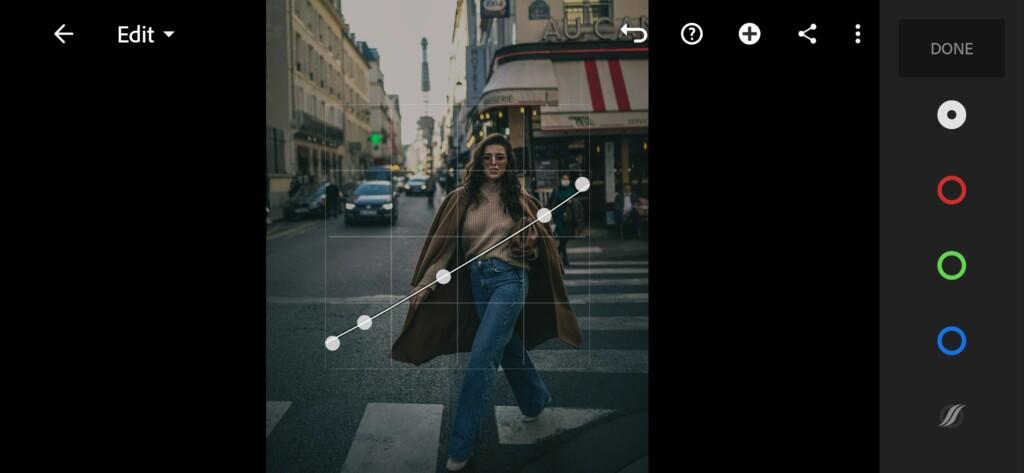
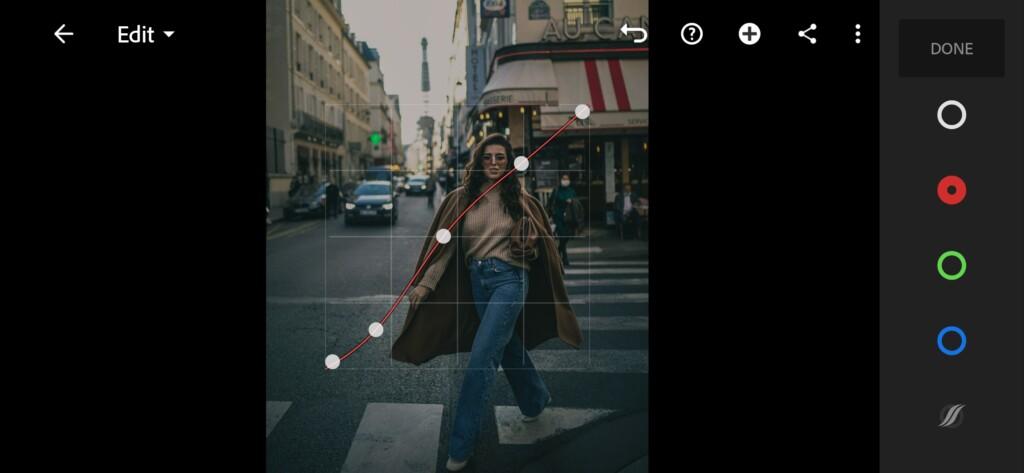
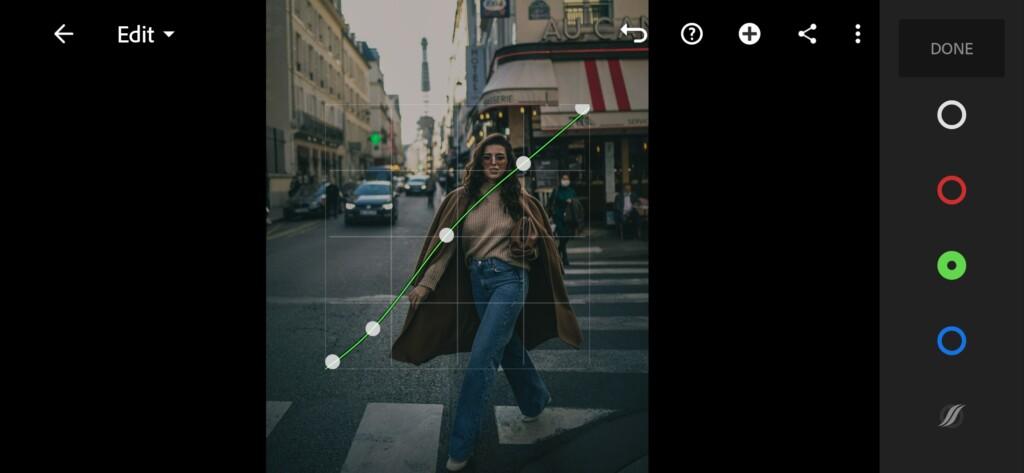
The light correction @KATIE.ONE is subdued, without strong whites, and with negative highlights. It is also very important to plot the tone curves correctly (see our screenshots).

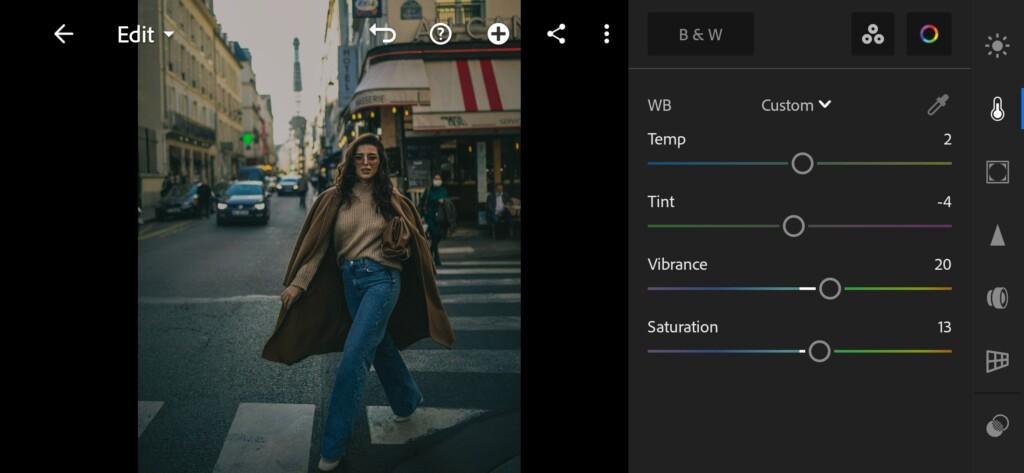
3. Color correction
@KATIE.ONE uses a dull, fairly realistic color scheme. It looks very beautiful, its color correction causes only admiration and delight.
07 Katie One Lightroom Preset 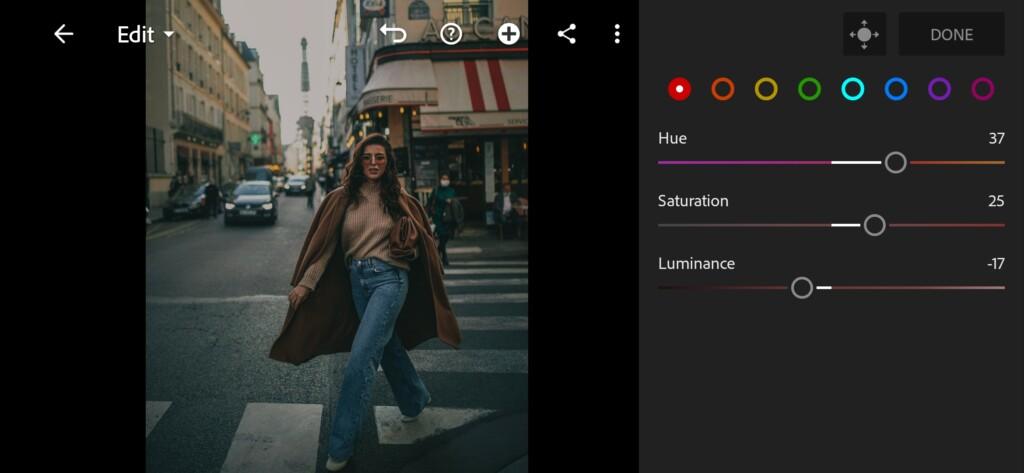
08 Katie One Lightroom Preset 
09 Katie One Lightroom Preset 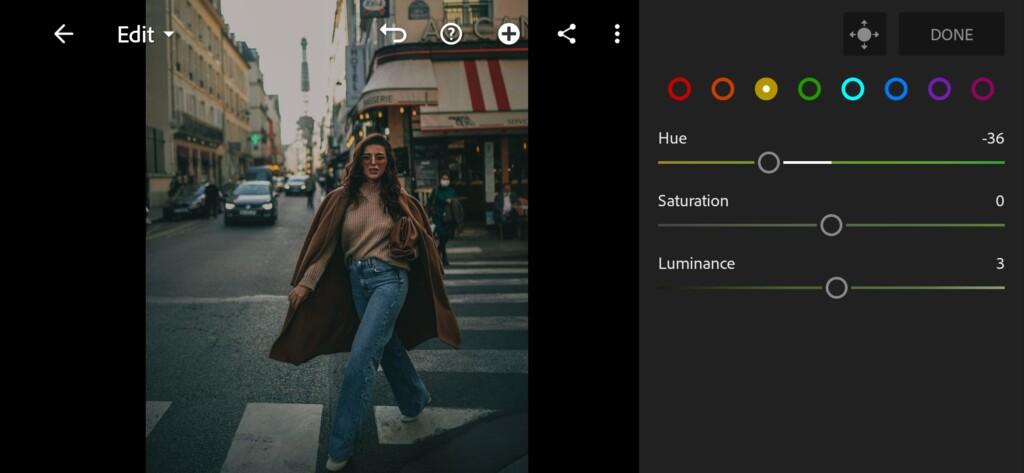
10 Katie One Lightroom Preset 
11 Katie One Lightroom Preset 
12 Katie One Lightroom Preset 
13 Katie One Lightroom Preset 
14 Katie One Lightroom Preset 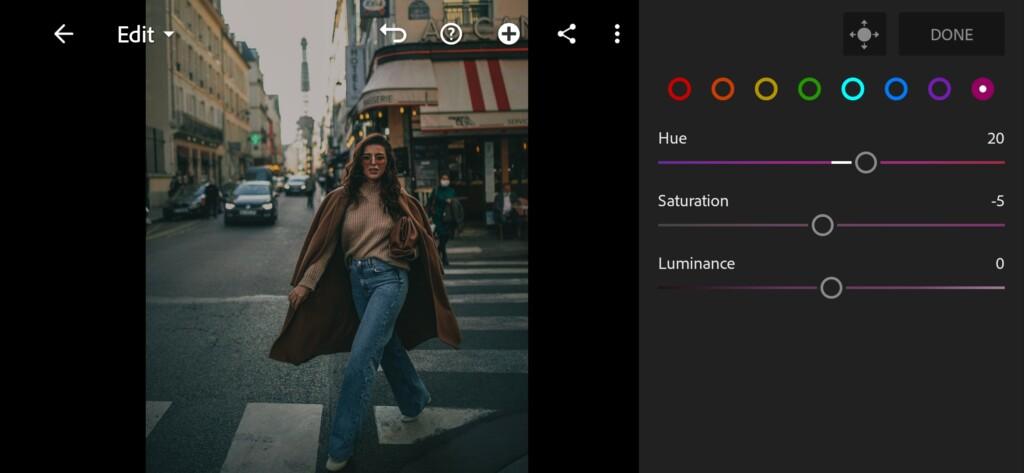
15 Katie One Lightroom Preset 
16 Katie One Lightroom Preset 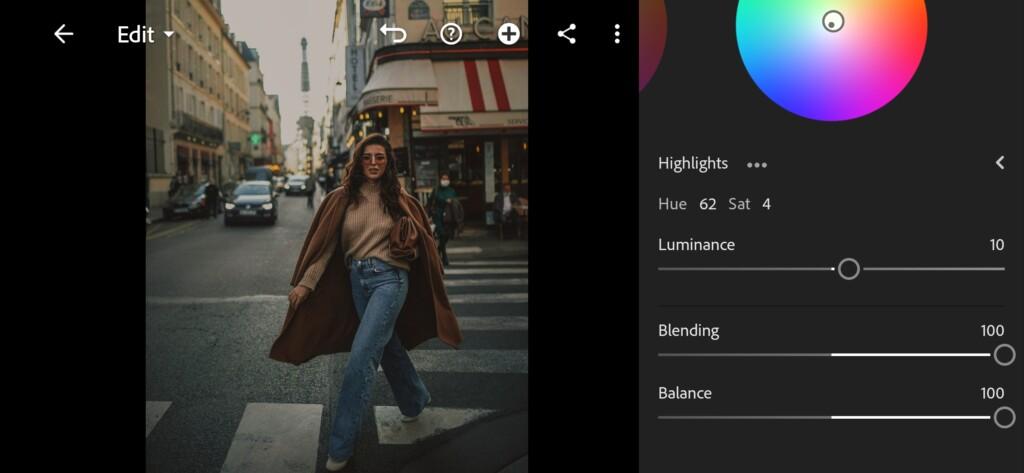
17 Katie One Lightroom Preset
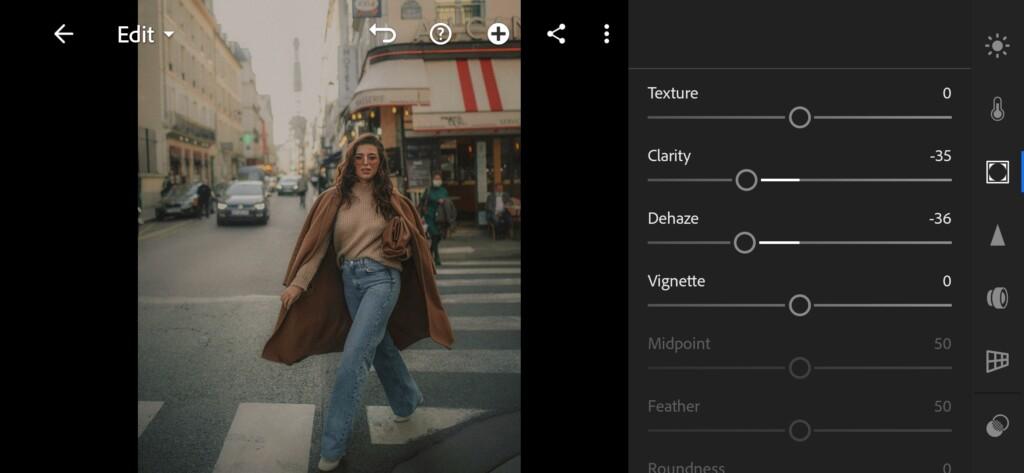
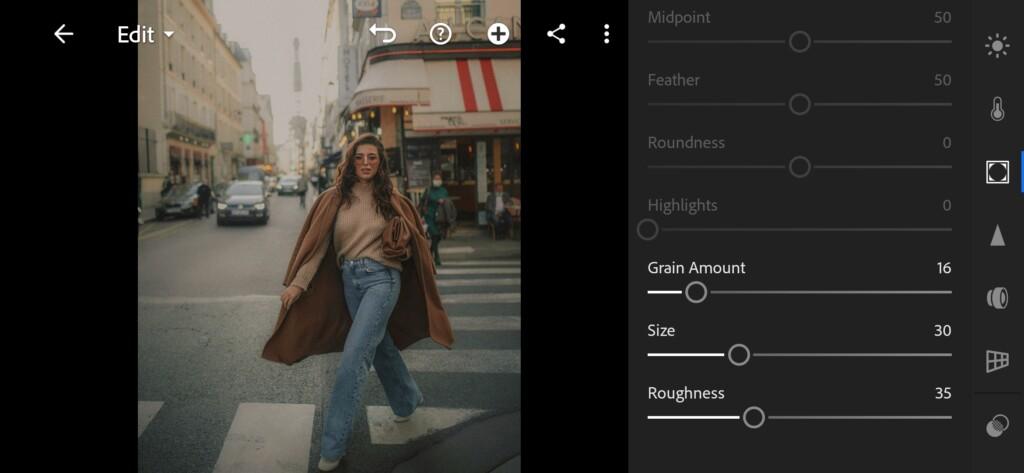
4. Effects editing
All the highlight of Katie Giorgadze lies in the effects editing Adobe Lightroom. Here is a real magical transformation of her photographs. She uses a combination of these effects in her photographs: negative clarity, dehaze, texture. Plus adds grain amount.
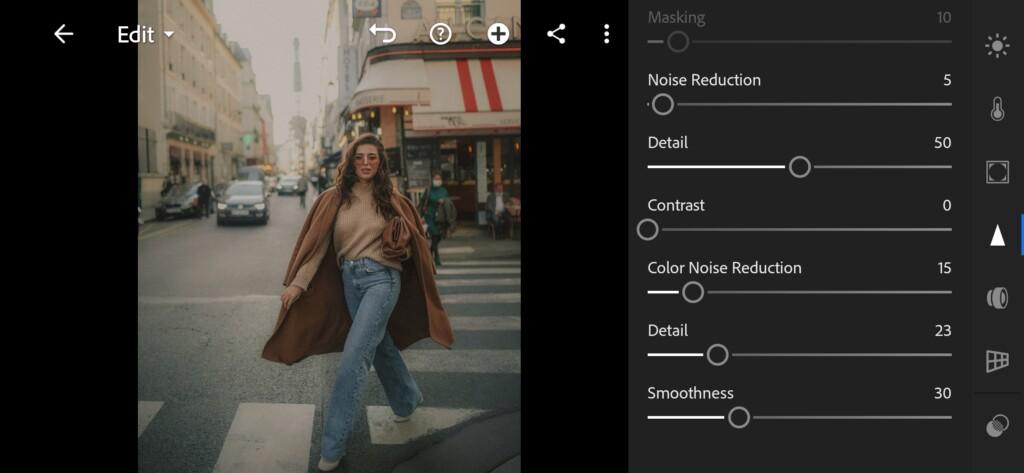
5. Detail correction
We have come to the final stage of our preset: detail correction. Our blogger @KATIE.ONE uses sharpening. In our example, we did not use it, since the quality of our photo is low, but you can add sharpening up to plus 50-60, if the quality of your photo allows it.
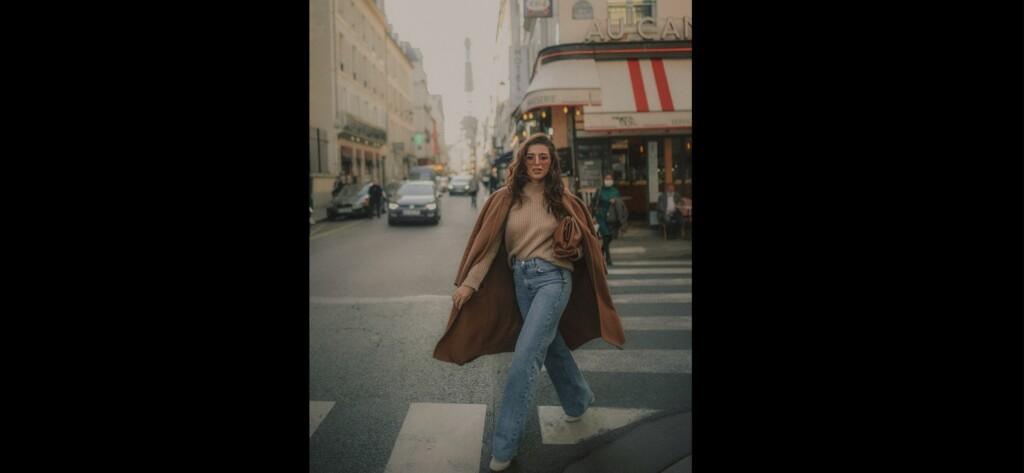
6. Preset is ready
The Katie Giorgadze style preset is ready. Use it with joy.

7. Save @KATIE.ONE preset
If you like it — save it!
If you still don’t know how to save a preset, see this article. If you have any questions, please contact us. We are always happy to help!
Thanks a lot to our subscribers for the preset ideas! We are extremely pleased to be of service to you!
Watch the video how to create Dreamy Town like @KATIE.ONE Lightroom preset | Tutorial
Download the Preset
To download the Preset for free you need to have a password which appears twice on the top right corner during the video


