City is a free Lightroom preset for dark and nondescript / rainy city photos. With this preset, you can make your photos harmonious, and don’t forget to adjust the preset settings for your photos.
You can choose the option that is better for you below
- You can follow this step-by-step guide to create a preset
- You can edit photos by yourself, watching our videos
- You can download our presets for free, but for this you need to carefully watch the video and remember the password (****) for downloading the preset in DNG format. Attention! The password appears only if you watch the video on YouTube, on this website (only on computer’s browsers) or on YouTube app.
- You can also buy set of presets like this. Look at the items down below
How to create CITY Preset for mobile Lightroom | Guide
We recommend using dark photos that were taken in cloudy weather.
1. Choose your photo
Choosing any photo took from city for City preset. How to add a photo, you can see here.
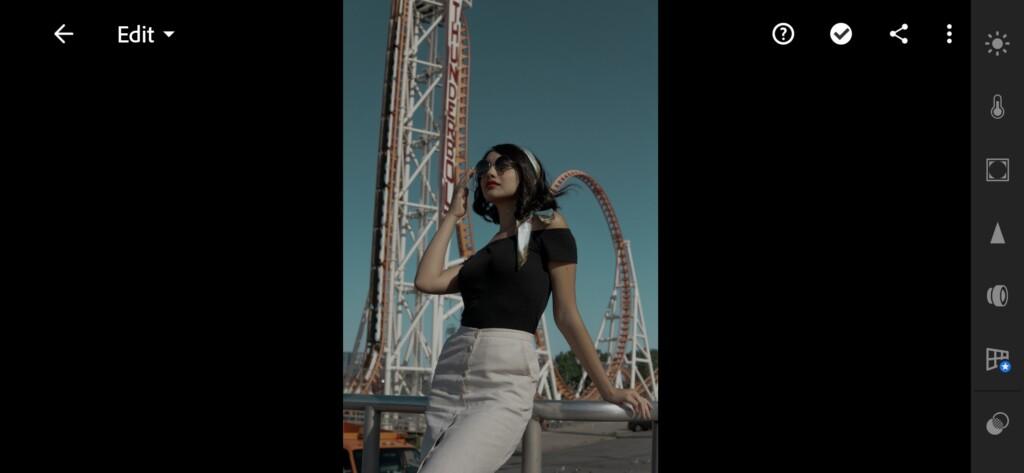
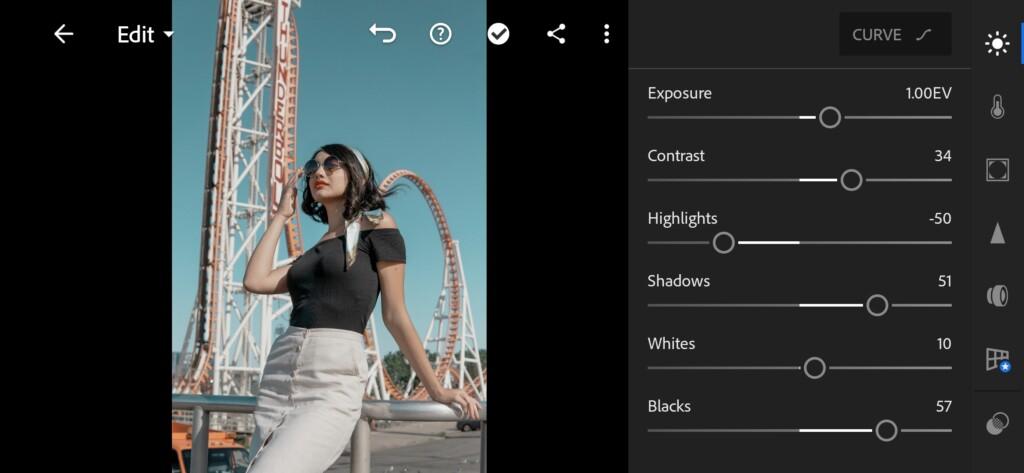
2. Light correction
Begin with light correction and set a good contrast for our photography.
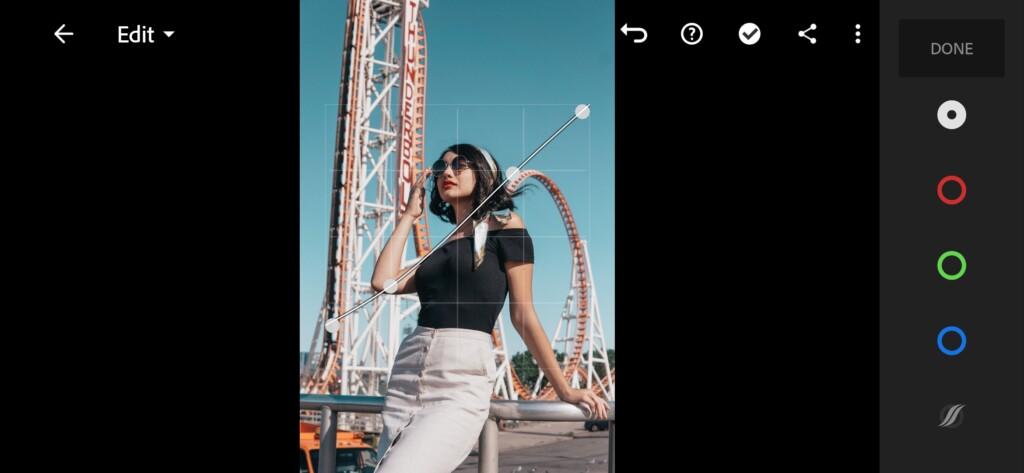
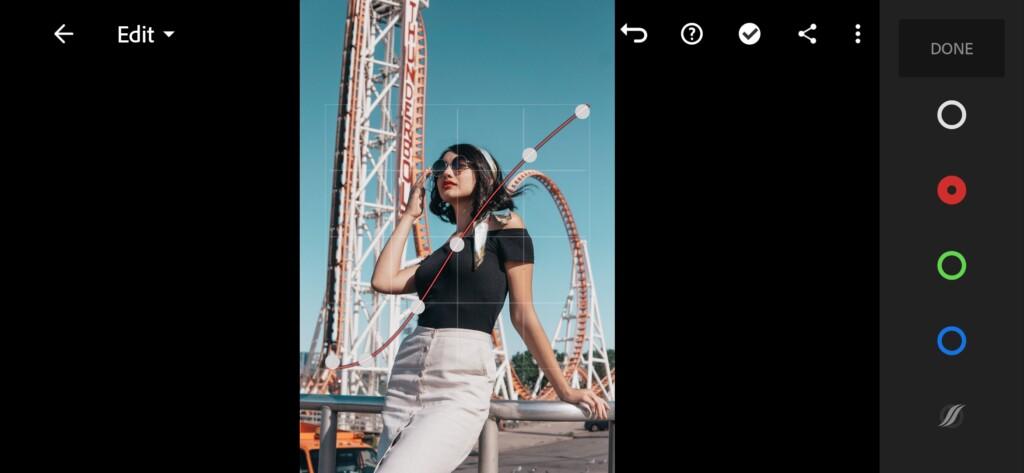
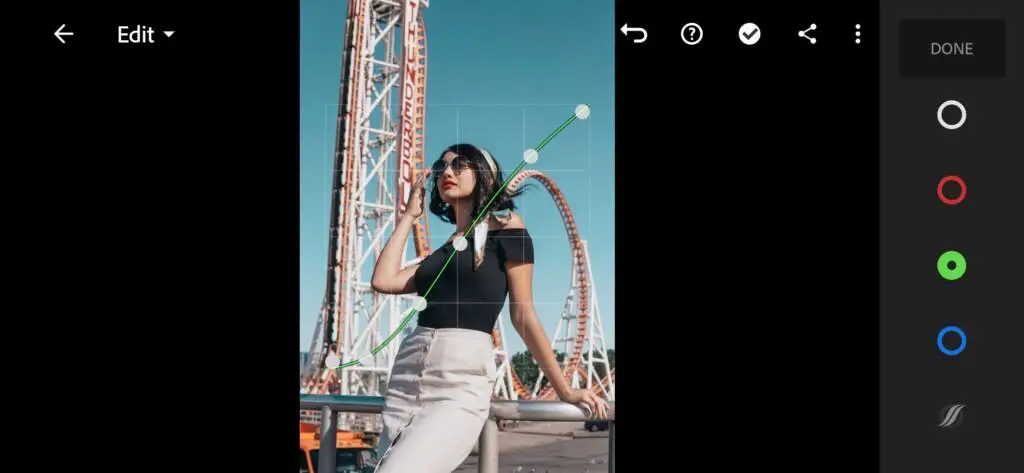
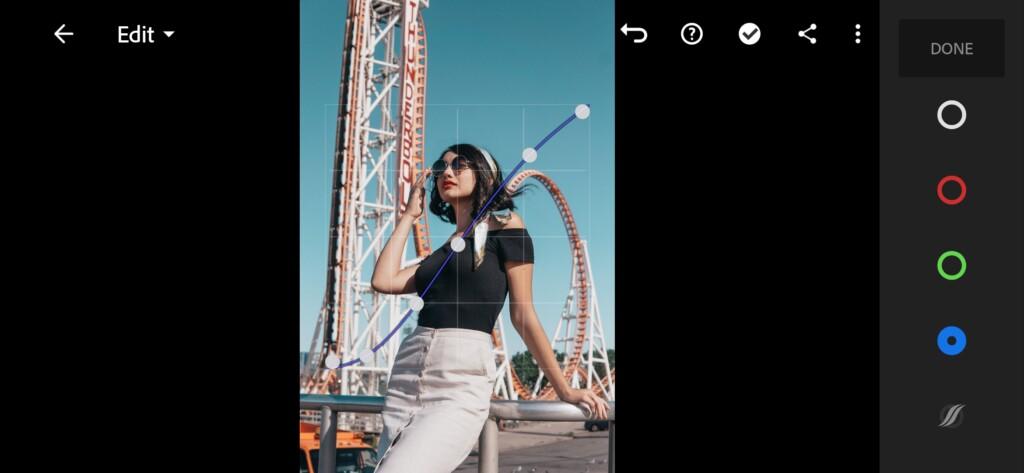
3. Color correction
Edit every color till getting a good combination of them.
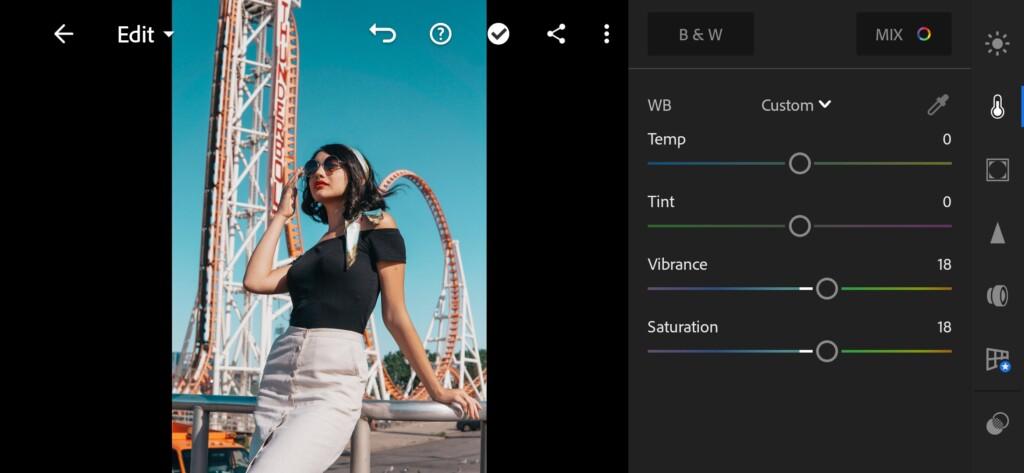
07 City Lightroom Preset 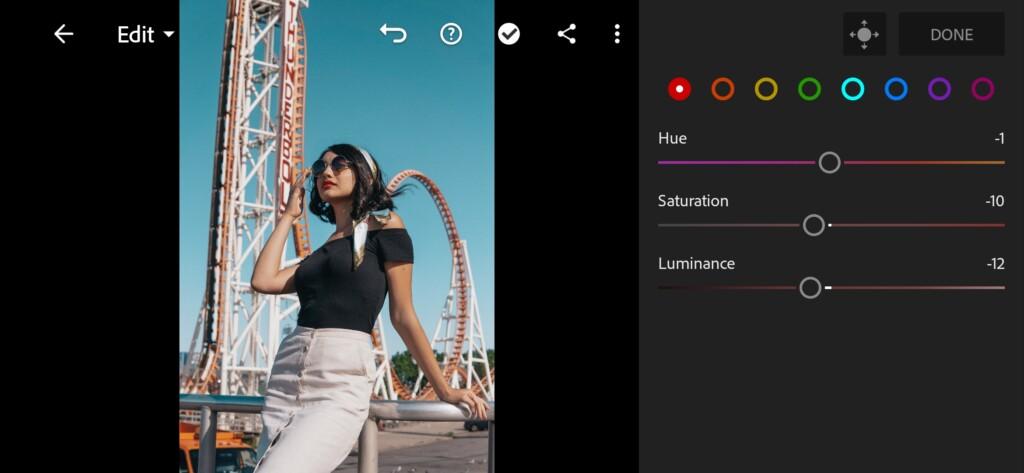
08 City Lightroom Preset 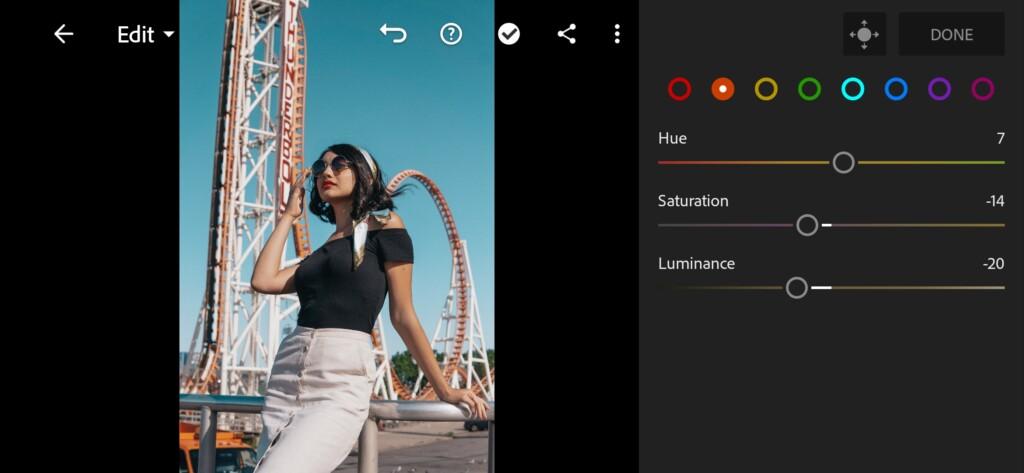
09 City Lightroom Preset 
10 City Lightroom Preset 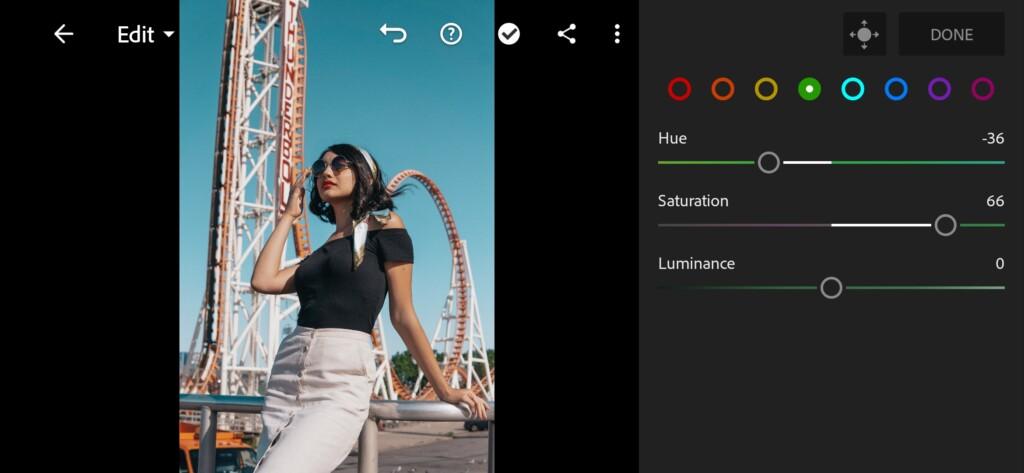
11 City Lightroom Preset 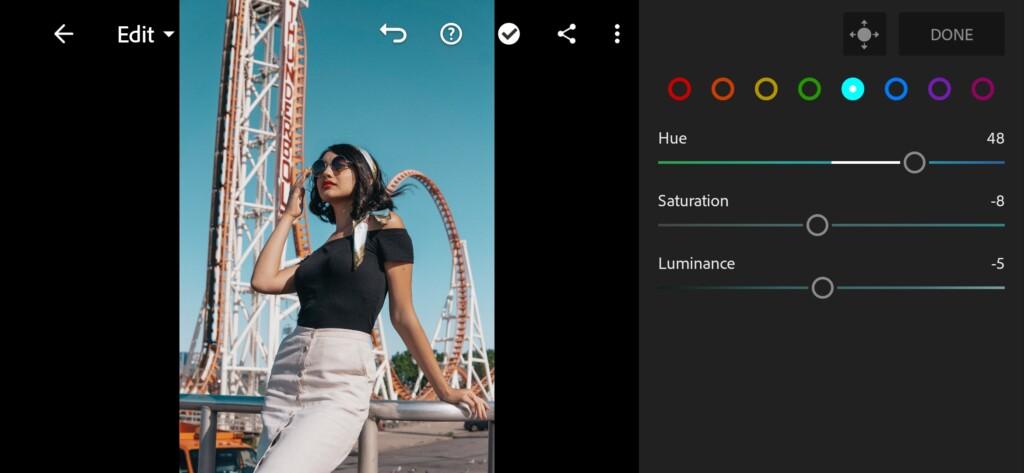
12 City Lightroom Preset 
13 City Lightroom Preset 
14 City Lightroom Preset 
15 City Lightroom Preset
4. Effects editing
Here is tiny changes which you can even skip.
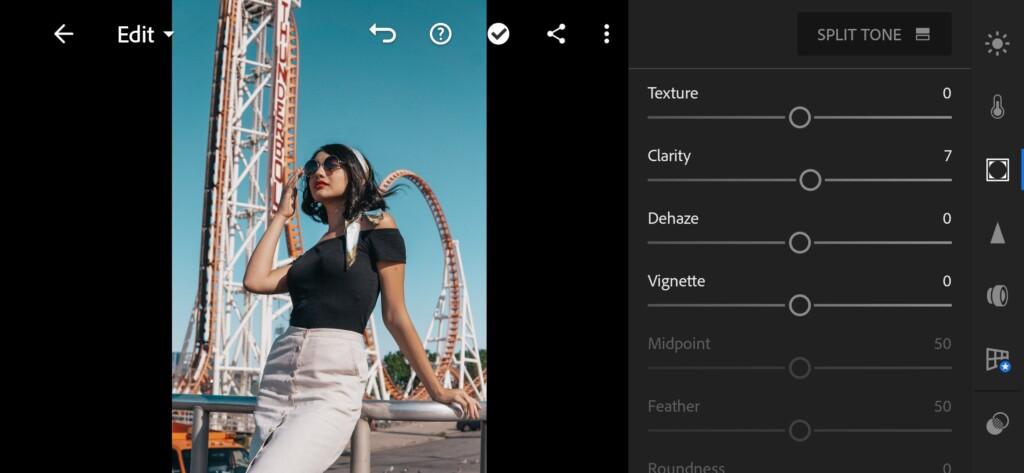
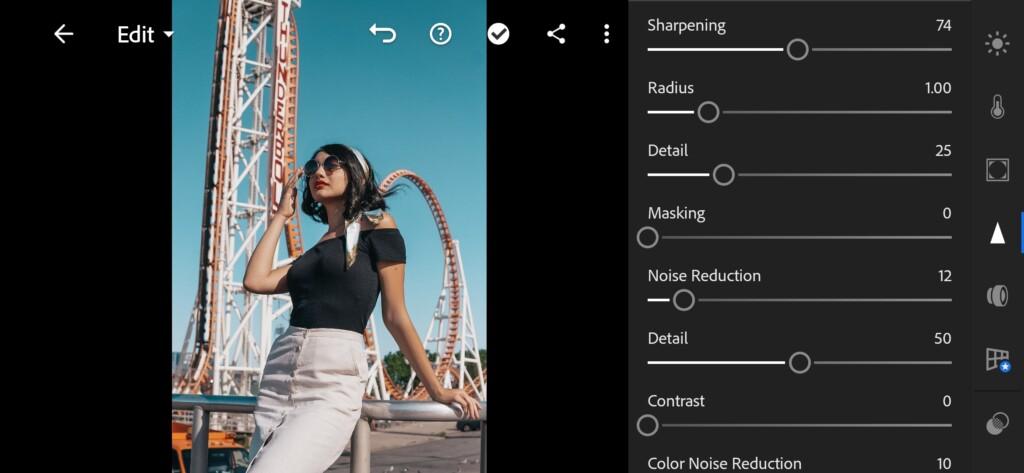
5. Detail correction
17 City Lightroom Preset 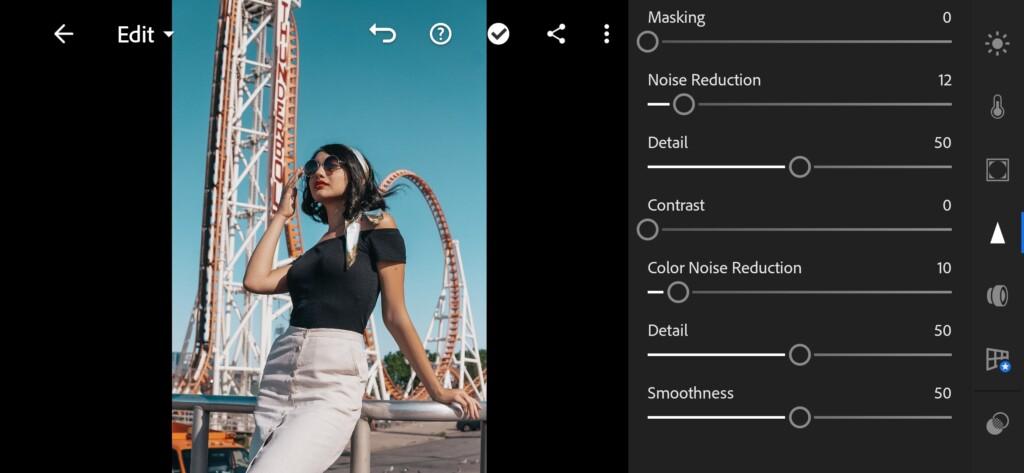
18 City Lightroom Preset
6. Preset is ready
After all we’ve got that amazing result that you can on the pictures down below.


7. Save City preset
Don’t forget to save the preset, for further use the presets in one click on your photos.
Thanks for reading! ? If you have something to offer us leave a message in comment box below or our social networks.
Watch the video how to create City preset | Tutorial
Download the Preset
To download the Preset for free you need to have a password which appears twice on the top right corner during the video


