Hello! Today we’ll show you the color grading option offered by our subscriber WINTER FOGGY TONE. To add fog and snow to the photo we will be using the Lens Distortions (LD) app. We have developed the preset in several versions: dark contrasting, bright, light, dim. Also, do not forget that you and I take photos at different times, in different lighting conditions, weather, respectively, the preset will look differently on a sunny photo and in cloudy weather.
You can choose the option that is better for you below
- You can follow this step-by-step guide to create a preset
- You can edit photos by yourself, watching our videos
- You can download our presets for free, but for this you need to carefully watch the video and remember the password (****) for downloading the preset in DNG format. Attention! The password appears only if you watch the video on YouTube, on this website (only on computer’s browsers) or on YouTube app.
- You can also buy set of presets like this. Look at the items down below
How to create WINTER FOGGY TONE for mobile Lightroom | Guide
For WINTER FOGGY TONE preset we recommend use urban photos.
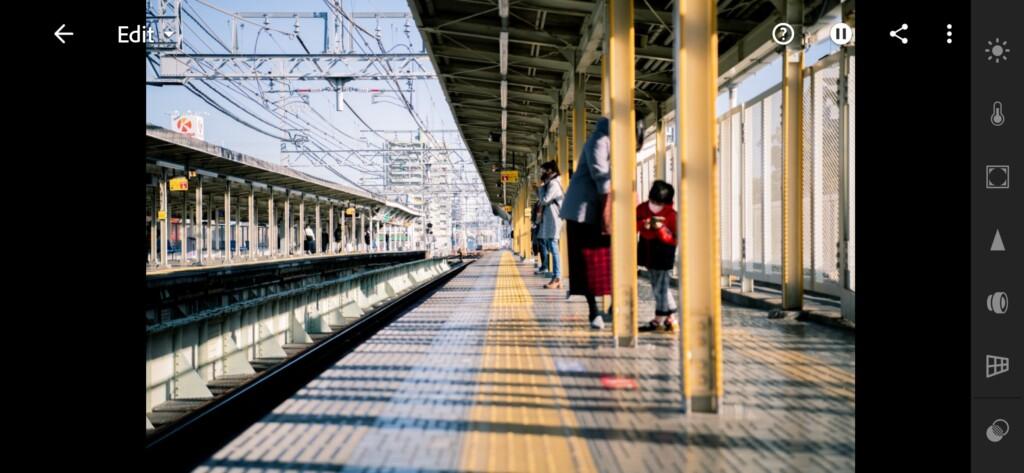
1. Choose your photo for WINTER FOGGY TONE preset
Please choose a light photo in the city, as in our example.
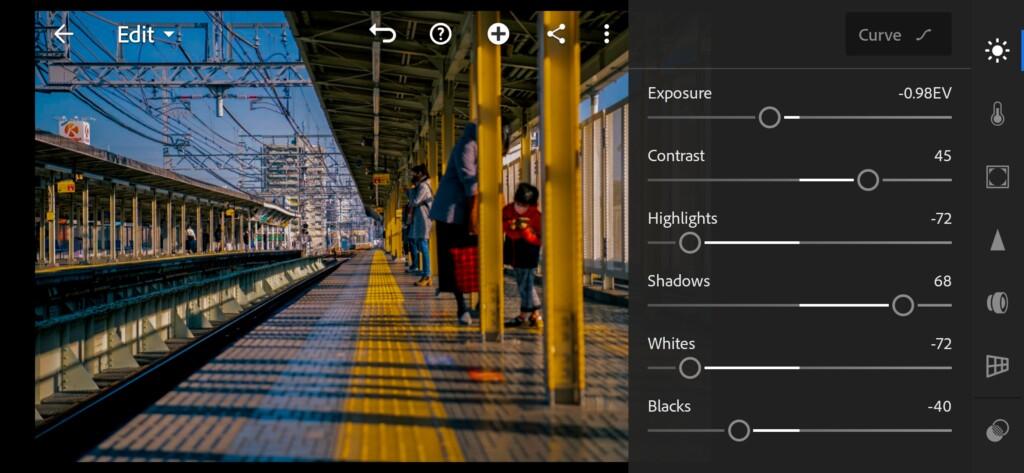
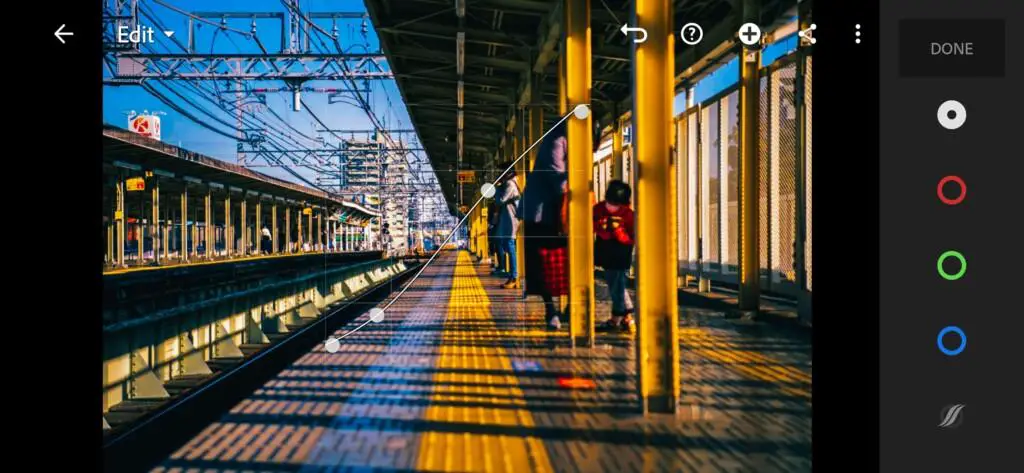
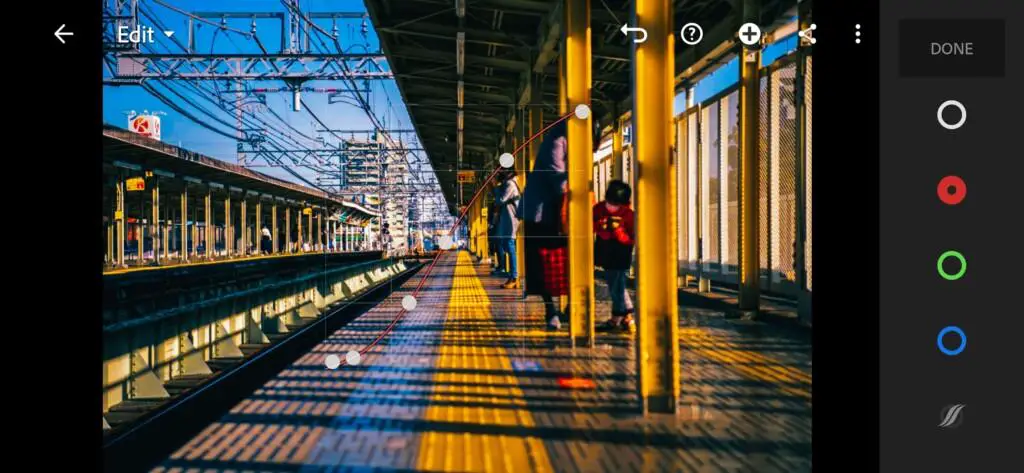
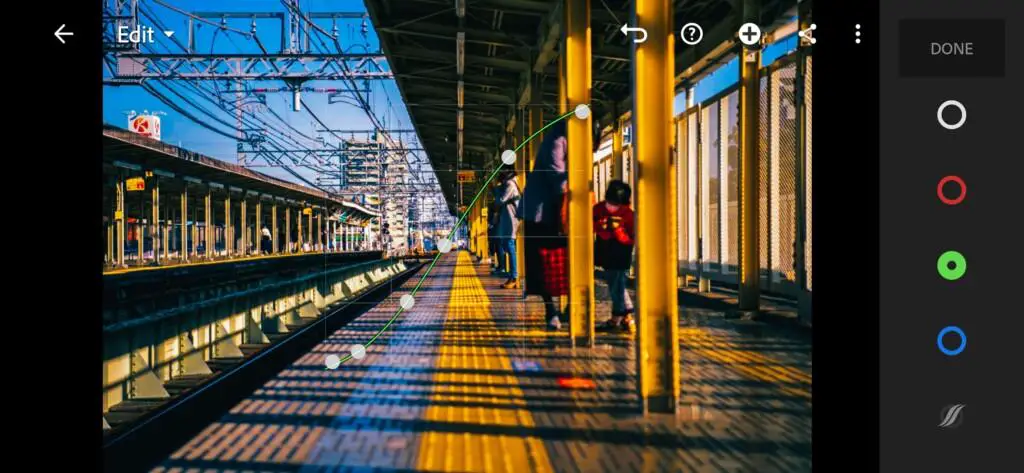
2. Light correction
Please repeat the light correction from our screenshots below. In this project we will use tone curves to give the photographs contrast and brightness.

3. Color correction
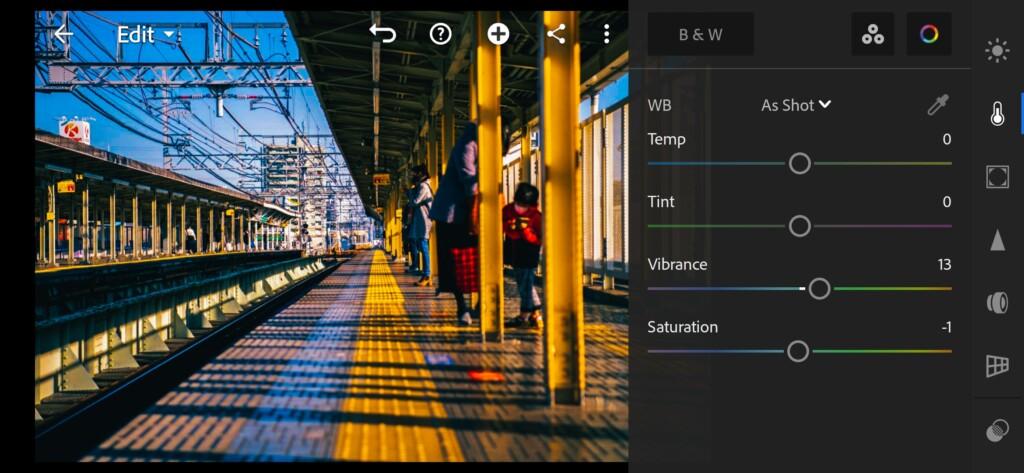
At the request of our subscriber, the color scheme of this preset is in orange-teal tones. We will strive for such shades.
07 Winter Foggy Tone Lightroom Preset 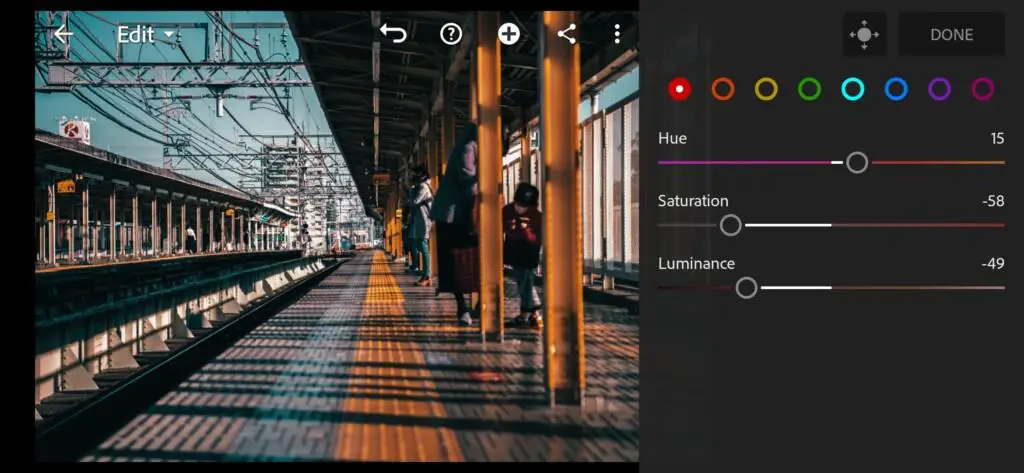
08 Winter Foggy Tone Lightroom Preset 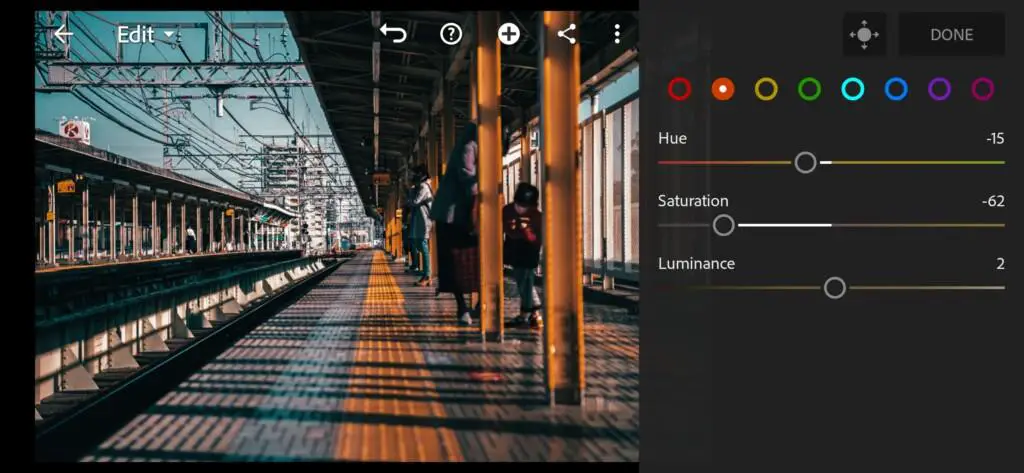
09 Winter Foggy Tone Lightroom Preset 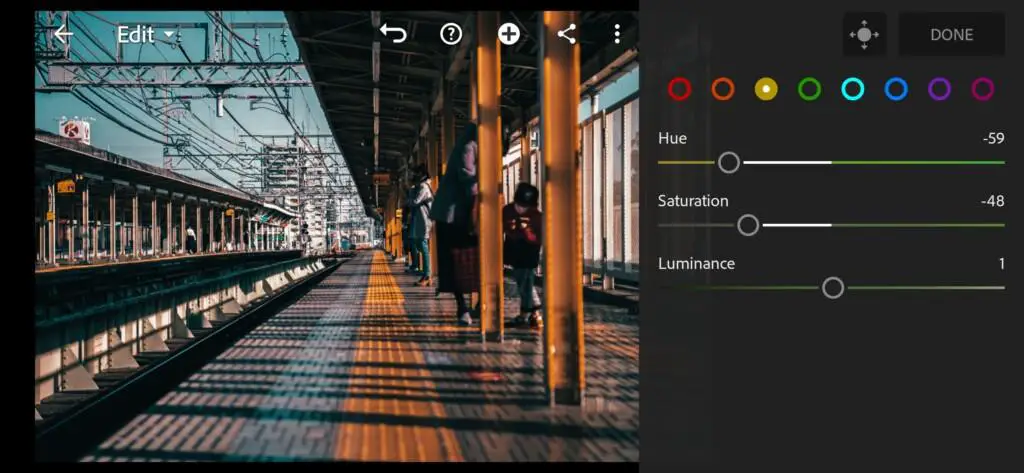
10 Winter Foggy Tone Lightroom Preset 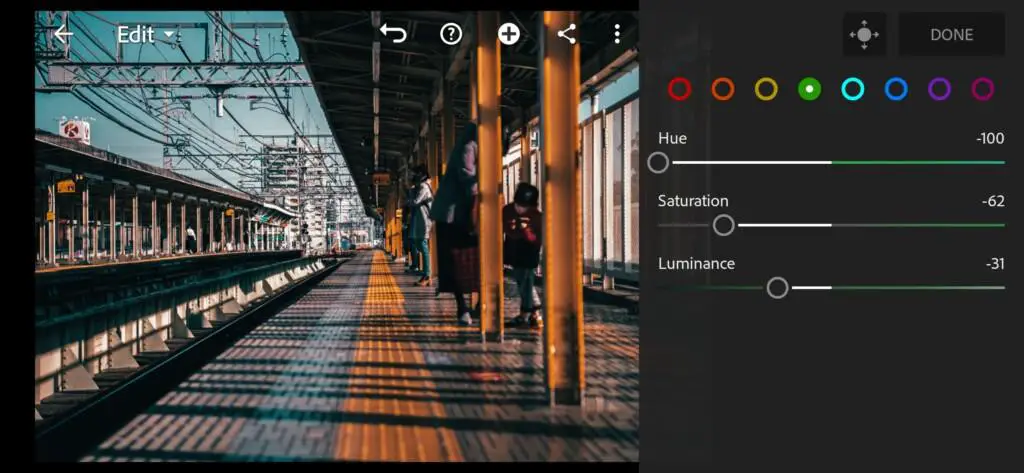
11 Winter Foggy Tone Lightroom Preset 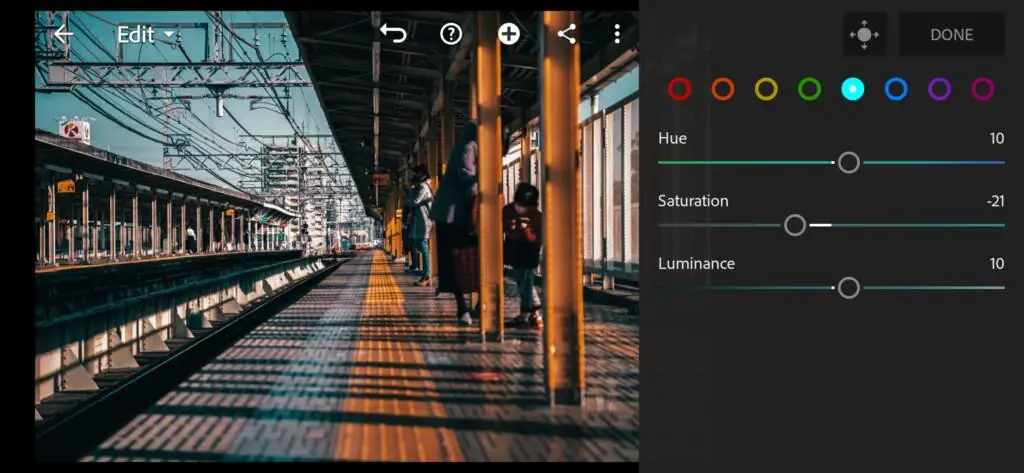
12 Winter Foggy Tone Lightroom Preset 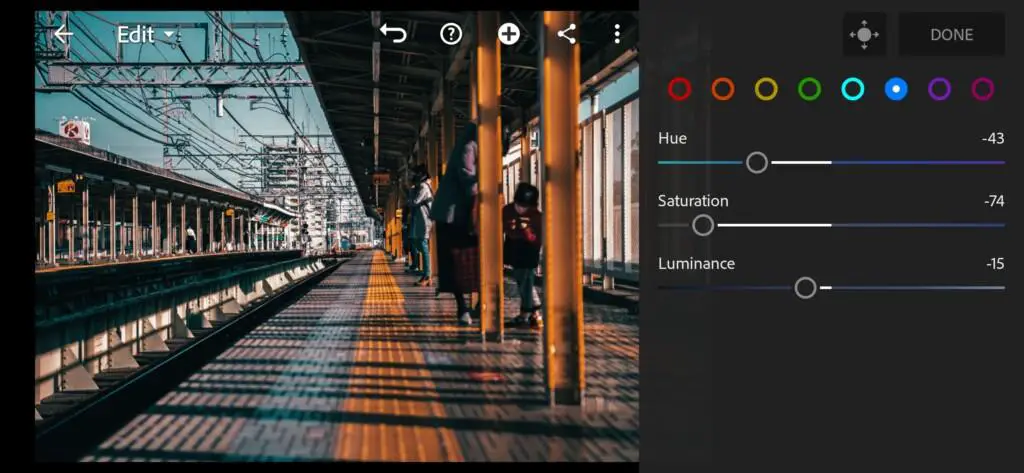
13 Winter Foggy Tone Lightroom Preset 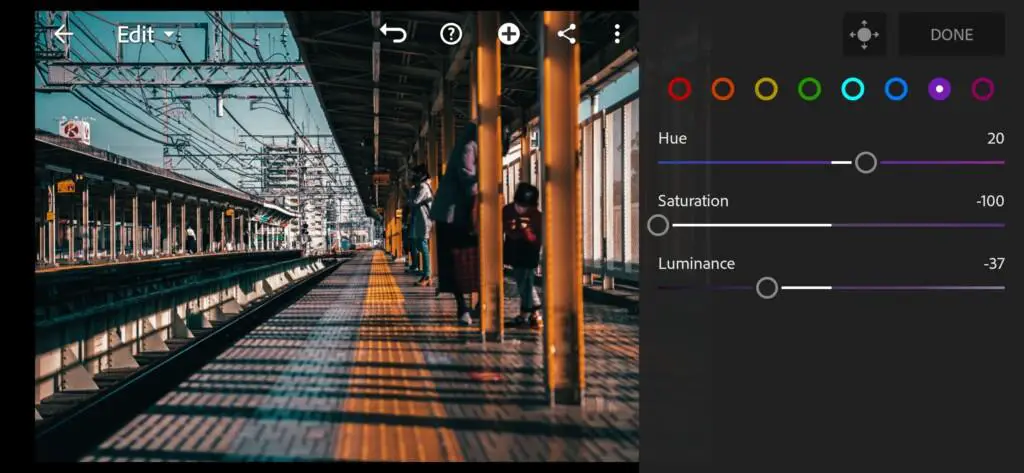
14 Winter Foggy Tone Lightroom Preset 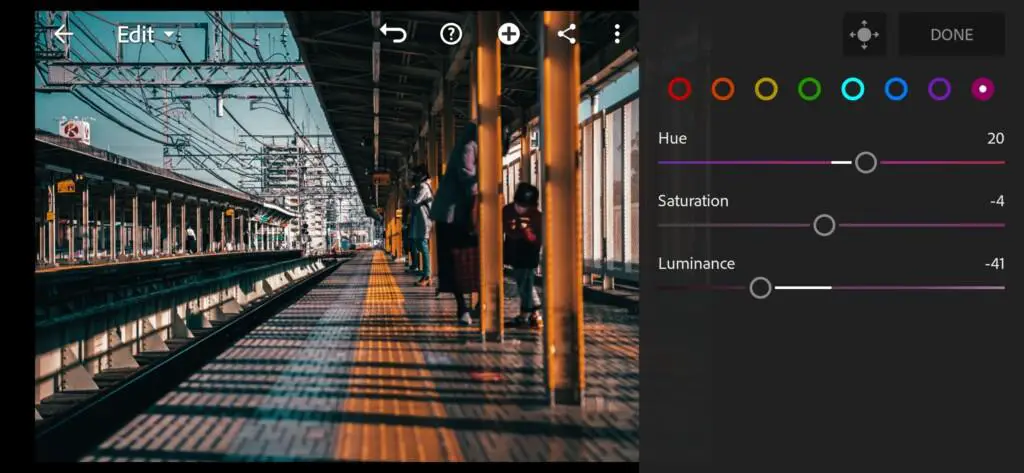
15 Winter Foggy Tone Lightroom Preset
4. Effects editing
In the photo we used to develop the preset, it was clear that the photographer was using a negative clarity effect. We do the same.
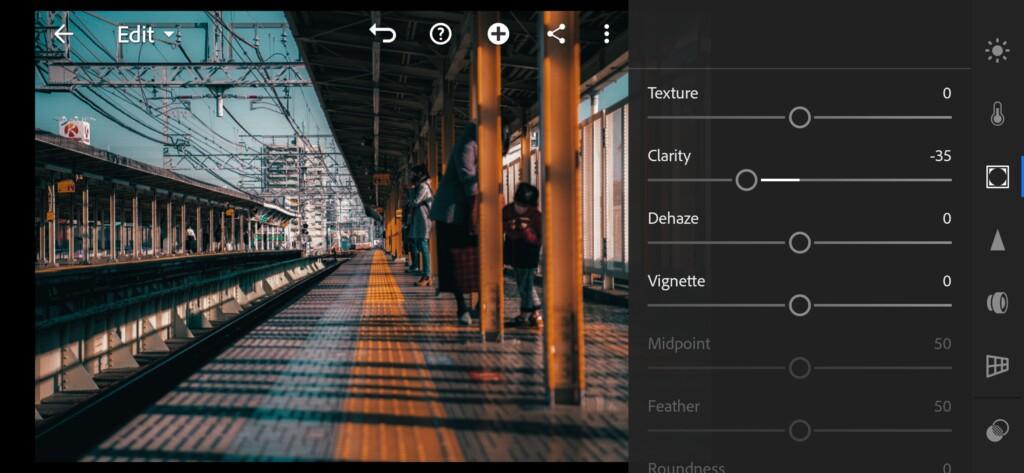

5. Detail correction
In detail correction we will add sharpening, masking, noise reduction, color noise reduction. Repeat these settings according to our screenshots.
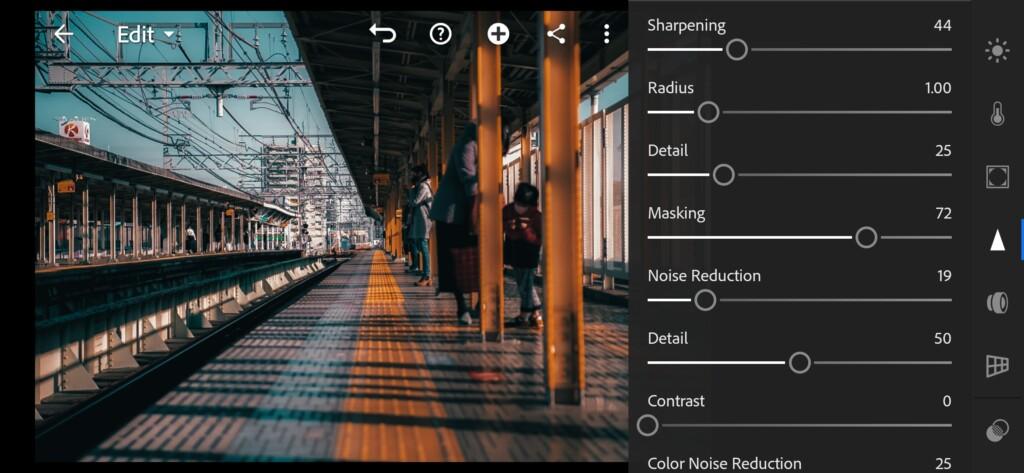
17 Winter Foggy Tone Lightroom Preset 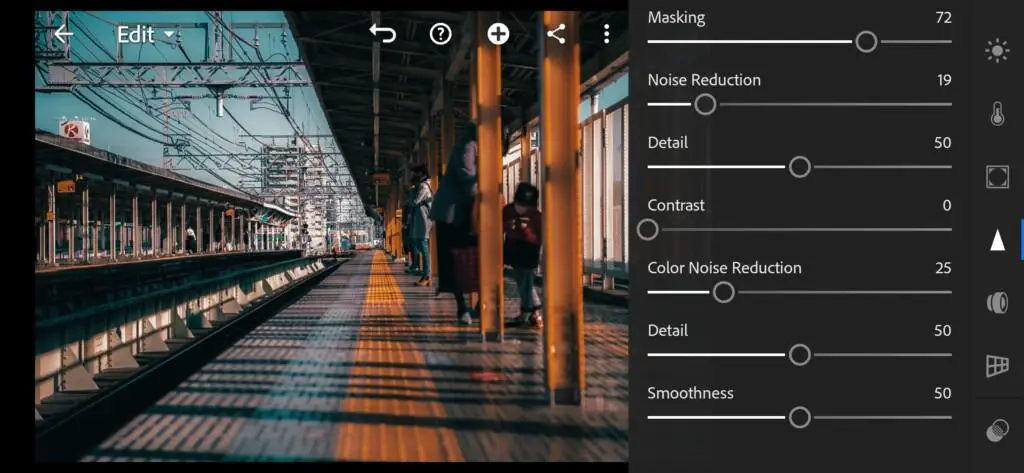
18 Winter Foggy Tone Lightroom Preset
6. Preset is ready
Our winter orange-teal preset is ready. Optionally, you can add snow and fog in the LD app.

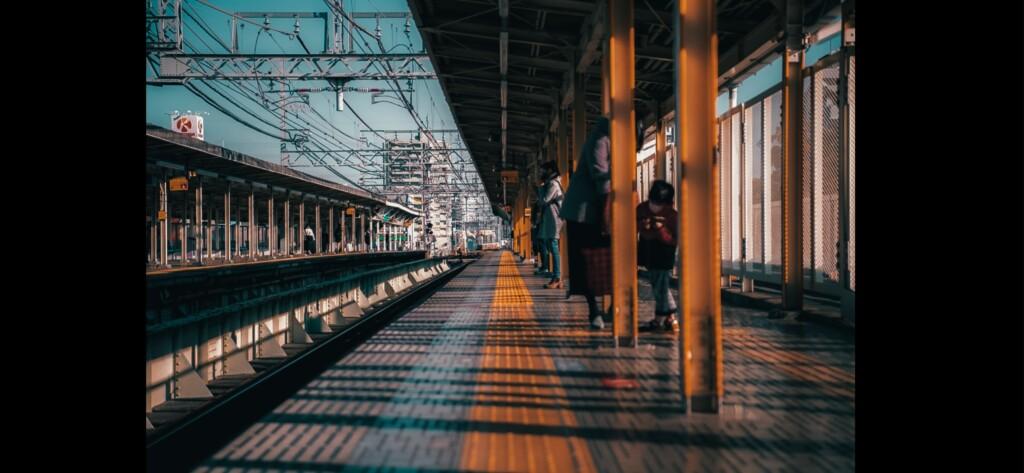
7. Save WINTER FOGGY TONE preset
Don’t forget to save WINTER FOGGY TONE preset and this photo to add fog and snow.
If you still don’t know how to save a preset, see this article. If you have any questions, please contact us. We are always happy to help!
8. Choose your photo in Lens Distortion application
Now we should choose our saved photo in the LD application.
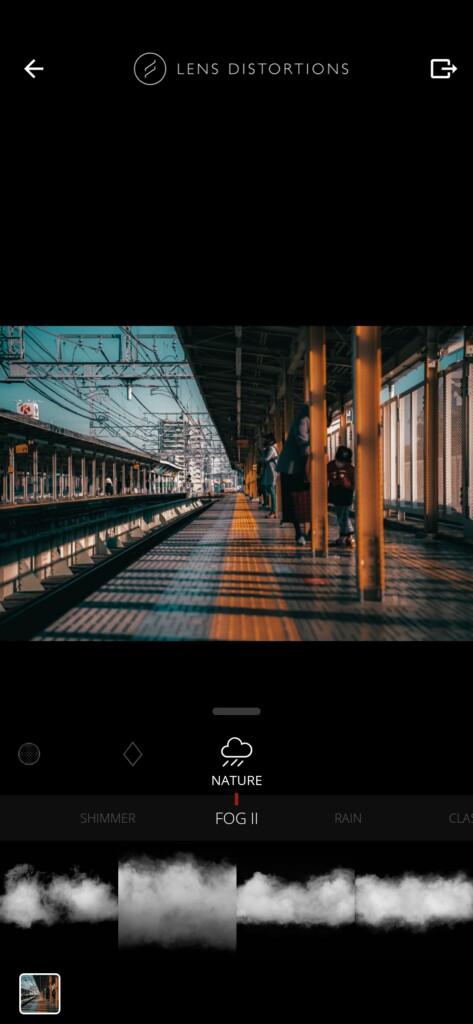
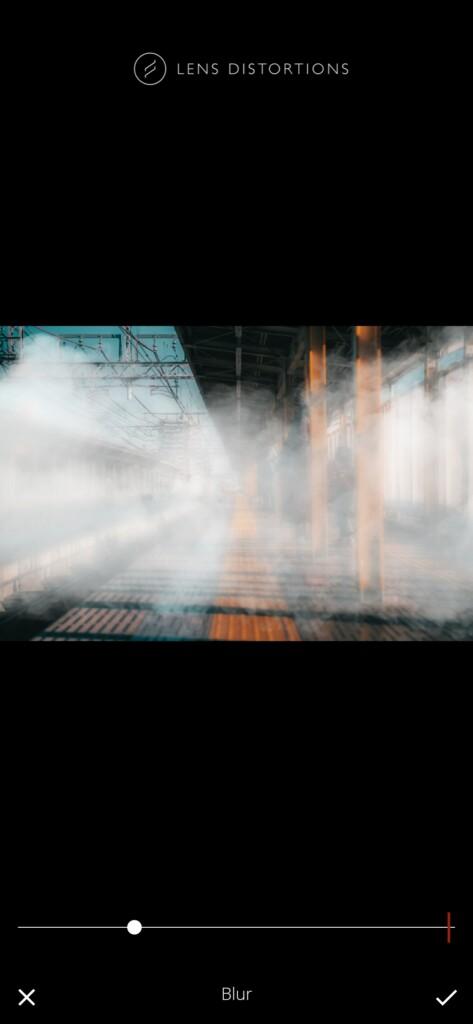
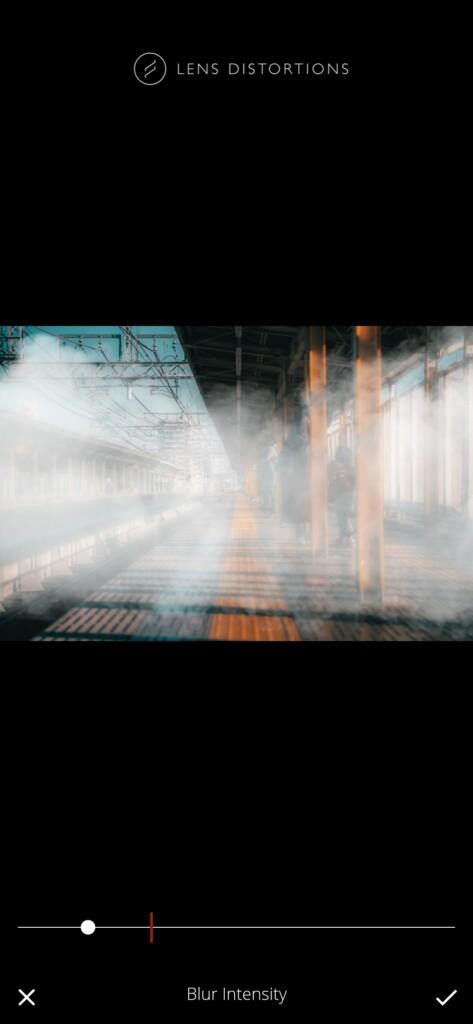
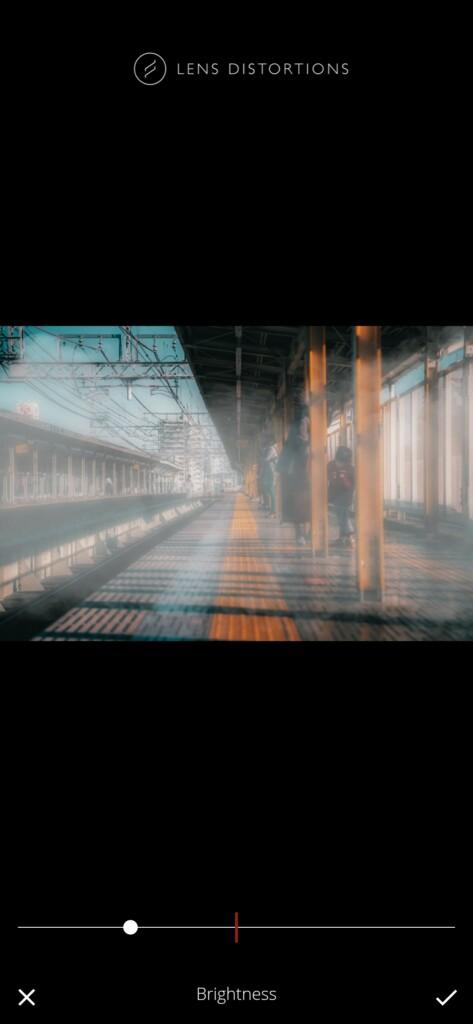
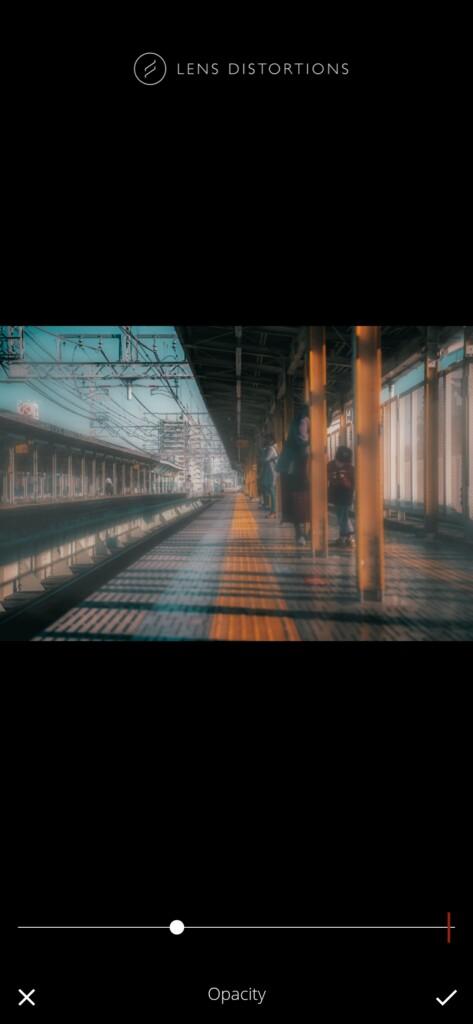
9. Add a fog
Select the NATURE tab and find FOG ||. Click on FOG ||, then select the third fog option.
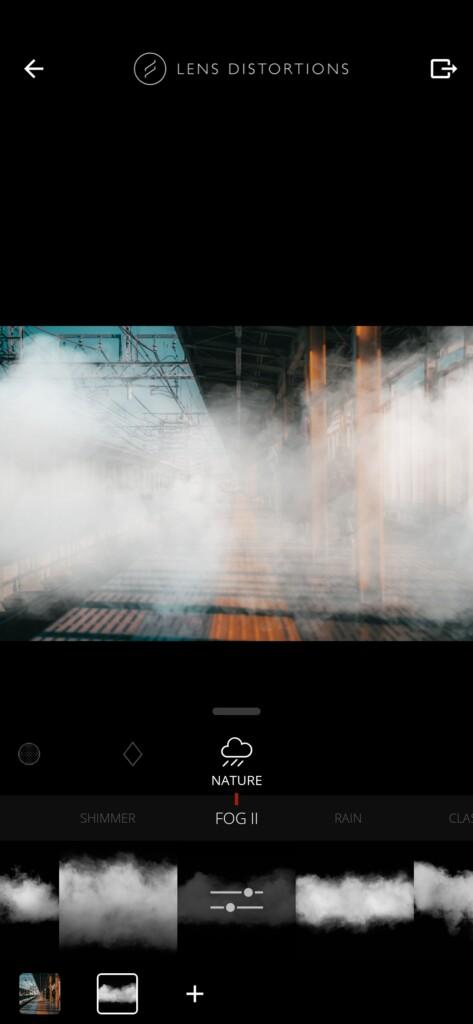
10. Adjusting the fog for our photo
We will adjust the following parameters: blur, blur intensive, brightness, opacity.

11. Add snow
To add snow to the photo, we select the CLASSIC SNOW tab, then the first snow option. Everything is ready!
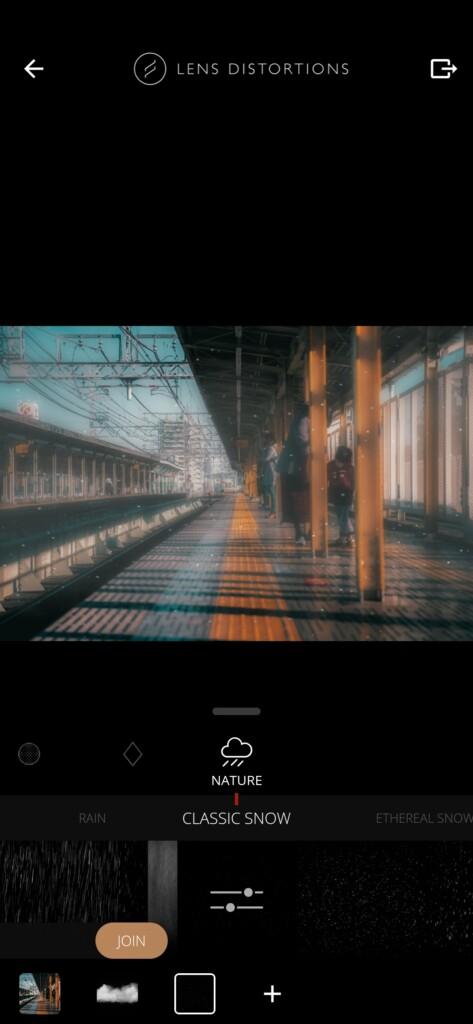
12. Our winter foggy photo is ready
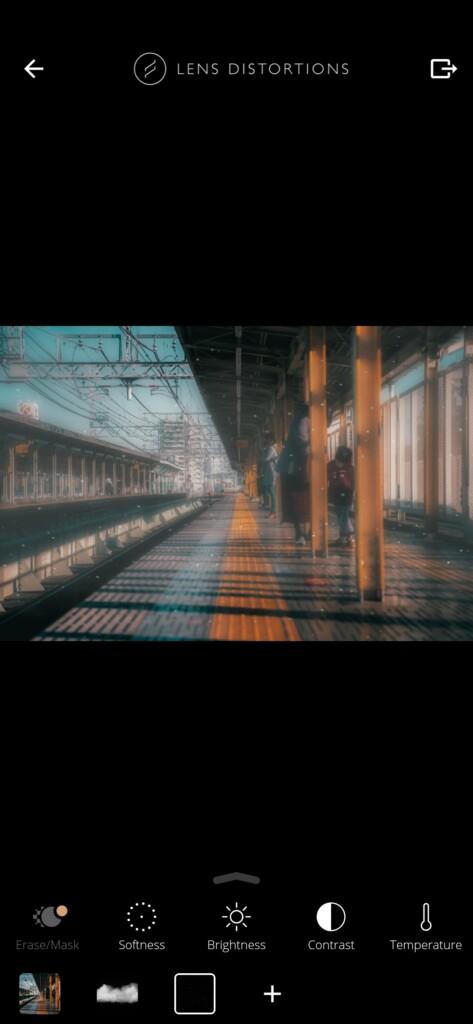
Our photo is ready. You can see the photo before and after changes.

Thank you for being with us! We are trying for you!
Watch the video how to create Winter Foggy Tone Lightroom preset | Tutorial
Download the Preset
To download the Preset for free you need to have a password which appears twice on the top right corner during the video


