Hello! Today we show you a beautiful, muted version of color grading in an orange and emerald color scheme. This preset was inspired by the profile of the photographer Drake Vincent. And we learned about this profile from our subscriber❤️. Guys, thank you so much for your preset requests! Thanks to your requests, we learn many beautiful color adjustments that we want to repeat and share with you. You can use this preset for macro photos, aesthetic photos, photos in nature, at home, in a cafe, in a car. Try it, experiment, and we start.
You can choose the option that is better for you below
- You can follow this step-by-step guide to create a preset
- You can edit photos by yourself, watching our videos
- You can download our presets for free, but for this you need to carefully watch the video and remember the password (****) for downloading the preset in DNG format. Attention! The password appears only if you watch the video on YouTube, on this website (only on computer’s browsers) or on YouTube app.
- You can also buy set of presets like this. Look at the items down below
How to create @DRAKECVINCENT for mobile Lightroom | Guide
For @DRAKECVINCENT preset we recommend using urban photos with green, orange, brown, white, yellow details.
1. Choose your photo for @DRAKECVINCENT preset
Photo is best used like that of photographer Drake Vincent, or any other.
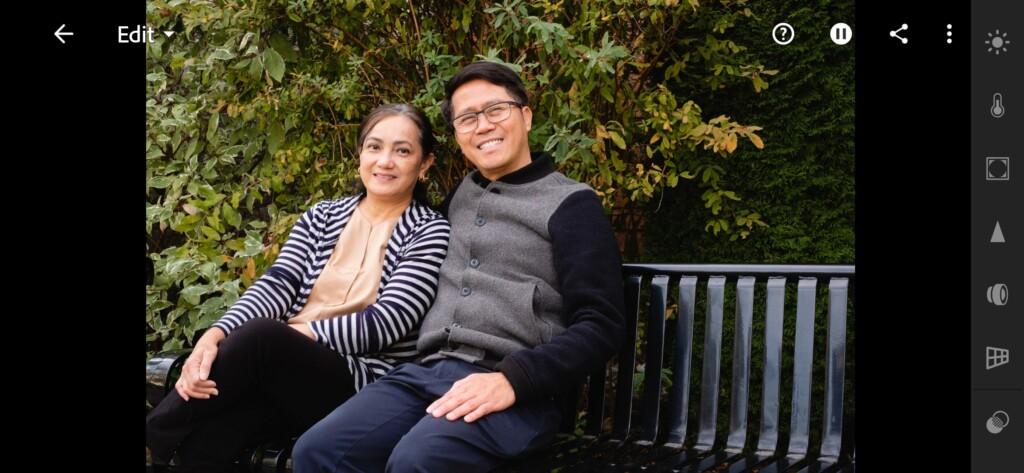
2. Light correction
Our task is to make a dark cream preset. This is what we will do. Repeat our steps from the screenshots below.
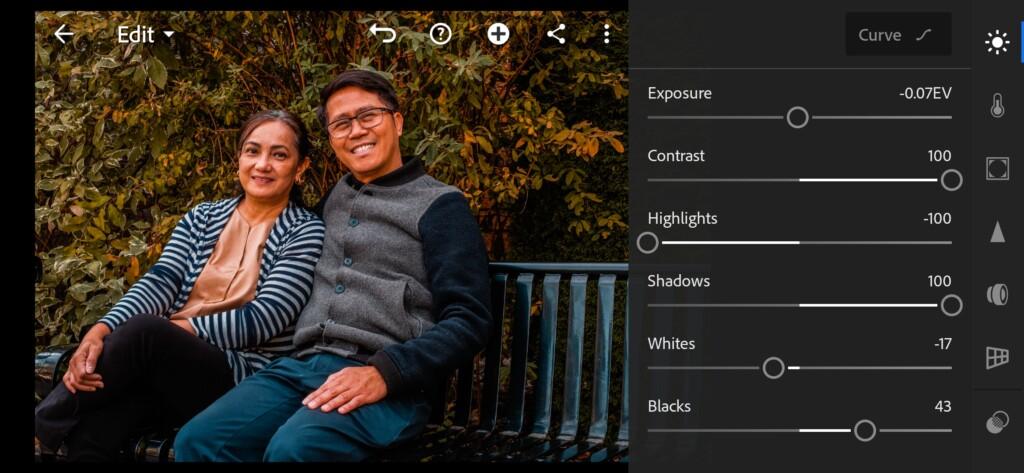

3. Color correction
Our color scheme should be muted. Our colors are dark green, orange, light beige. We will try to achieve the same color scheme as that of the photographer Drake Vincent.
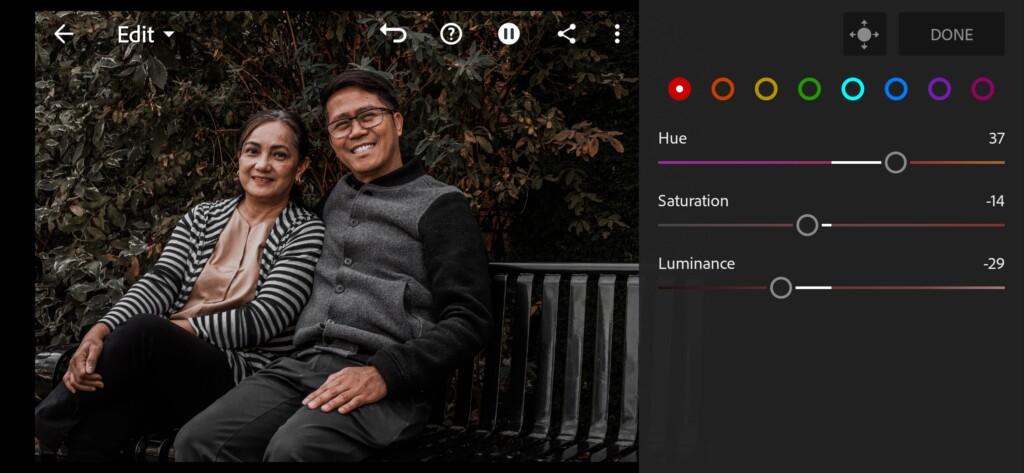
04 Drakecvincent Lightroom Preset 
05 Drakecvincent Lightroom Preset 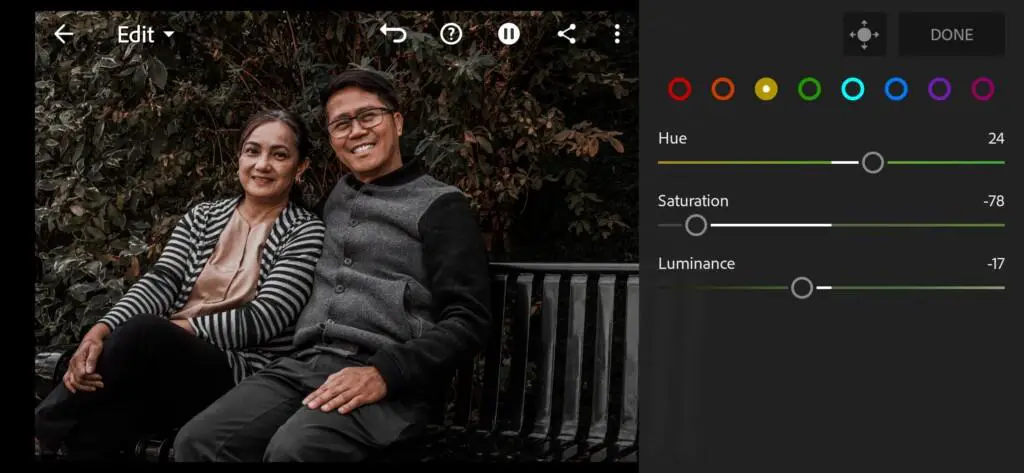
06 Drakecvincent Lightroom Preset 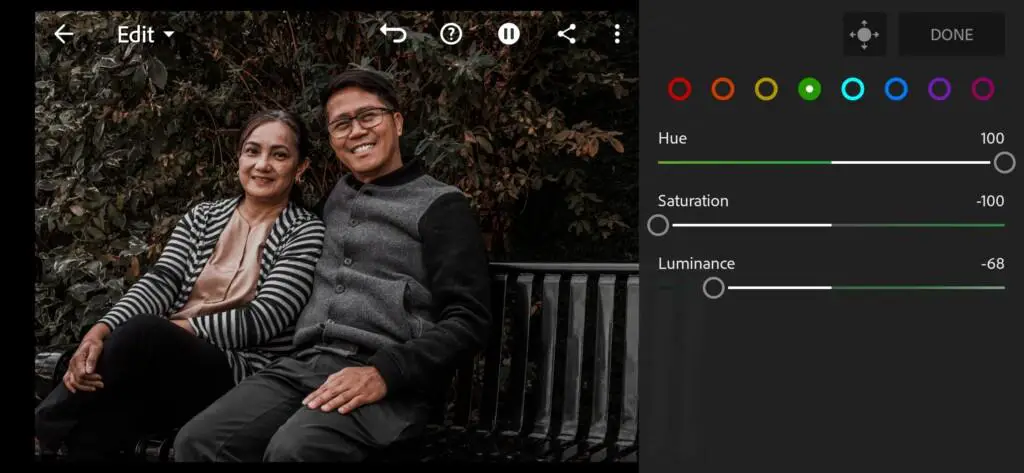
07 Drakecvincent Lightroom Preset 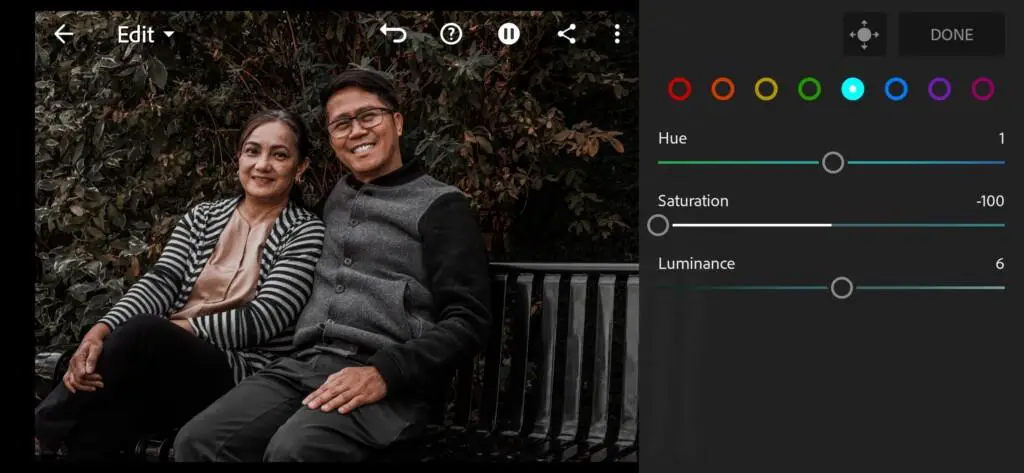
08 Drakecvincent Lightroom Preset 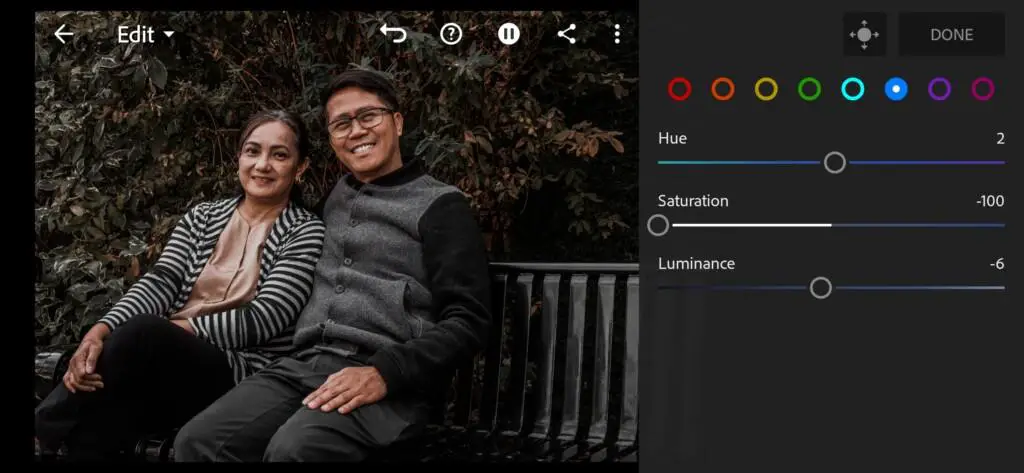
09 Drakecvincent Lightroom Preset 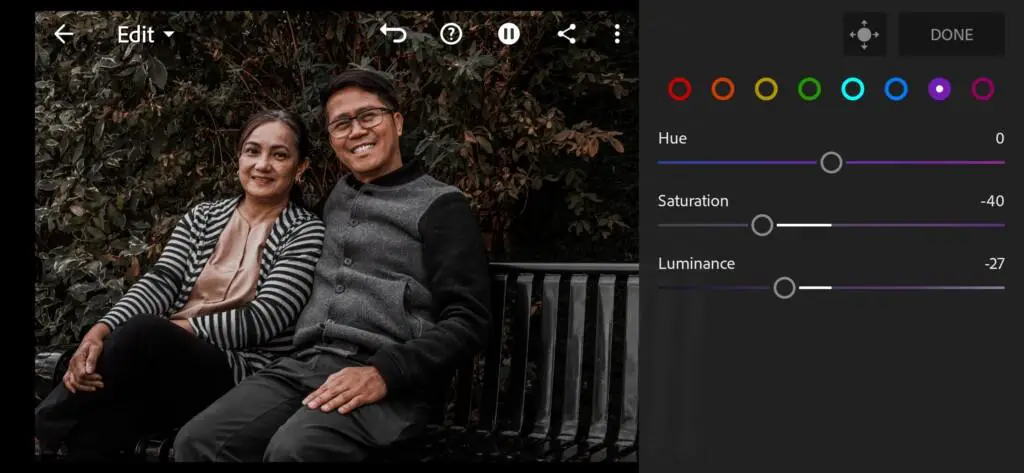
10 Drakecvincent Lightroom Preset 
11 Drakecvincent Lightroom Preset 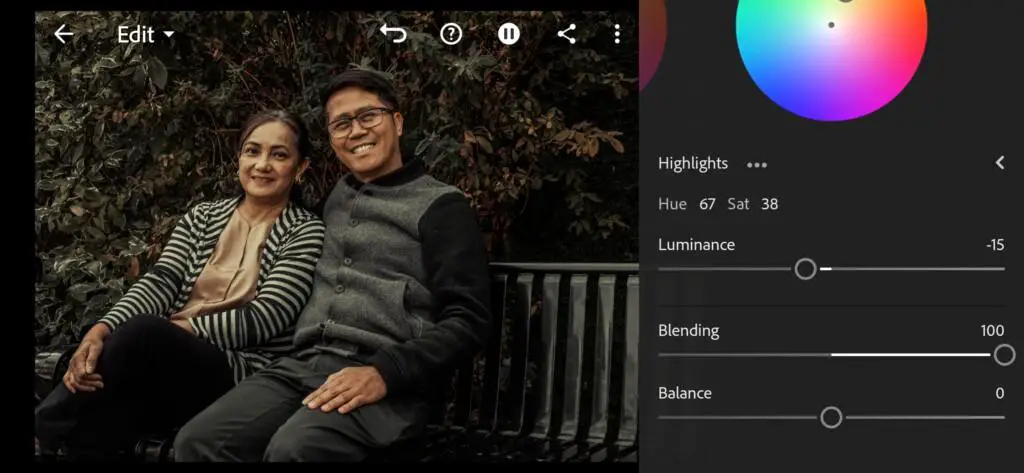
12 Drakecvincent Lightroom Preset
4. Effects editing
Optionally, you can adjust the clarity to minus 30 or less. We love this effect very much.
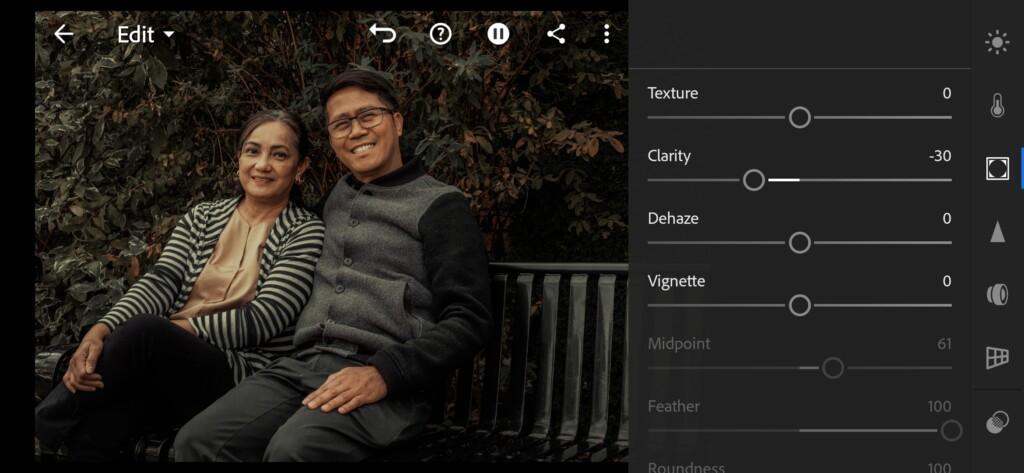
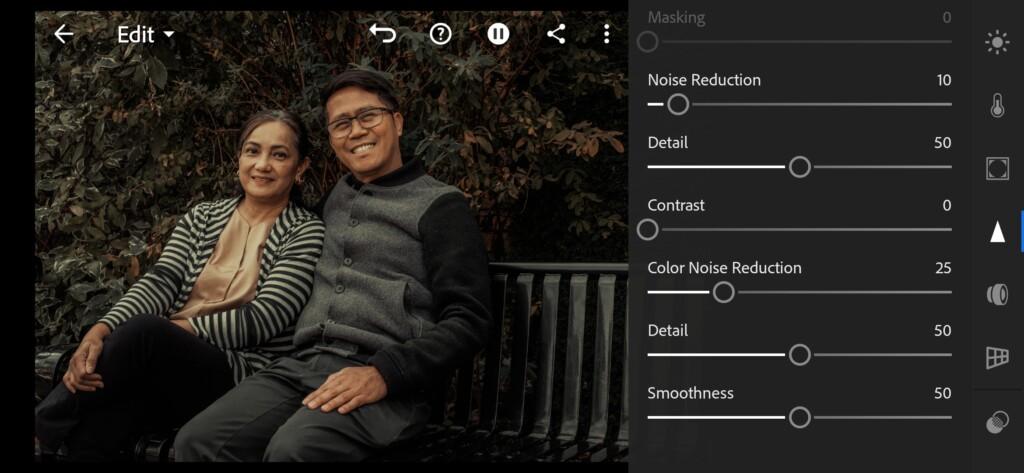
5. Detail correction
Watch screenshot for details.
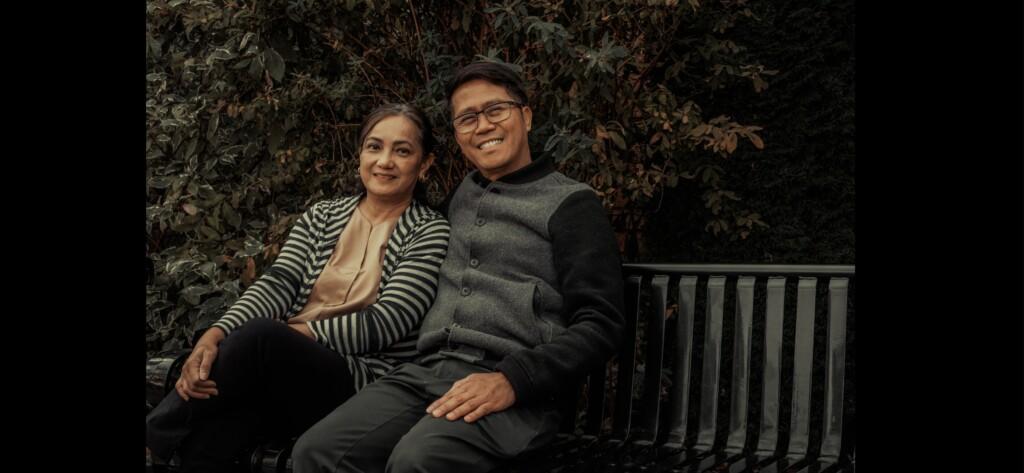
6. Preset is ready
Our preset is ready. Don’t forget to save it if you like the preset.

7. Save @DRAKECVINCENT preset
How to save this preset look at here.
If you still don’t know how to save a preset, see this article. If you have any questions, please contact us. We are always happy to help!
Thank you for being with us today. We are glad to try for you!
Watch the video how to create @DRAKECVINCENT Lightroom preset | Tutorial
Download the Preset
To download the Preset for free you need to have a password which appears twice on the top right corner during the video


