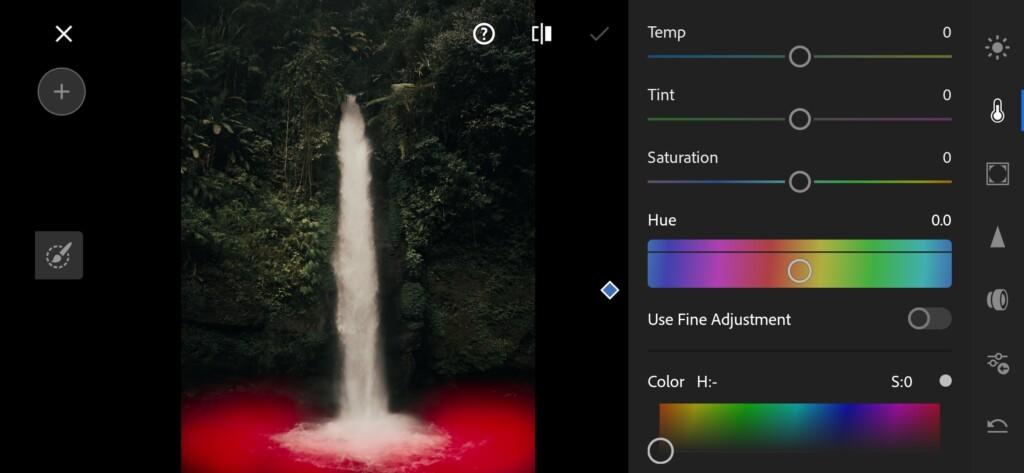
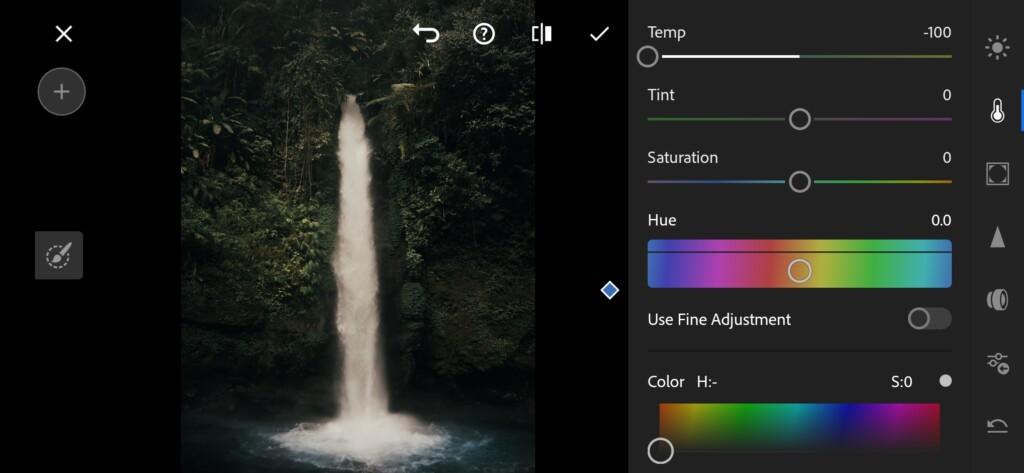
The @NEVERENDINGHORIZON preset won the last vote. Today we will show you one of the color correction options in his style. If necessary, use the selective selection function. For example, if you have green water in the photo, and you need blue, for example. To do this, you will need to take the temperature of the selected area to minus. It is easy and convenient to do it in the Lightroom mobile application. To create the preset, we will use a photo of the forest, like our photographer Luka. Let’s begin.
You can choose the option that is better for you below
- You can follow this step-by-step guide to create a preset
- You can edit photos by yourself, watching our videos
- You can download our presets for free, but for this you need to carefully watch the video and remember the password (****) for downloading the preset in DNG format. Attention! The password appears only if you watch the video on YouTube, on this website (only on computer’s browsers) or on YouTube app.
- You can also buy set of presets like this. Look at the items down below
How to create Dense Forest for mobile Lightroom | Guide
For DENSE FOREST preset we recommend use nature photos.
1. Choose your photo
For this preset, please select a photo with nature. Perhaps you have a photograph showing a forest and a river, or a waterfall. This kind of photo is perfect.
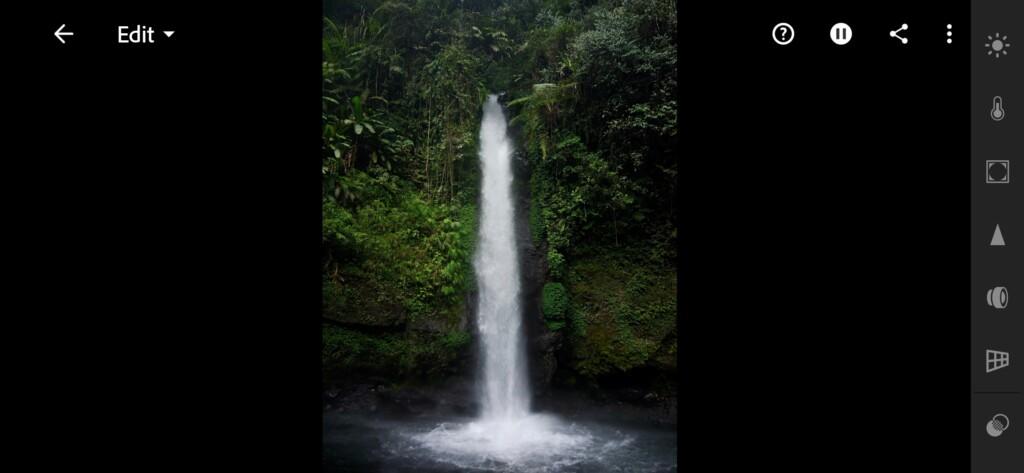
2. Light correction
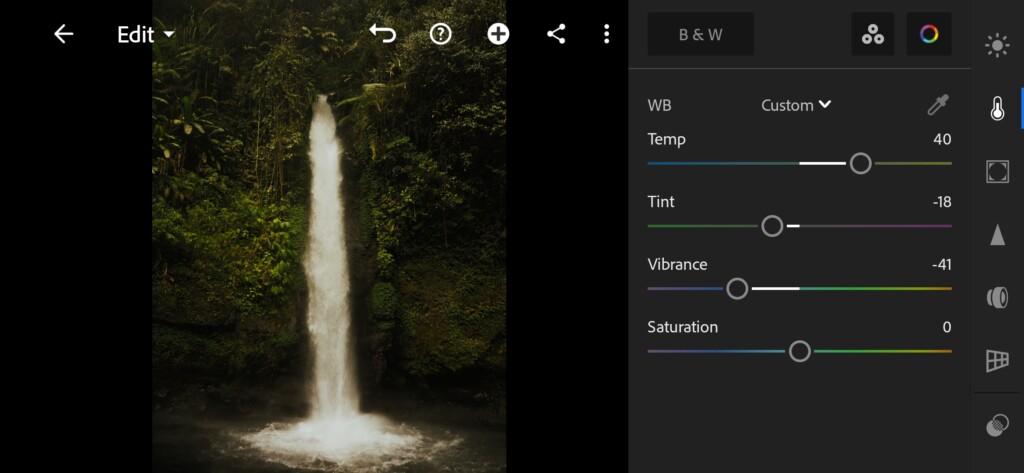
We create light correction in the muted style, like in Instagram photographer @NEVERENDINGHORIZON. You will need to repeat the settings in our screenshots.
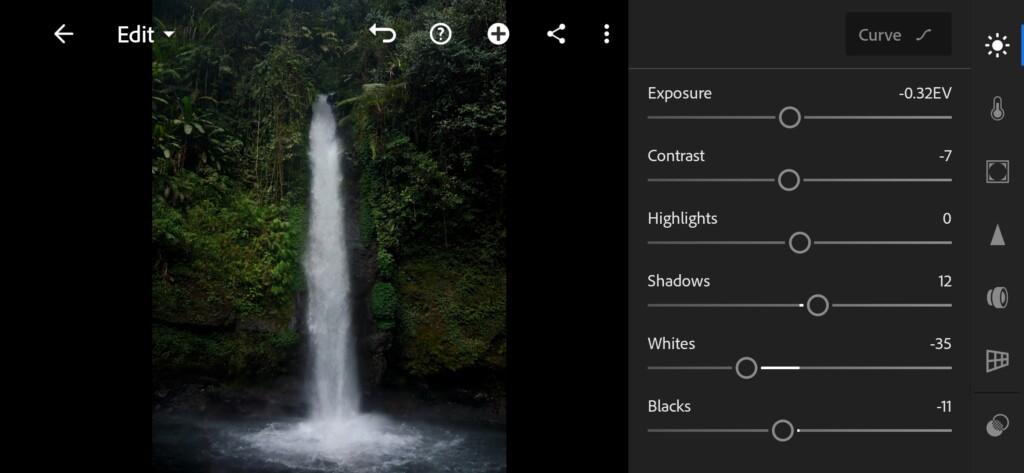
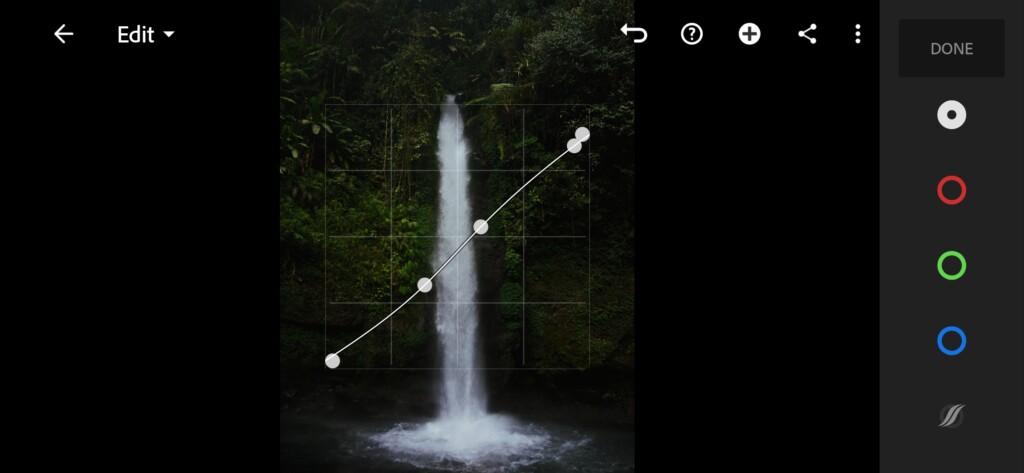


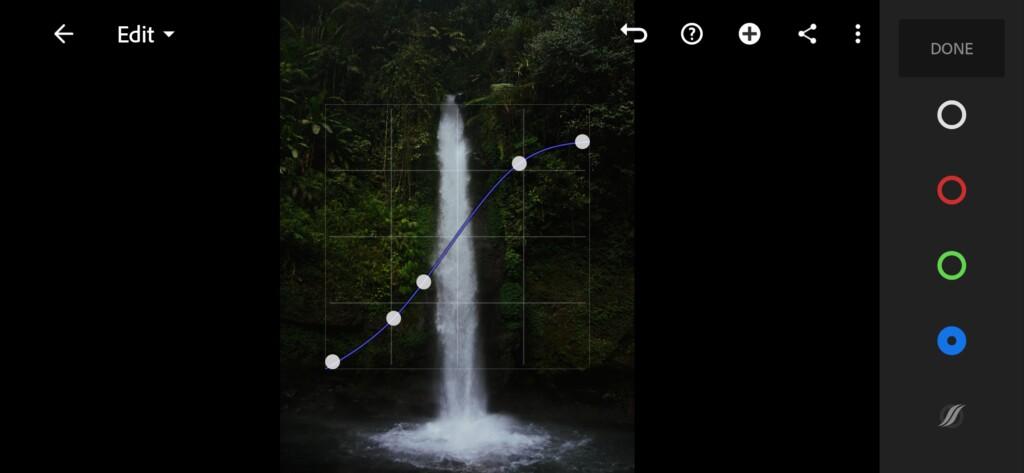
3. Color correction
The color scheme consists of deep green, brown and dark blue.
07 Dense Forest Lightroom Preset 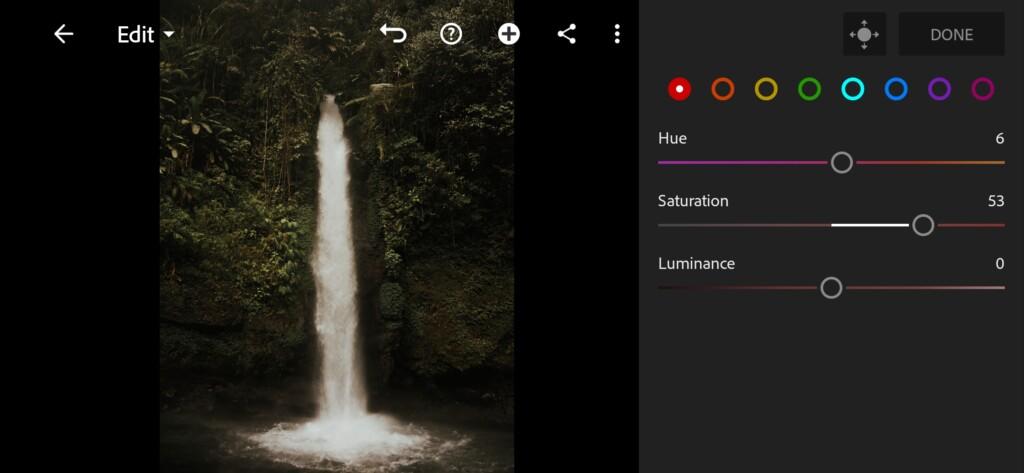
08 Dense Forest Lightroom Preset 
09 Dense Forest Lightroom Preset 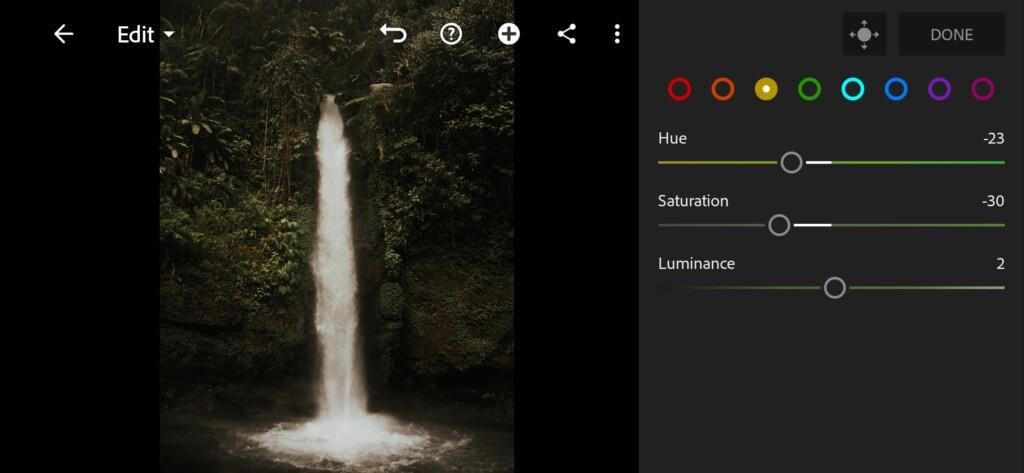
10 Dense Forest Lightroom Preset 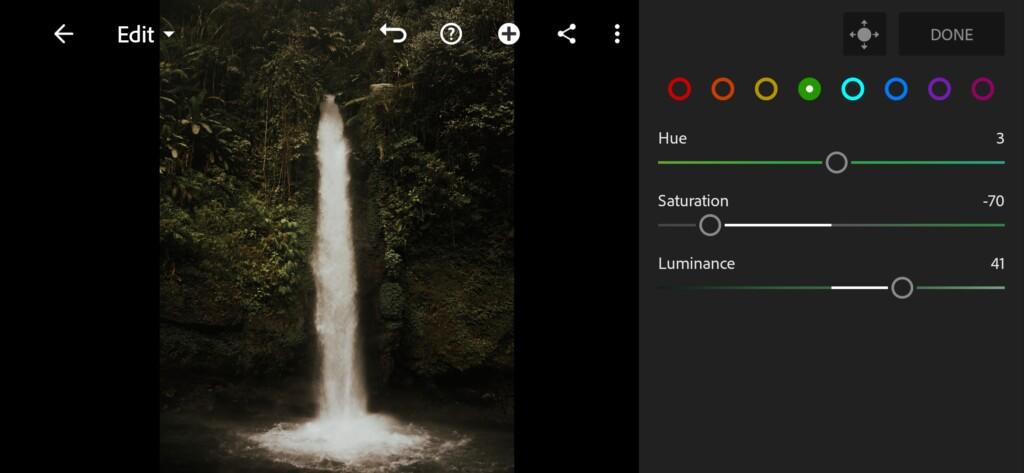
11 Dense Forest Lightroom Preset 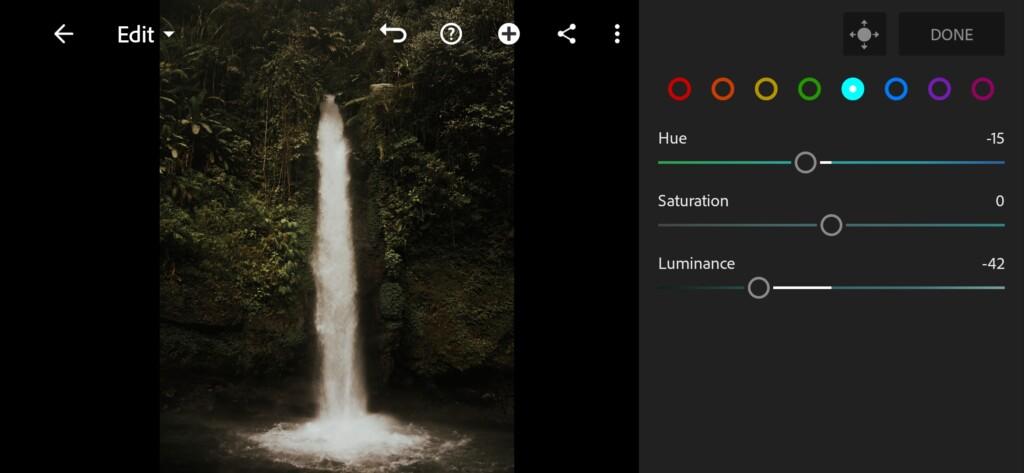
12 Dense Forest Lightroom Preset 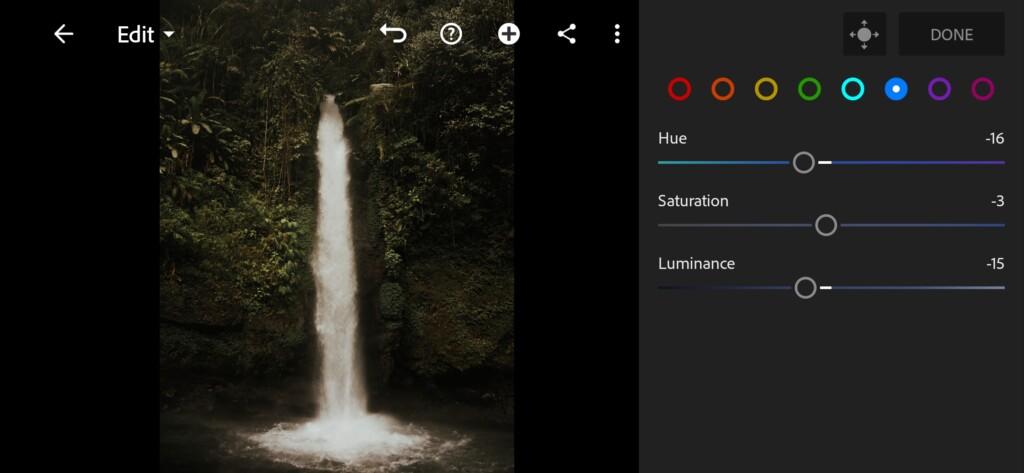
13 Dense Forest Lightroom Preset 
14 Dense Forest Lightroom Preset 
15 Dense Forest Lightroom Preset
4. Effect Editing
We will led our parameters to the negative.
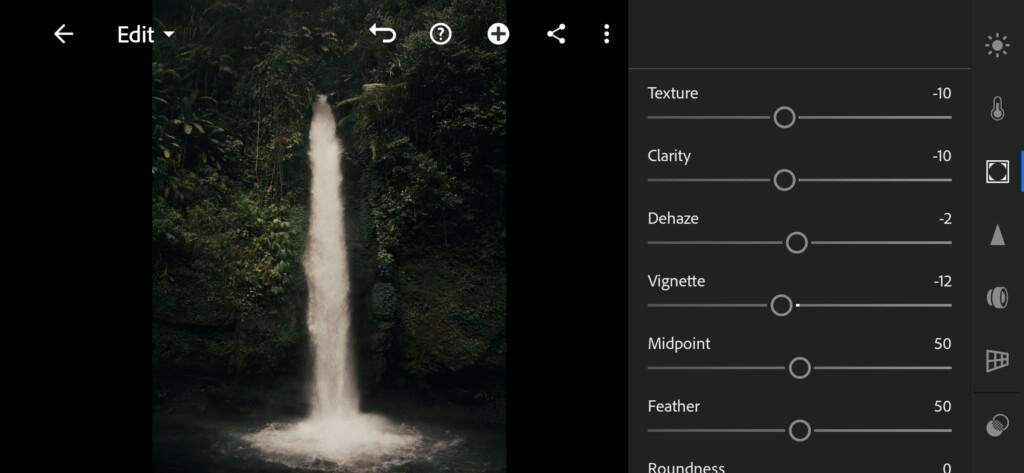
5. Detail correction
In detailed correction, add sharpening, noise reduction, color noise reduction. See below.
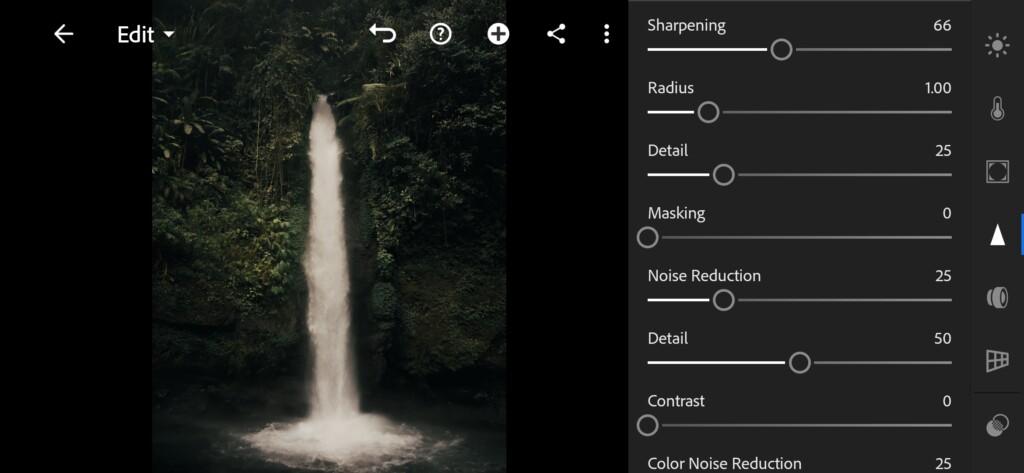
17 Dense Forest Lightroom Preset 
18 Dense Forest Lightroom Preset
6. Selective correction
Here you can see how to add a blue ootenque to water. You can also take the white a little into a cool shade.
7. Preset is ready
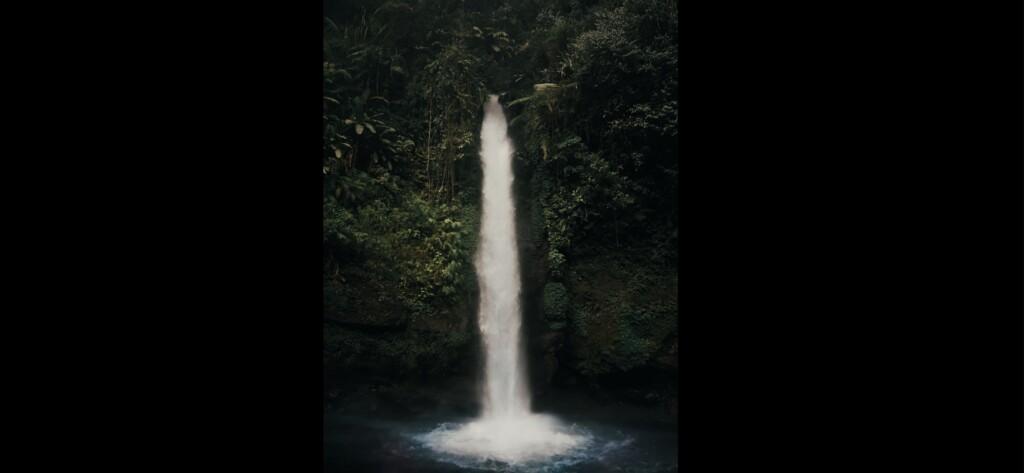
Our DENSE FOREST preset is ready. The preset is designed according to the profile @NEVERENDINGHORIZON.

8. Save this preset
Don’t forget to save this preset.
If you still don’t know how to save a preset, see this article. If you have any questions, please contact us. We are always happy to help!
You can always download our presets for free. You can also see our other bloggers, nature presets. We are sure that you will definitely find something interesting and beautiful for yourself. Since we fall in love with the first preset!
Watch the video how to create Dense Forest Lightroom preset | Tutorial
Download the Preset
To download the Preset for free you need to have a password which appears twice on the top right corner during the video


