COCOA preset is made in brown shades with a chocolate note. Photos with this preset look very beautiful, especially with white, brown and green details. If you like chocolate-style color grading, repeat it after us, or download a ready-made preset from our site for free. In addition to this preset, you can find other chocolate-style color grading options on our website. This preset will perfectly cope with redness on the skin, this often happens from prolonged exposure to the sun, for example. And in this situation, our preset will certainly help out.
You can choose the option that is better for you below
- You can follow this step-by-step guide to create a preset
- You can edit photos by yourself, watching our videos
- You can download our presets for free, but for this you need to carefully watch the video and remember the password (****) for downloading the preset in DNG format. Attention! The password appears only if you watch the video on YouTube, on this website (only on computer’s browsers) or on YouTube app.
- You can also buy set of presets like this. Look at the items down below
How to create COCOA Preset for mobile Lightroom | Tutorial
You can choose any photos for Cocoa Preset and don’t forget to adjust Cocoa Preset settings for your photos for the best result.
1. Choose your photo
We have chosen a photo with a red tint on the skin to show you how you can hide such imperfections in the Lightroom mobile application.
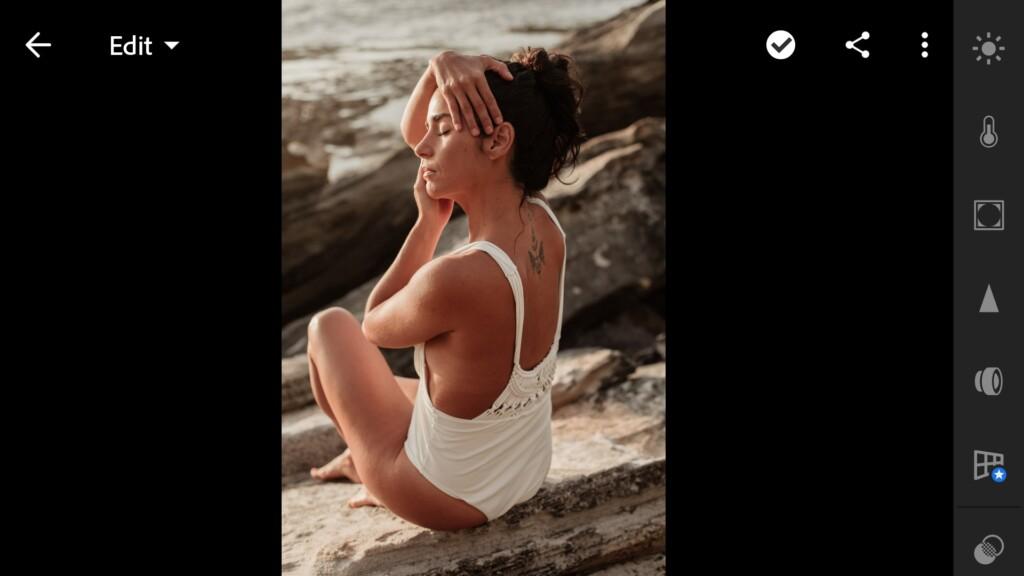
2. Light correction
We use the standard free settings in the Lightroom app for our preset. See our step-by-step lighting setup in these screenshots. Setting up the light is perhaps the most difficult and painstaking job in creating a preset, but it’s worth it.
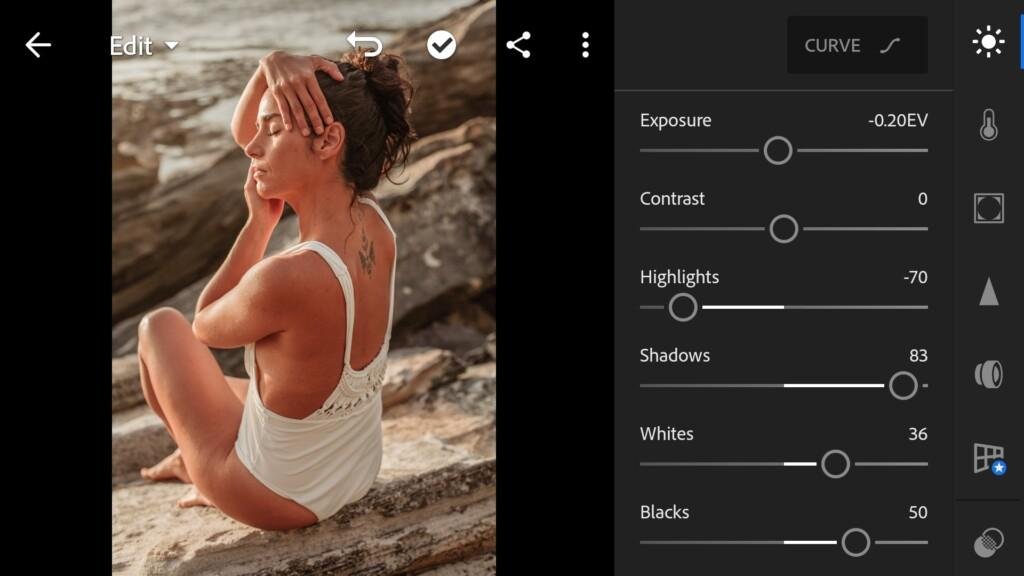

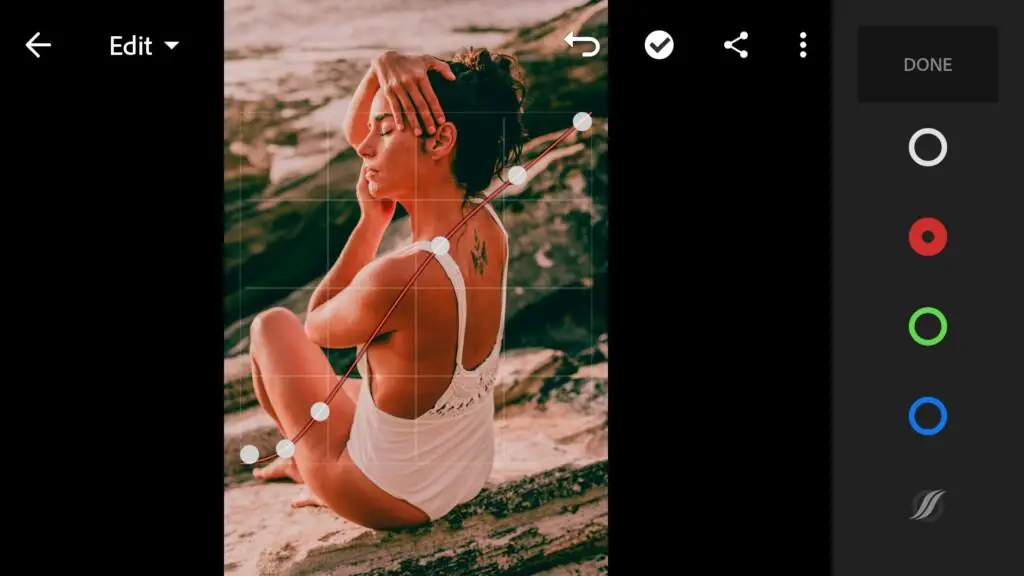
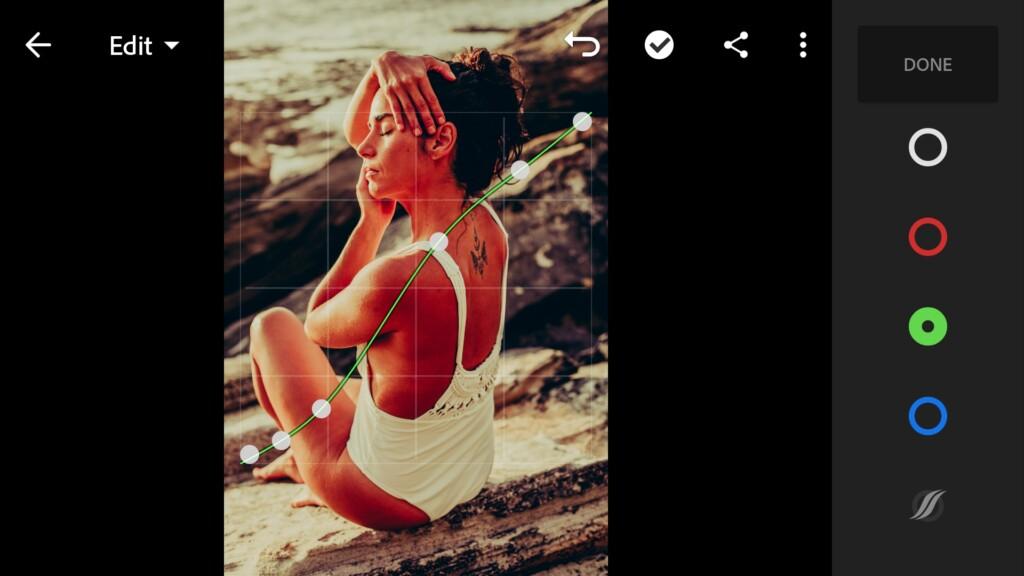

3. Color correction
We add warmth photos, then adjust hue, luminance, saturation for each color individually.
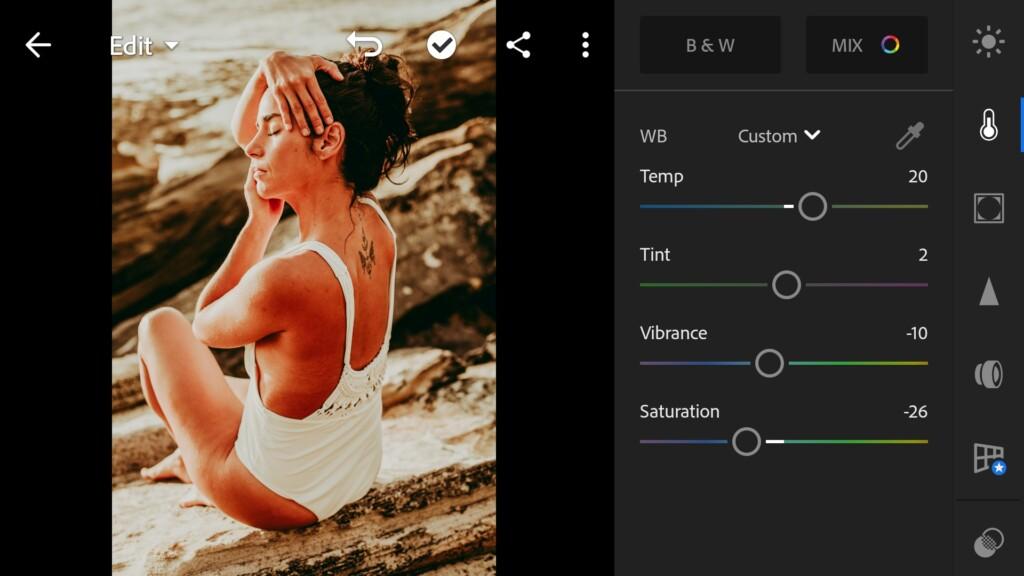
07 Cocoa 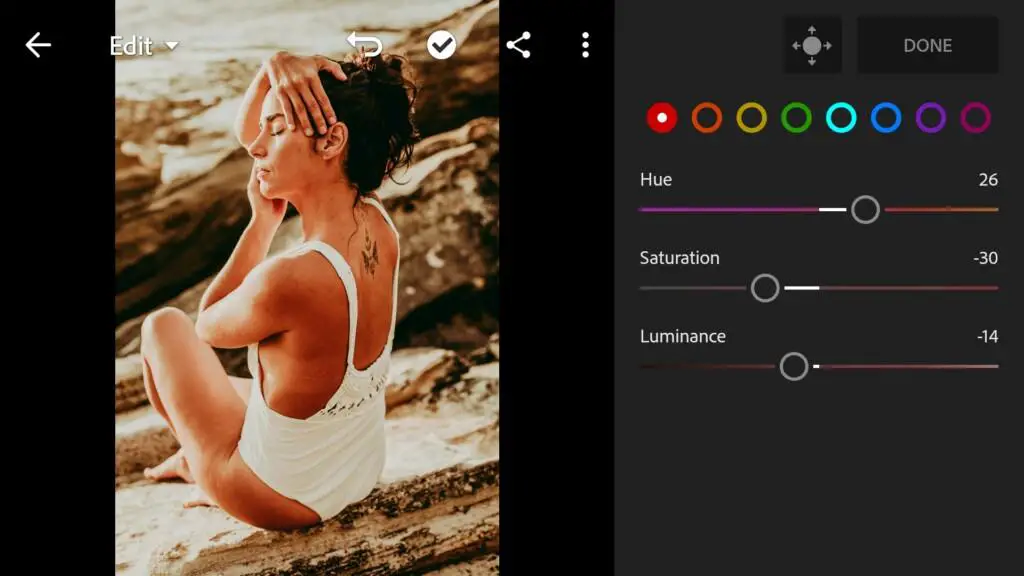
08 Cocoa 
09 Cocoa 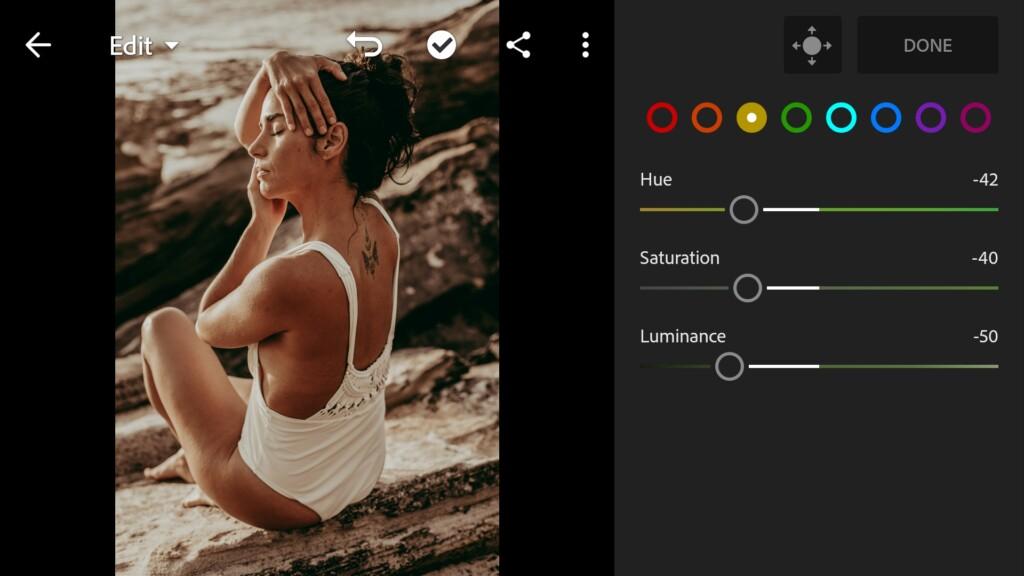
10 Cocoa 
11 Cocoa 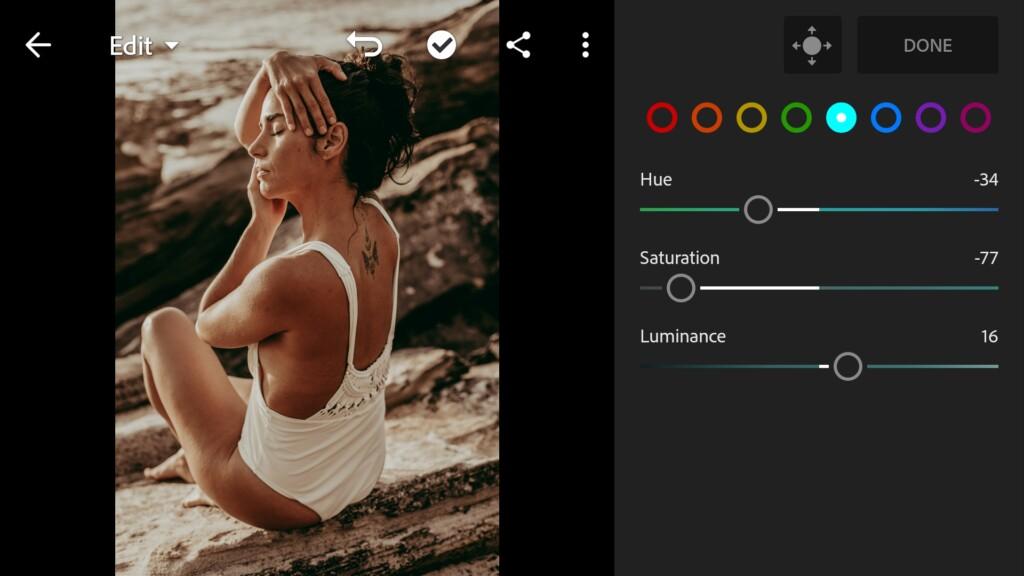
12 Cocoa 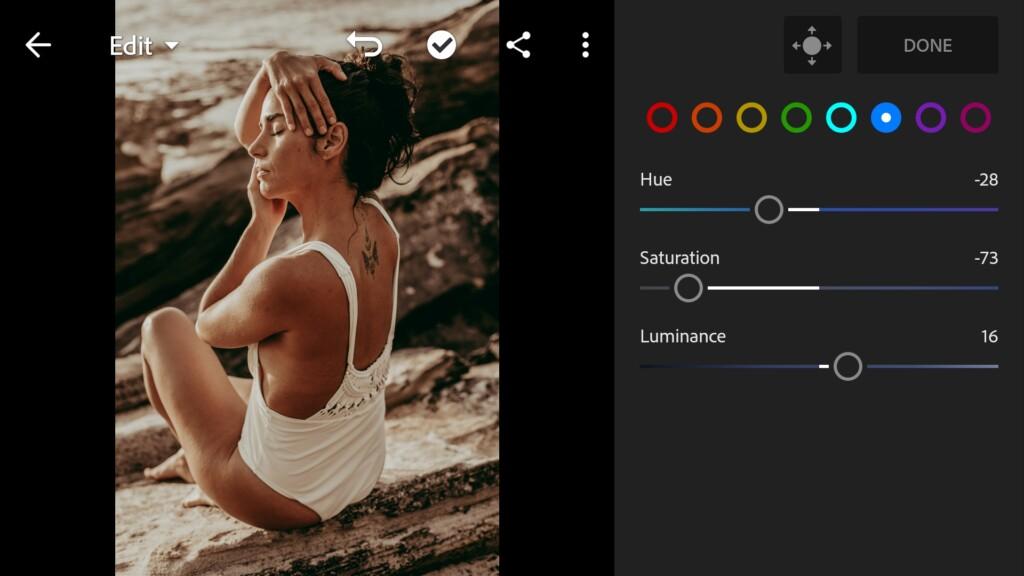
13 Cocoa 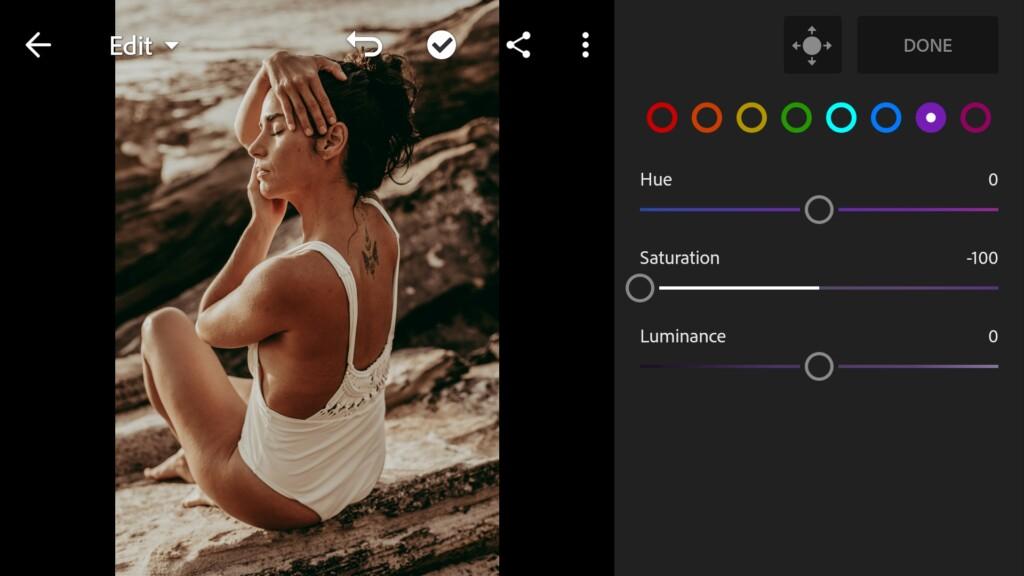
14 Cocoa 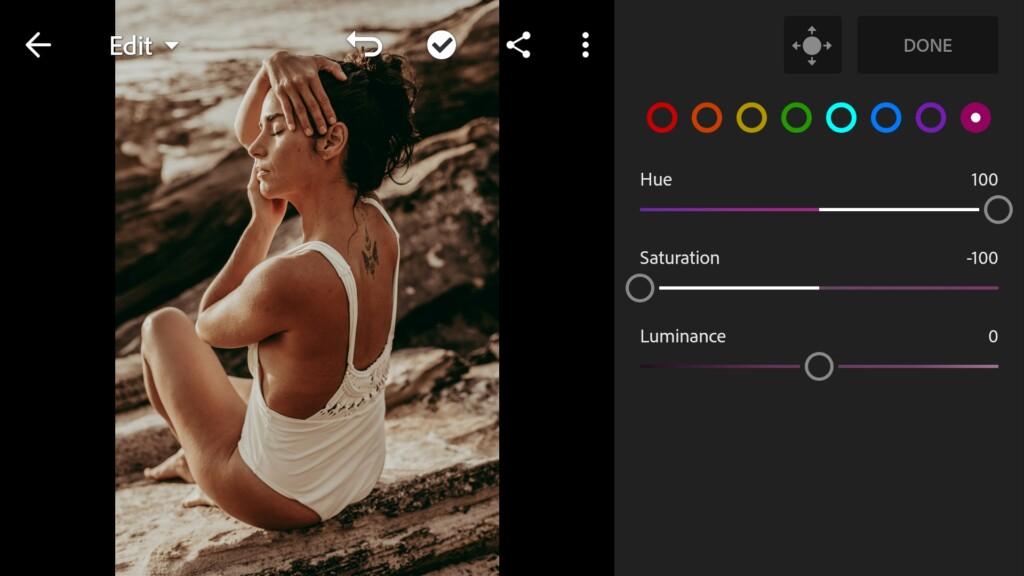
15 Cocoa
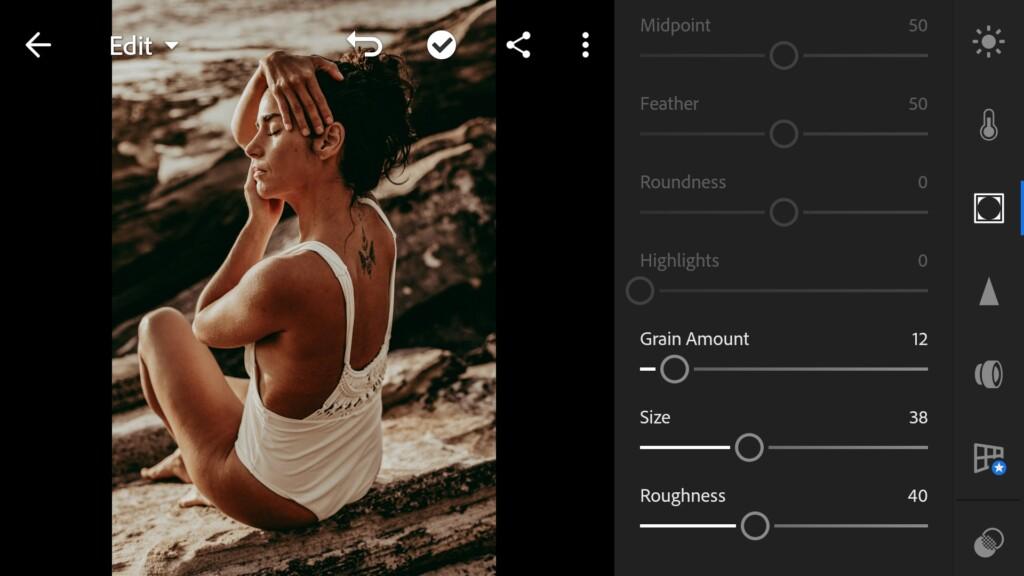
4. Effects editing
We add clarity, dehaze, grain amount.
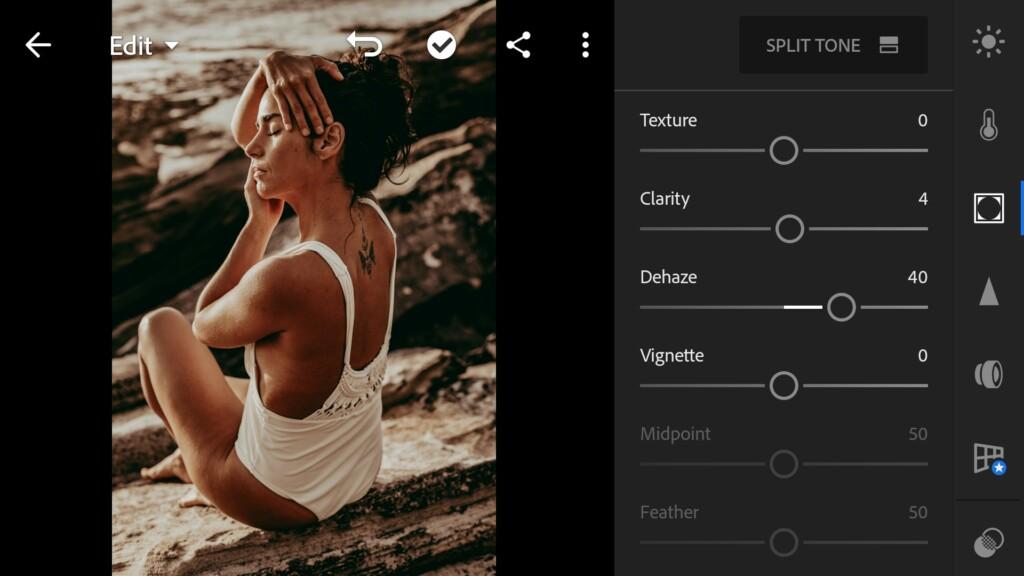
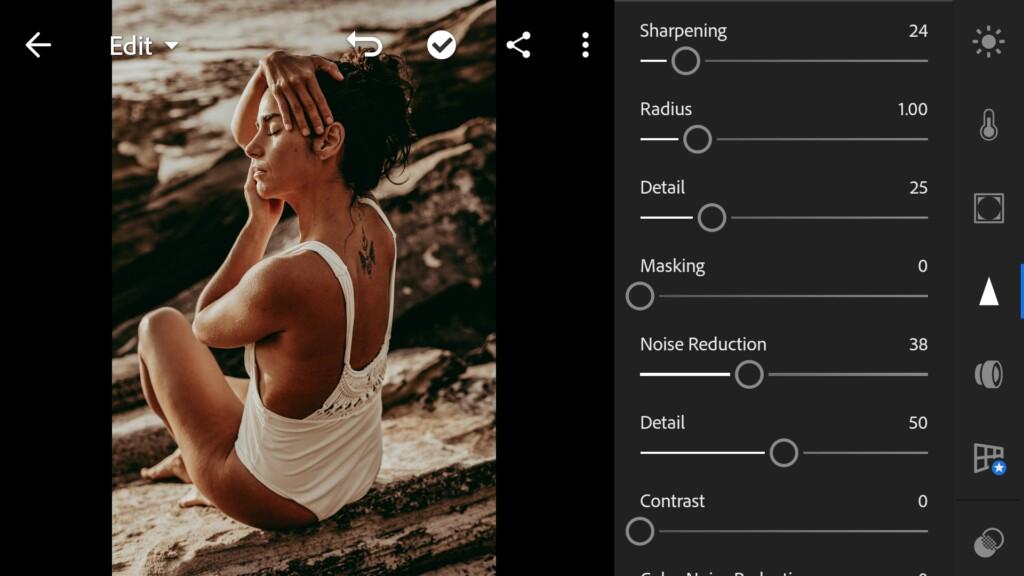
5. Detail correction
Add sharpening, noise reduction, color noise reduction. You can experiment with these features on your own, and find what you like for yourself.
18 Cocoa 
19 Cocoa
6. Preset is ready
If you like the work done, you can save it.


7. Save your preset
Don’t forget to save the preset, for further use the presets in one click on your photos.
Don’t forget to check out our other chocolate presets. You will definitely find something beautiful for yourself on our website. Well, we do not say goodbye, but tell you see you soon, and thank you for being with us. We are trying for you.
Watch video how to create Cocoa preset | Tutorial
Download the Preset
To download the Preset for free you need to have a password which appears twice on the top right corner during the video


