Hello everyone! Today we will show you how to create a preset in the Lightroom mobile application in the style of Instagram photographer and blogger @MONARIS_. Her work is surprising and inspiring, she is a real professional, which is why we have so many presets in the Paola M Franqui style. Today we are creating a mind-blowing cinematic preset in top tones. We are one hundred percent sure that this preset will not leave anyone indifferent. We begin.
You can choose the option that is better for you below
- You can follow this step-by-step guide to create a preset
- You can edit photos by yourself, watching our videos
- You can download our presets for free, but for this you need to carefully watch the video and remember the password (****) for downloading the preset in DNG format. Attention! The password appears only if you watch the video on YouTube, on this website (only on computer’s browsers) or on YouTube app.
- You can also buy set of presets like this. Look at the items down below
How to create Cinematic Colors preset for mobile Lightroom | Guide
For CINEMATIC COLORS we recommend using photos with blue and red details.
1. Choose your photo
Please choose a photo that you like.

2. Light correction
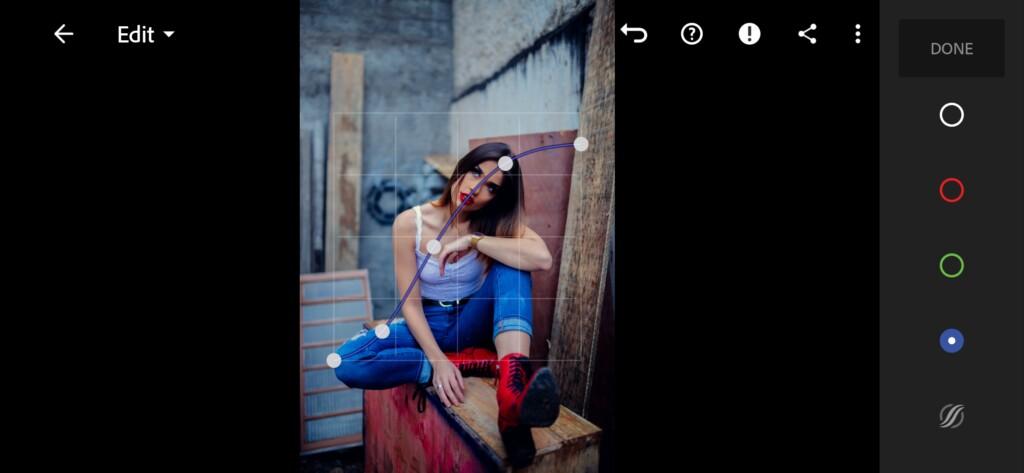
We start working on the preset in the Lightroom mobile application by setting up the light. We tweak exposure, highlights, whites, blacks, shadows and tone curves based on one photograph by @MONARIS_. This photographer is very fond of using cool shades of shadows in his work, and we will repeat that today.
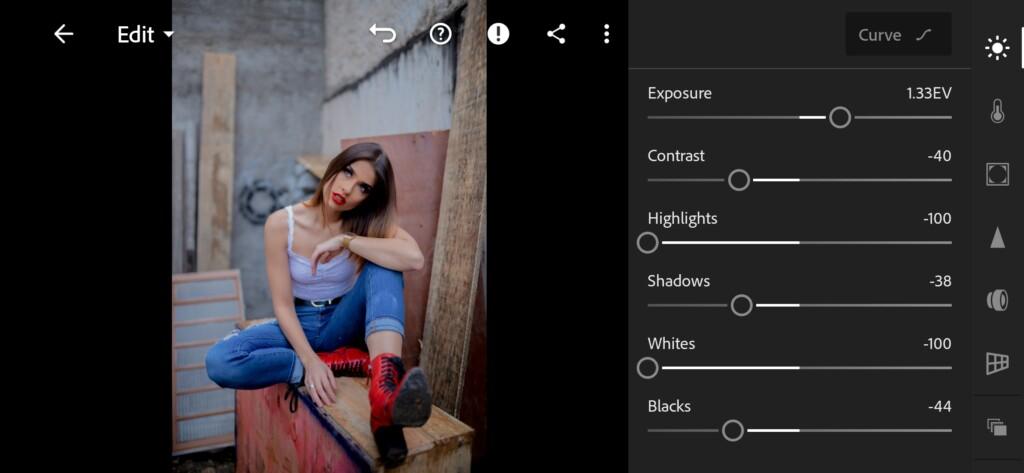
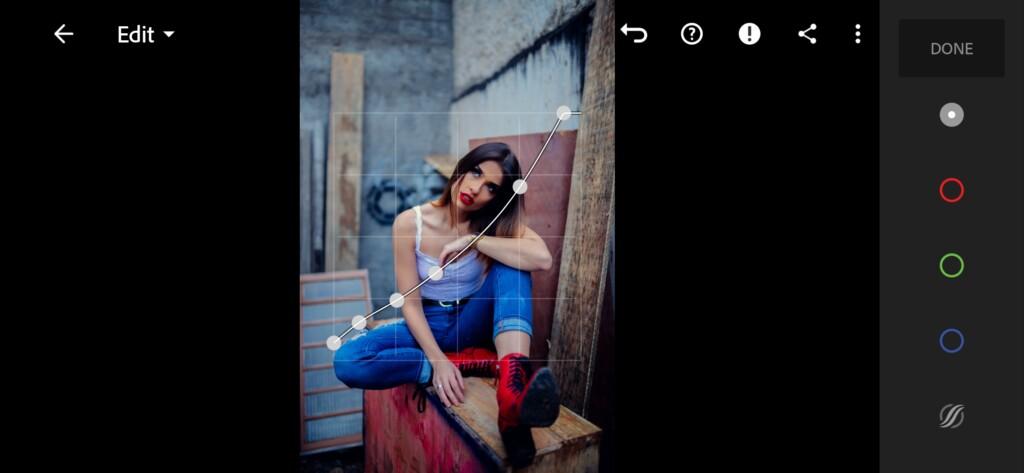
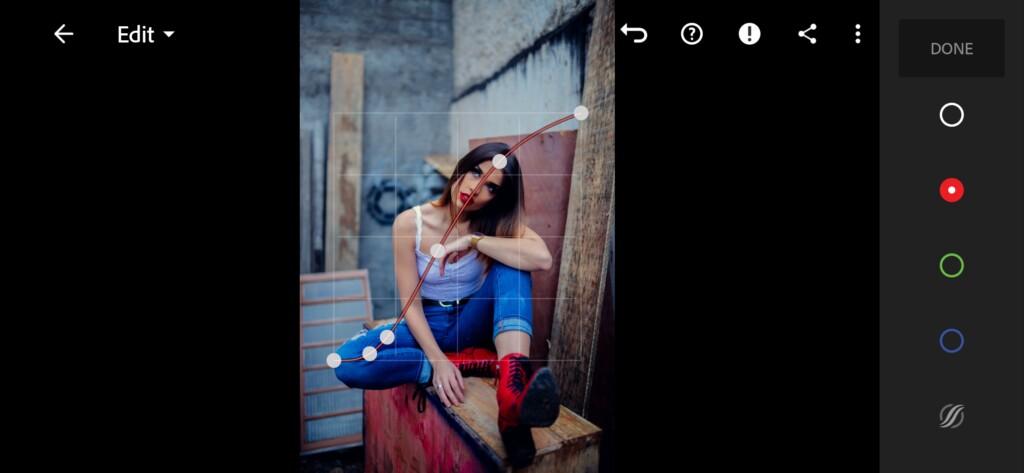
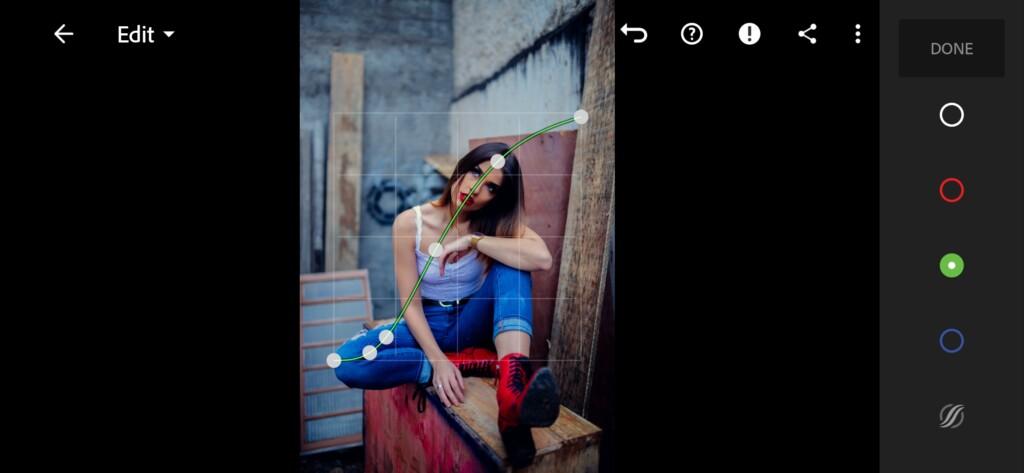
3. Color correction
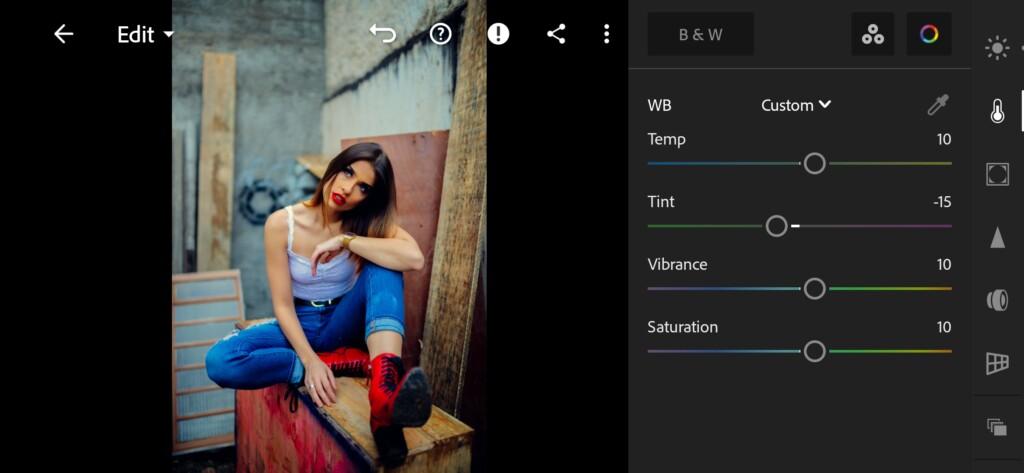
We focus on the Instagram photo of blogger and photographer @MONARIS_ and adjust the color scheme of our preset. The preset turns out to be very beautiful, all shades are harmoniously combined with each other.
07 Cinematic Colors Lightroom Preset 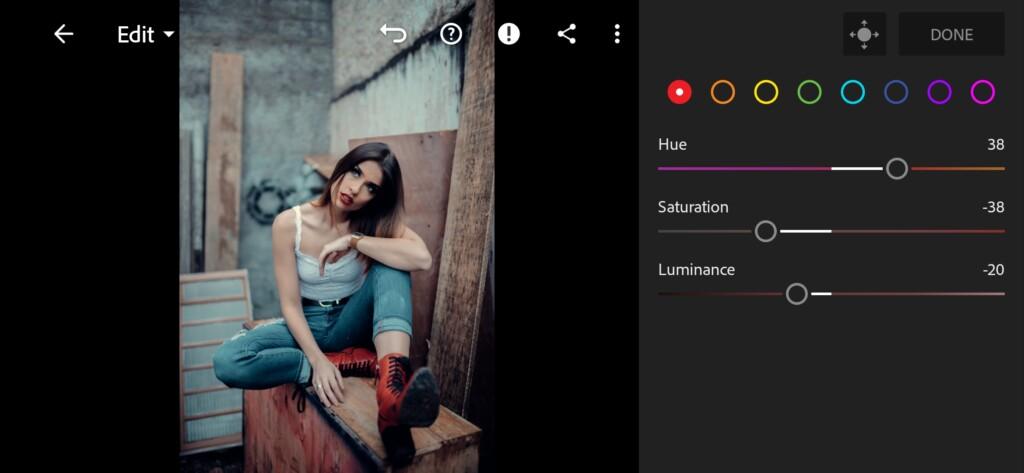
08 Cinematic Colors Lightroom Preset 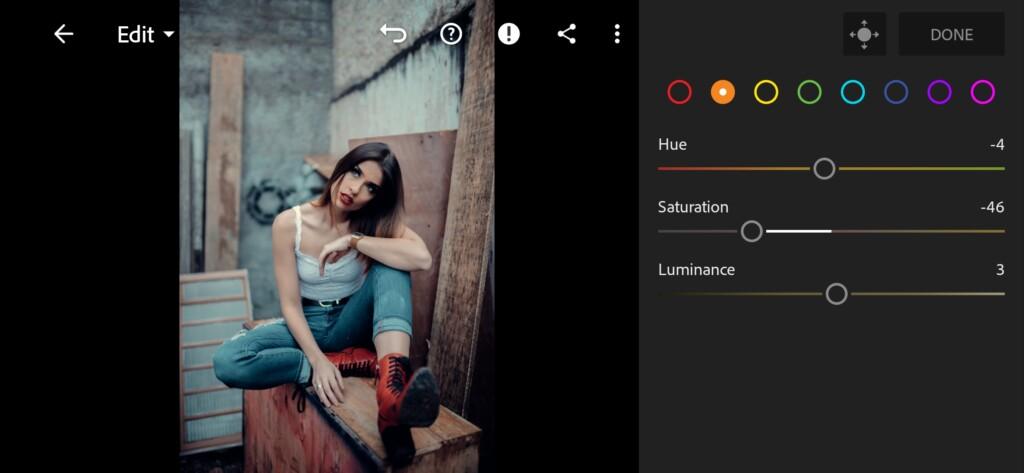
09 Cinematic Colors Lightroom Preset 
10 Cinematic Colors Lightroom Preset 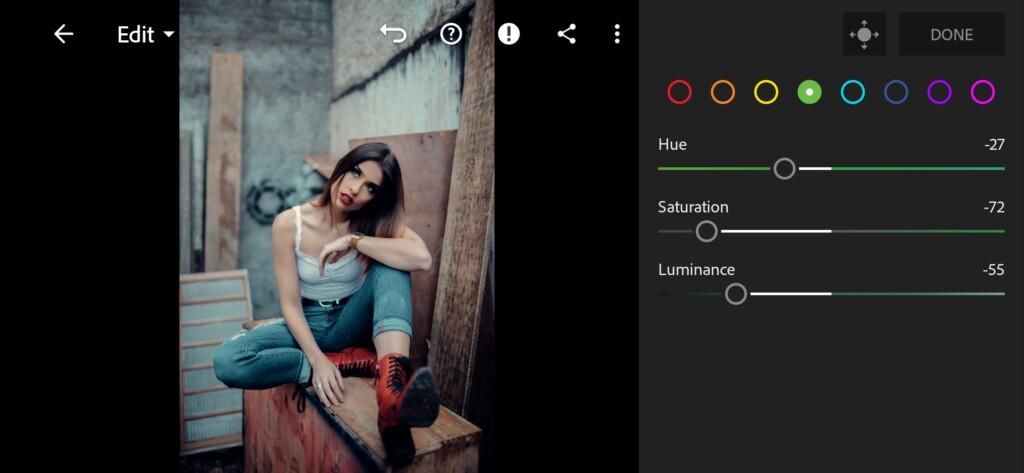
11 Cinematic Colors Lightroom Preset 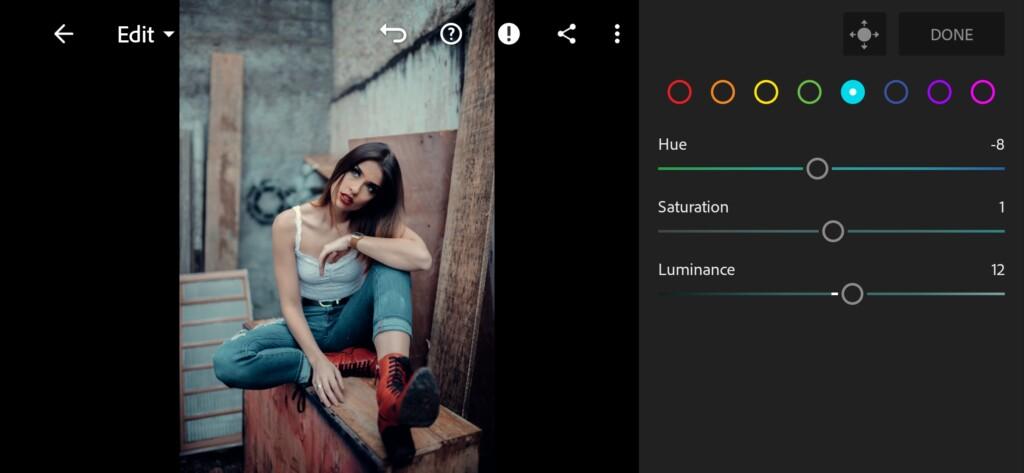
12 Cinematic Colors Lightroom Preset 
13 Cinematic Colors Lightroom Preset 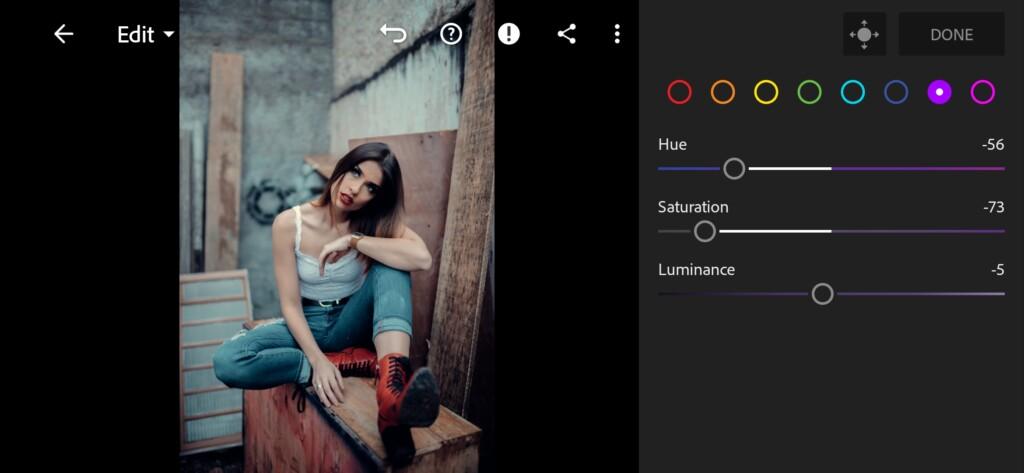
14 Cinematic Colors Lightroom Preset 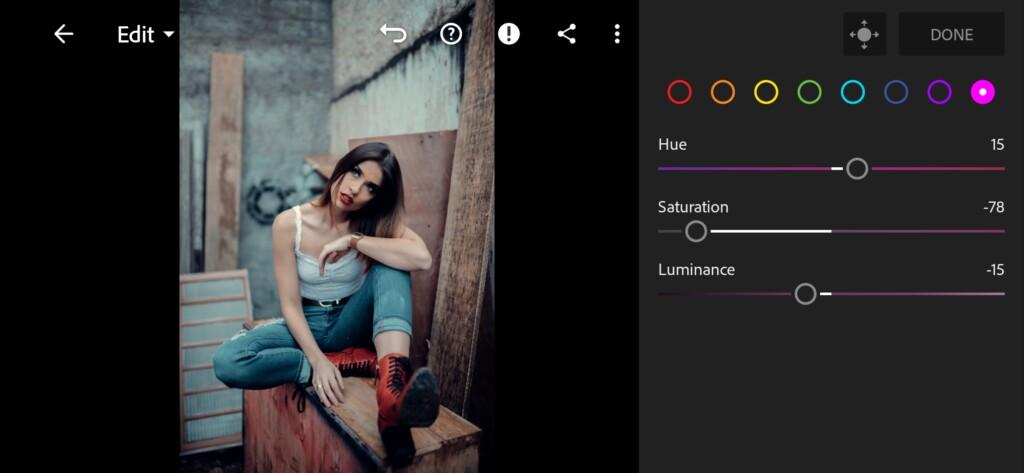
15 Cinematic Colors Lightroom Preset 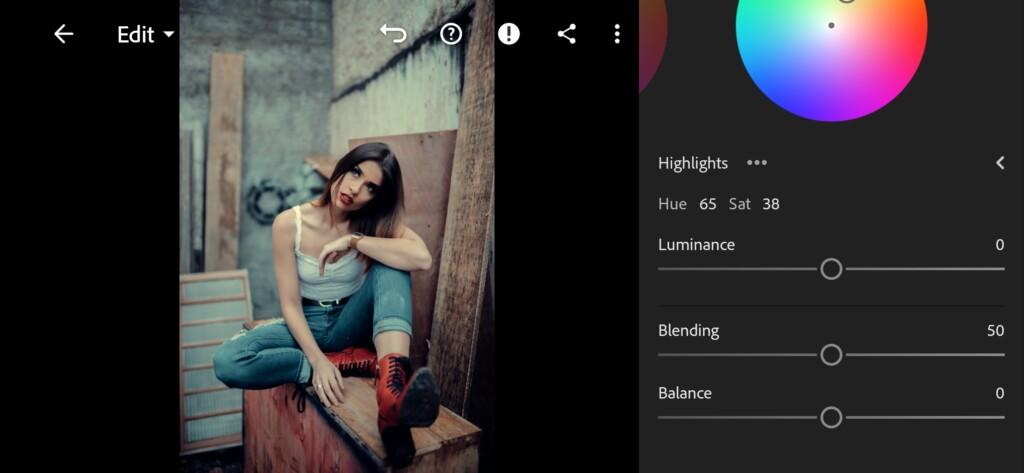
16 Cinematic Colors Lightroom Preset
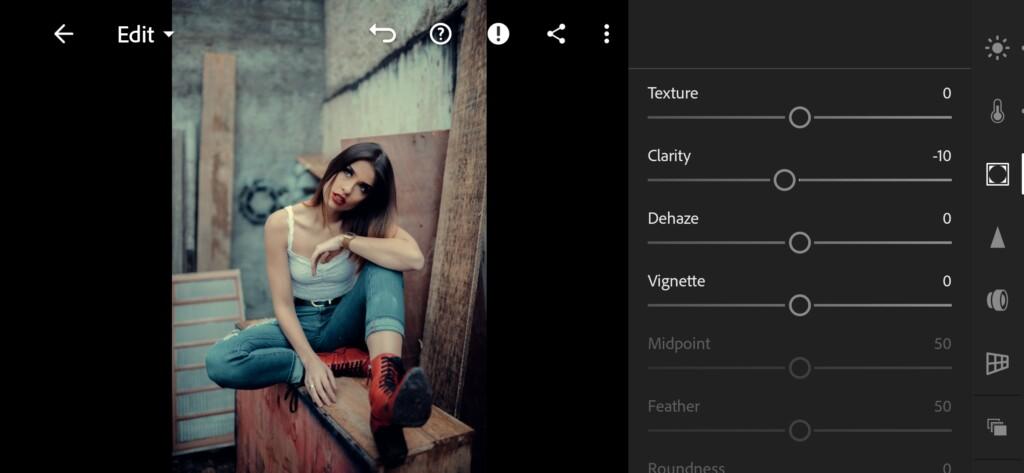
4. Effects editing
Add negative clarity effect.
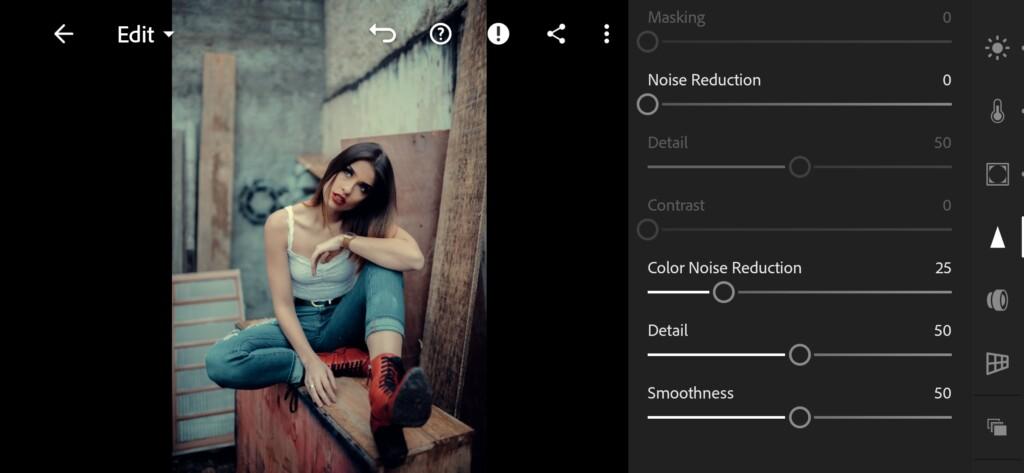
5. Detail correction
Add color noise reduction.
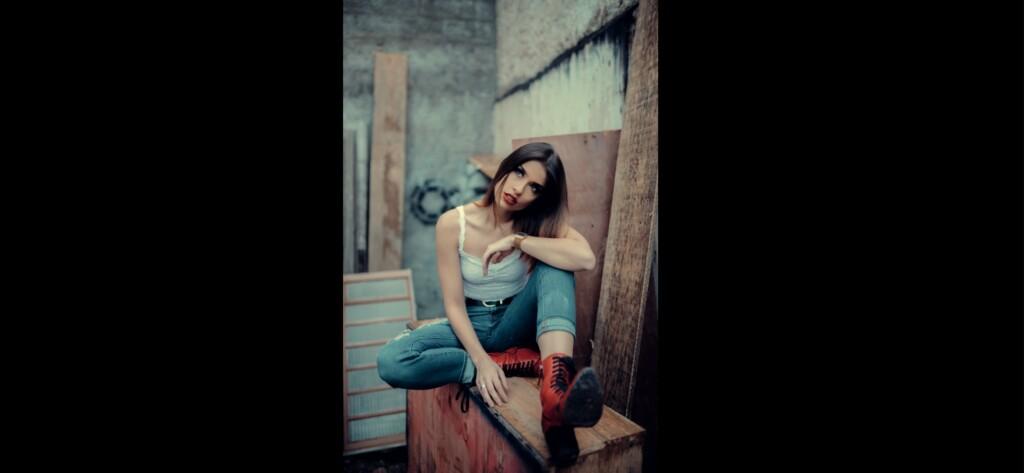
6. Preset is ready
CINEMATIC COLORS preset is ready.

7. Save this preset
If you still don’t know how to save a preset, see this article. If you have any questions, please contact us. We are always happy to help!
We have finished creating a preset in the Paola M Franqui style. This preset is truly gorgeous, professional and unique. If you want to learn how to create presets yourself as our team, we recommend that you subscribe to our YouTube channel, participate every week in the vote, where our subscribers choose the best color correction, which we share with you on Sundays absolutely free.
Watch the video how to create Cinematic Colors Lightroom preset | Tutorial
Download the Preset
To download the Preset for free you need to have a password which appears twice on the top right corner during the video


