Guys, by popular demand, we made a preset like the photographer BENJ VILLENA did. The profile of this photographer is truly impressive and will definitely not leave anyone indifferent. Today we will show you how to transform your photos and make them as similar as possible to those of BENJ VILLENA. We will be using two applications to create the photo: Adobe Lightroom and Lens Distortions. In Lightroom we will do color correction, create a preset, and in the LD (Lens Distortions) application we will add light, like our photographer, only the photographer does it in Adobe Photoshop, but we will use a free mobile application, because all retouching takes place on the phone. Go!
You can choose the option that is better for you below
- You can follow this step-by-step guide to create a preset
- You can edit photos by yourself, watching our videos
- You can download our presets for free, but for this you need to carefully watch the video and remember the password (****) for downloading the preset in DNG format. Attention! The password appears only if you watch the video on YouTube, on this website (only on computer’s browsers) or on YouTube app.
- You can also buy set of presets like this. Look at the items down below
How to create Teal Orange Film like @BENJVILLENA for mobile Lightroom | Guide
For Teal Orange Film preset we recommend using photos with red, orange, blue, green and dark blue details
1. Choose your photo for THIS preset
You can use any photo at your discretion, but please consider our recommendations. And it’s better to use a light photo like in our example.
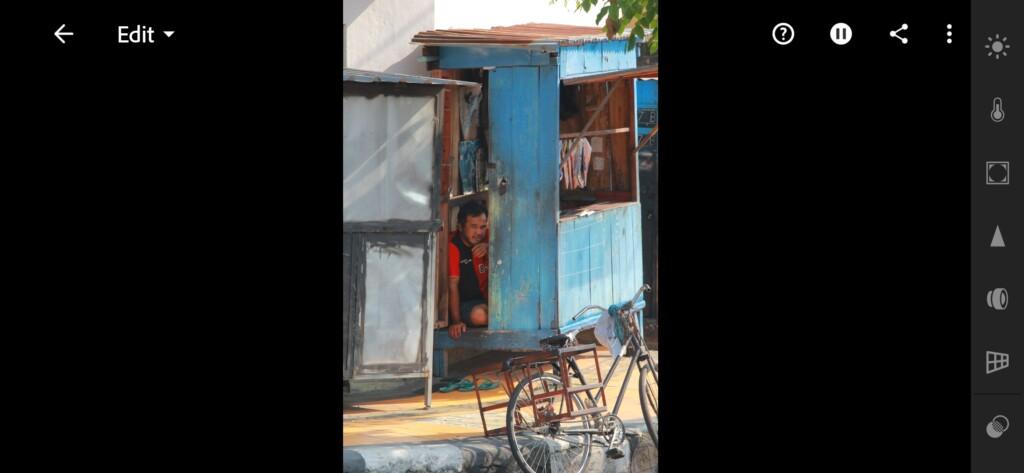
2. Light correction
We need to create a dark preset, which means we will take the exposure to minus, and build a white curve for all colors by darkening the blacks a little, lightening the middle tones, and lightening the white tones.
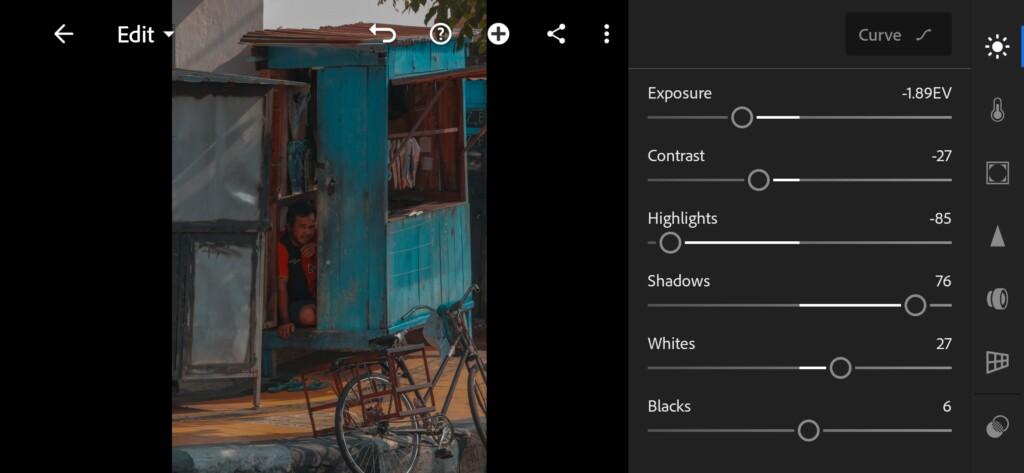
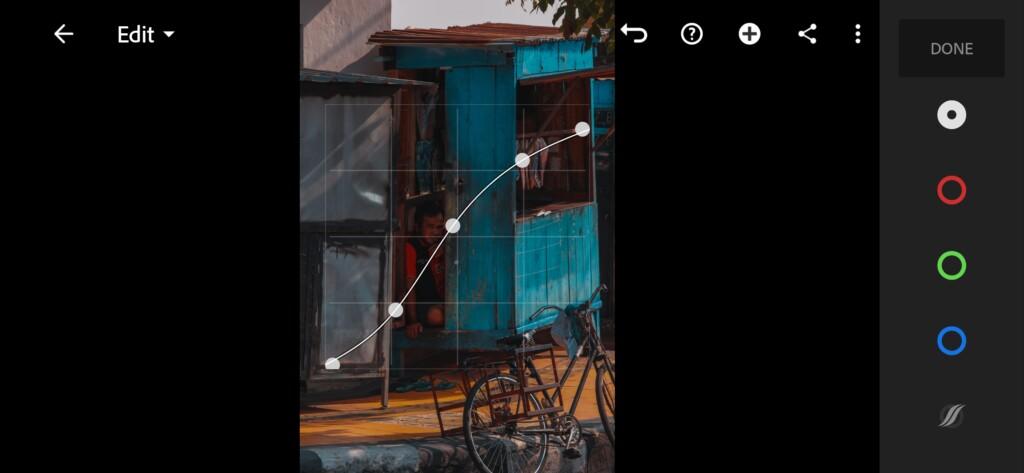
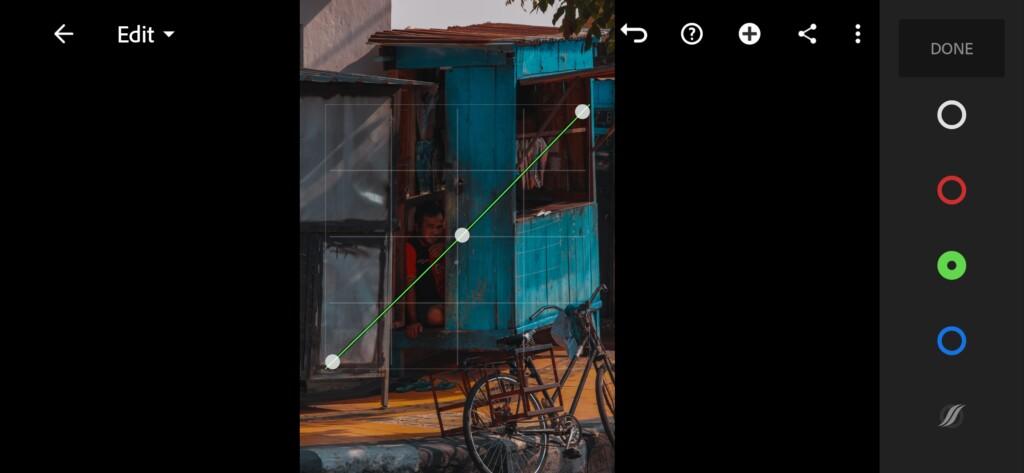
3. Color correction
We remove the saturation, because our color palette is not very bright, and we bring the colors to an orange-blue color scheme with emerald green. We add a blue tint to the shadows and a little yellow to the highlights. So much better!
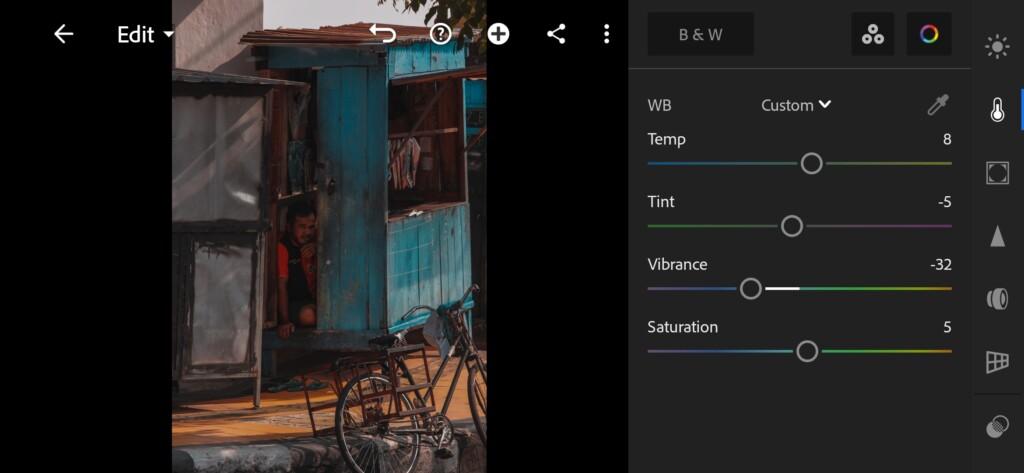
05 Benjvillena Lightroom Preset 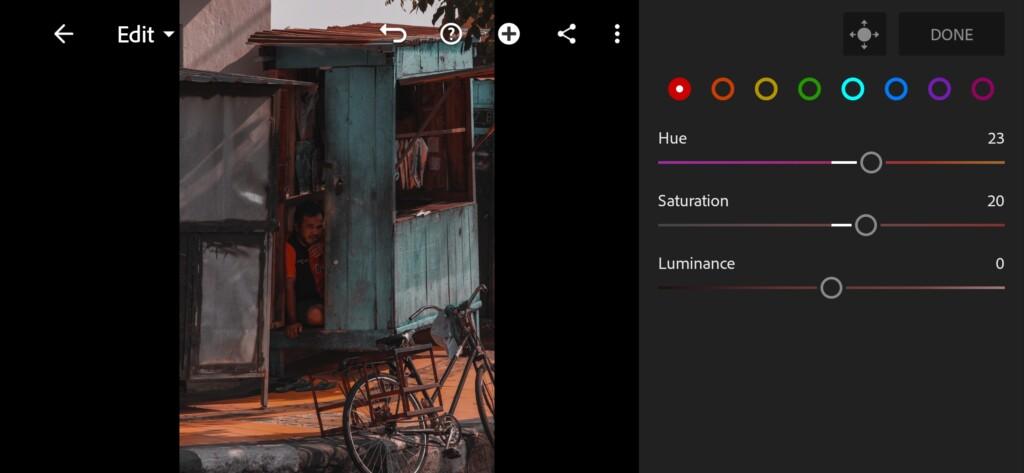
06 Benjvillena Lightroom Preset 
07 Benjvillena Lightroom Preset 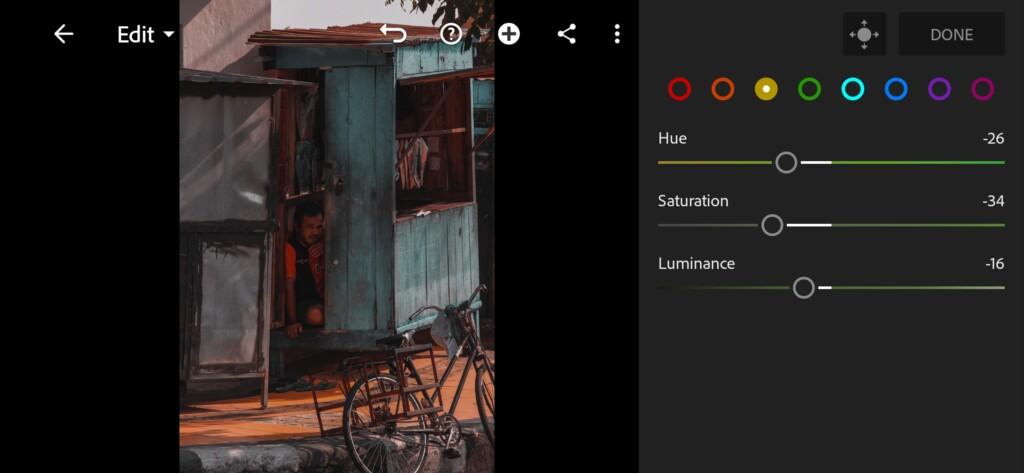
08 Benjvillena Lightroom Preset 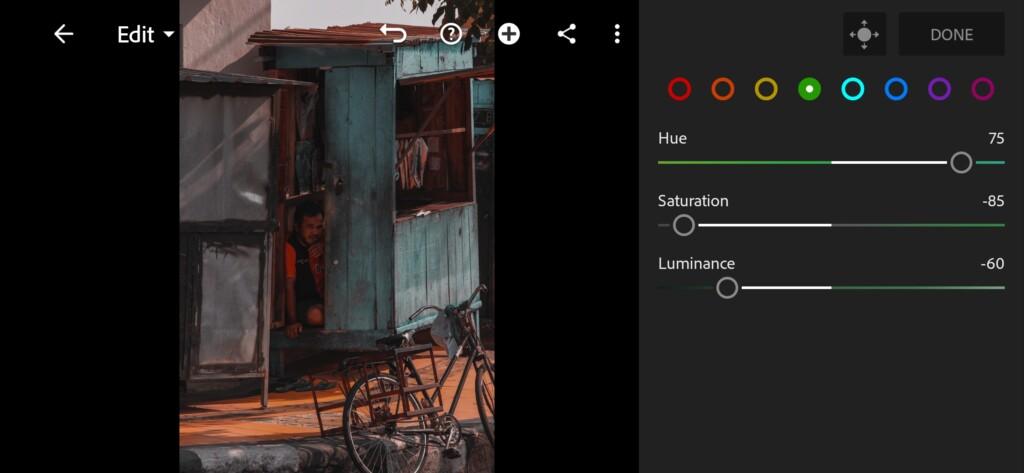
09 Benjvillena Lightroom Preset 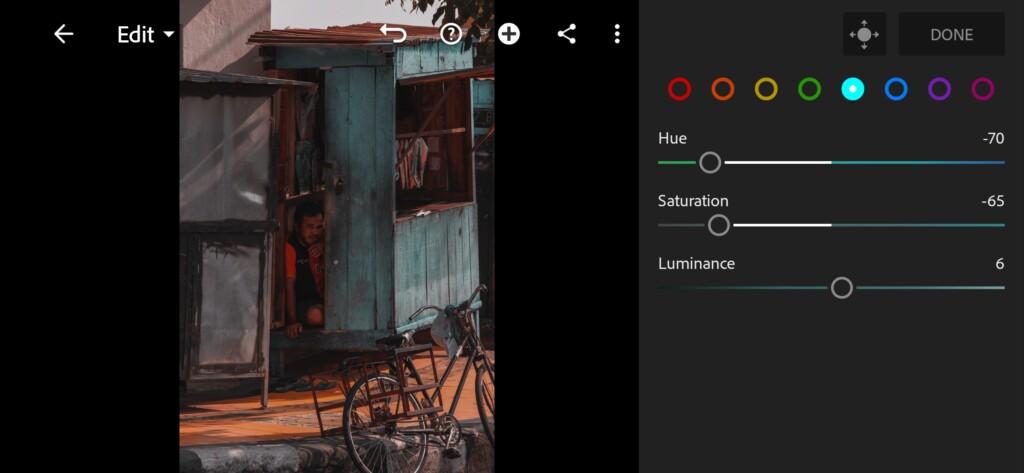
10 Benjvillena Lightroom Preset 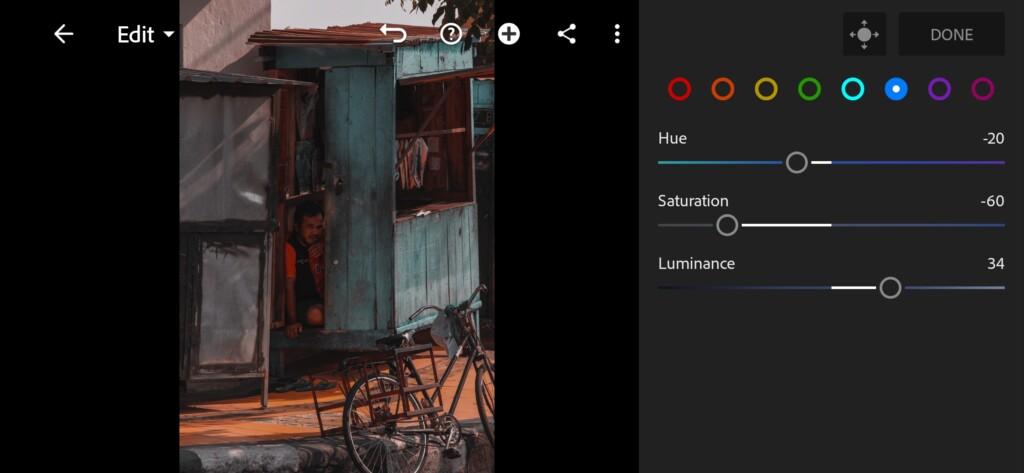
11 Benjvillena Lightroom Preset 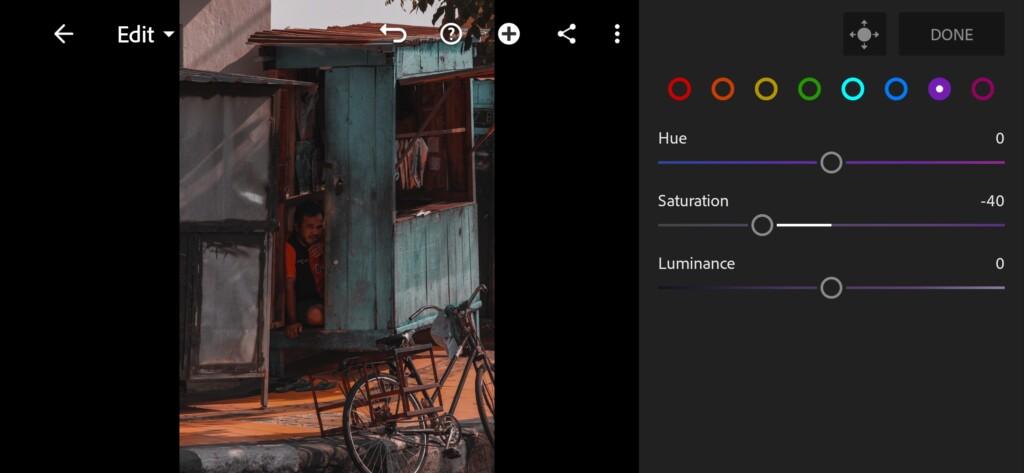
12 Benjvillena Lightroom Preset 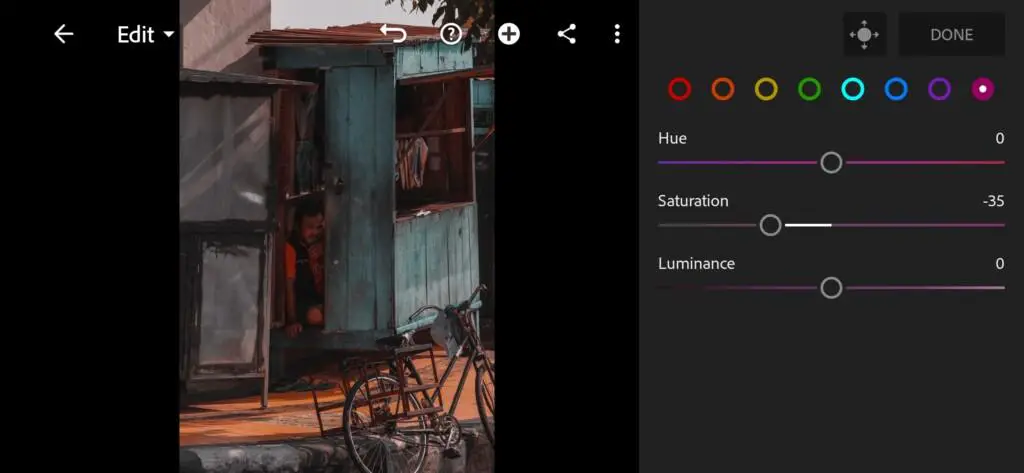
13 Benjvillena Lightroom Preset 
14 Benjvillena Lightroom Preset 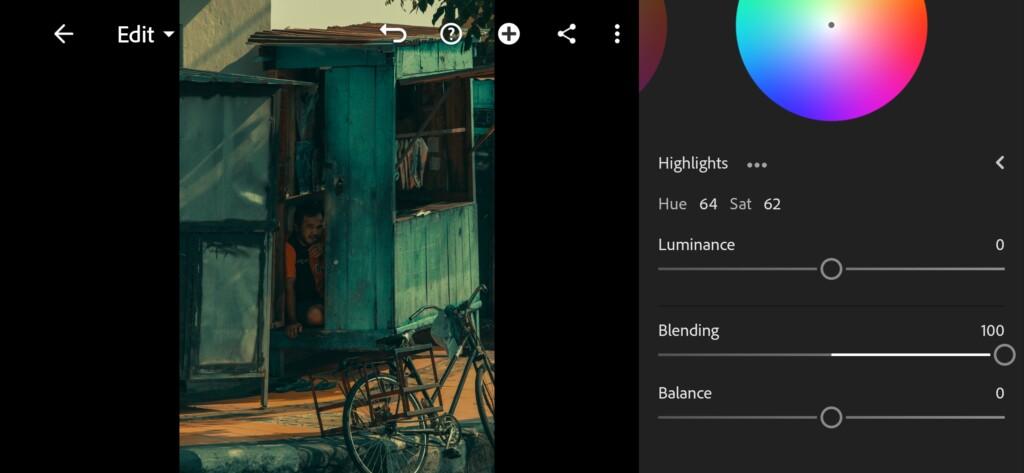
15 Benjvillena Lightroom Preset
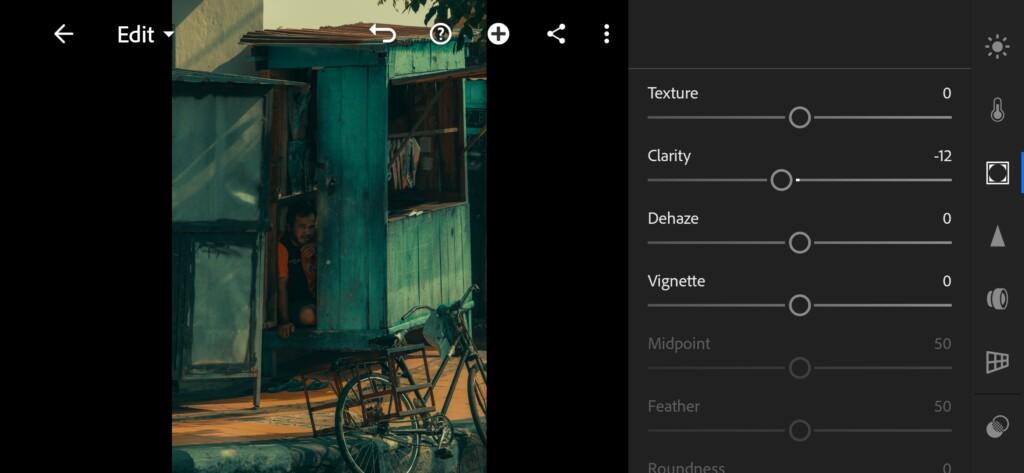
4. Effects editing
Now we will remove the clarity to minus 12.
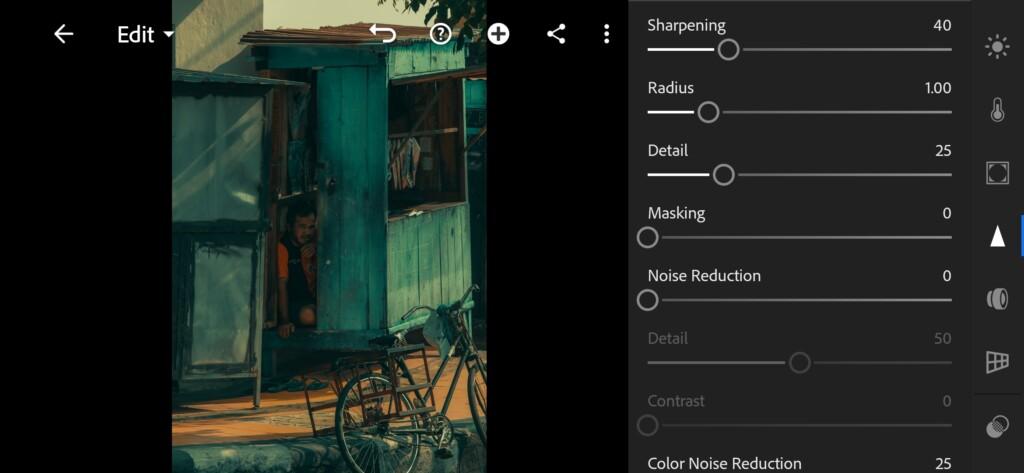
5. Detail correction
Add sharpening +40, and color noise reduction +25.
17 Benjvillena Lightroom Preset 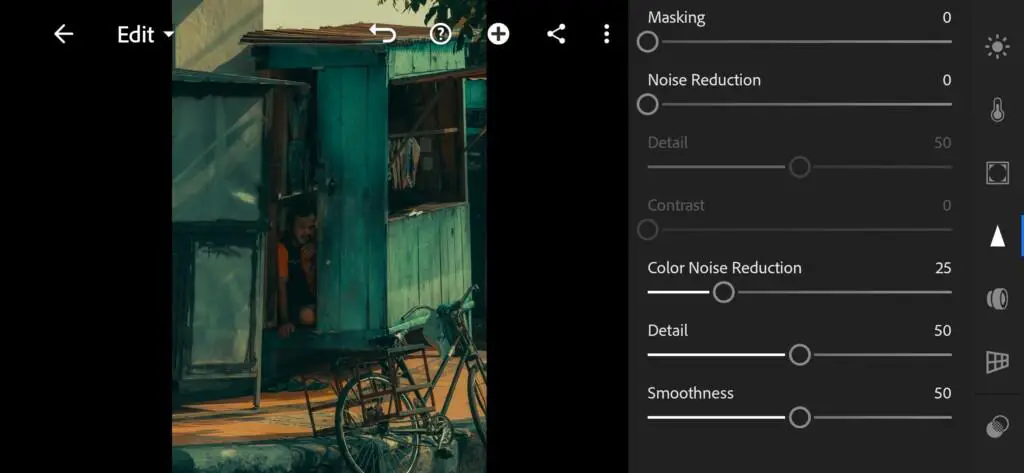
18 Benjvillena Lightroom Preset
6. @BENJVILLENA preset is ready
Our beautiful, dark, cinematic preset is ready.

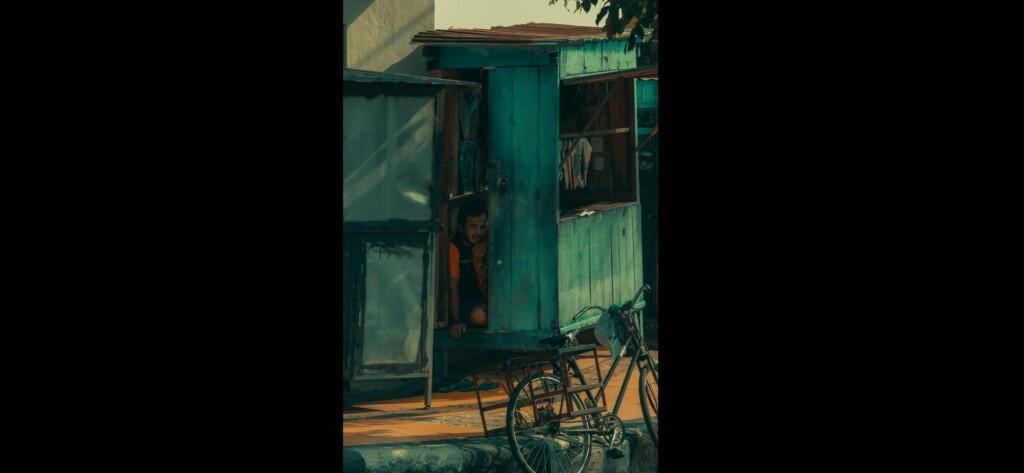
7. Save the preset
Be sure to save the preset and save the correction photo, because we are going to add light now and brighten the photo a little.
If you still don’t know how to save a preset, see this article. If you have any questions, please contact us. We are always happy to help!
8. Open the Lens Distortions app and add our photo that we just correction
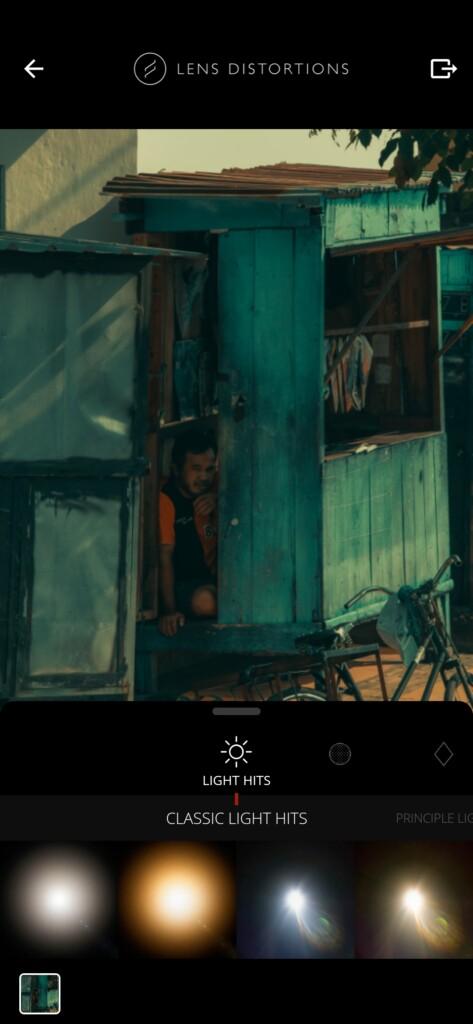
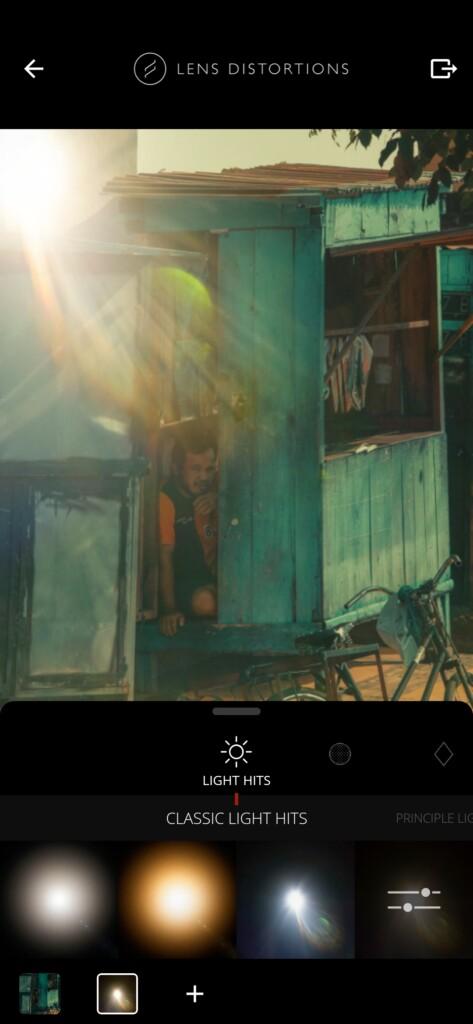
9. Add light for our photo
Now that we have added our photo, we need to choose the light that suits us. We choose the fourth option, and repeat the settings from the screenshots. Light can be moved around the photo, brightness, contrast, warmth can be adjusted.
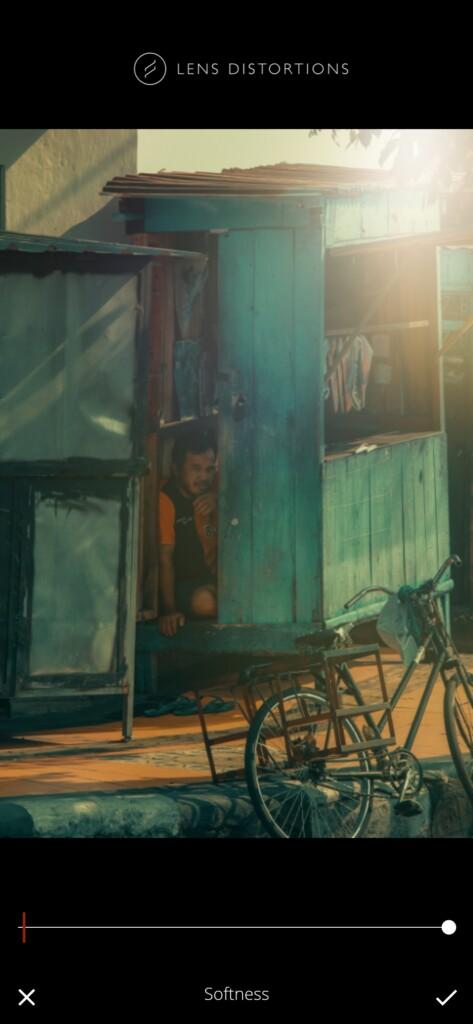
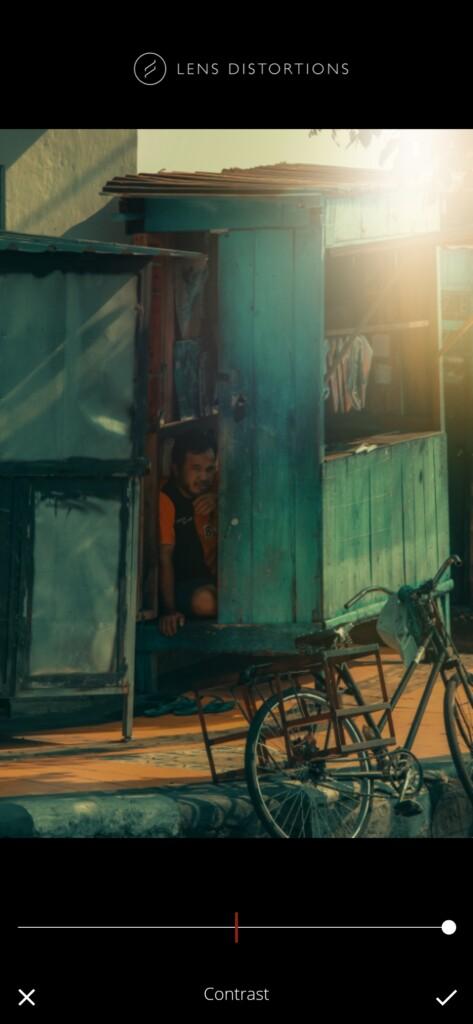
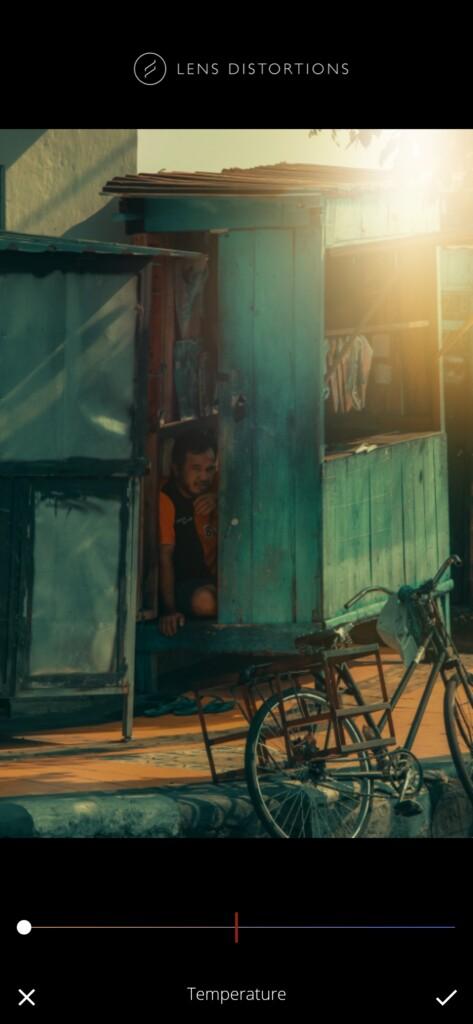
10. Our photo is ready
Now our photo is finished and we actually did a very similar retouching to BENJ VILLENA. If you liked this photo correction with the LD application, please let us know.

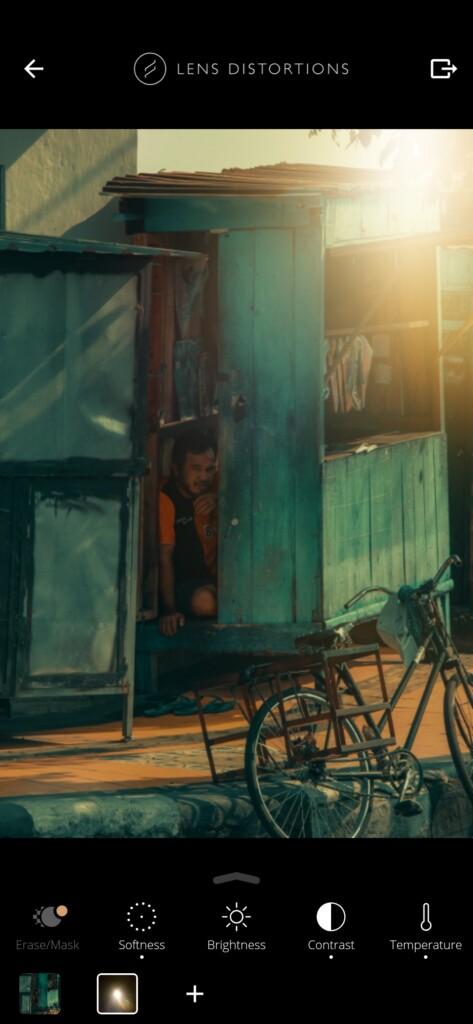
Thank you for inspiring us to do beautiful photo editing!
Watch the video how to create Teal Orange Film like @BENJVILLENA Lightroom preset | Tutorial
Download the Preset
To download the Preset for free you need to have a password which appears twice on the top right corner during the video


