Hello! Today we will show you a color correction option in the style of Instagram blogger and photographer @BILLYDEEE. This preset won our last weekly poll, and today we’ll show you how to create awesome color grading in the style of your favorite photographer Billy Dinh. If you are interested in the topic of color correction, stay with us and repeat the creation of a preset in the Lightroom mobile application or in the Lightroom program on your computer.
You can choose the option that is better for you below
- You can follow this step-by-step guide to create a preset
- You can edit photos by yourself, watching our videos
- You can download our presets for free, but for this you need to carefully watch the video and remember the password (****) for downloading the preset in DNG format. Attention! The password appears only if you watch the video on YouTube, on this website (only on computer’s browsers) or on YouTube app.
- You can also buy set of presets like this. Look at the items down below
How to create Moody Cinematic preset for mobile Lightroom | Guide
For MOODY CINEMATIC preset you can choose any photos.
1. Choose your photo
Please choose a photo that you like.
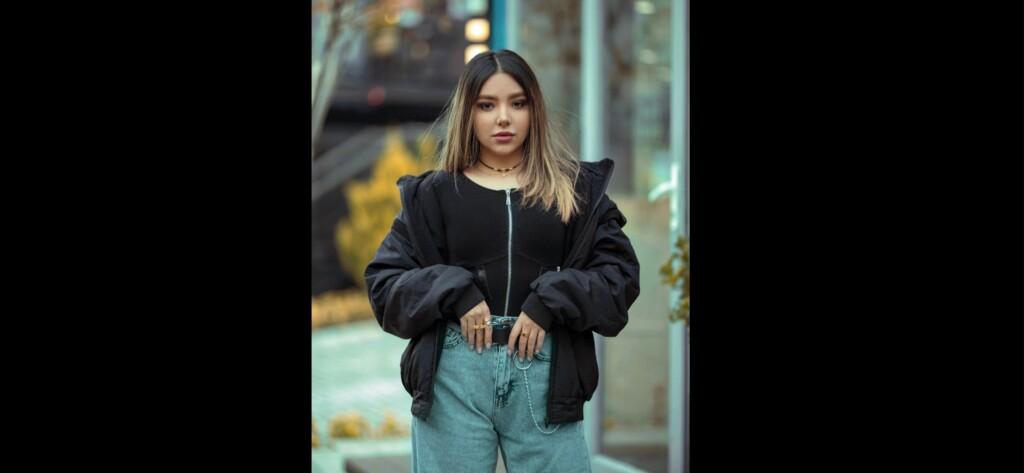
2. Light correction
We always start creating the preset with a light settingWe start creating the preset by adjusting the light correction, and we also carefully look at the photographer’s photo, according to which we will create the preset, analyze the photo, and start creating the preset.
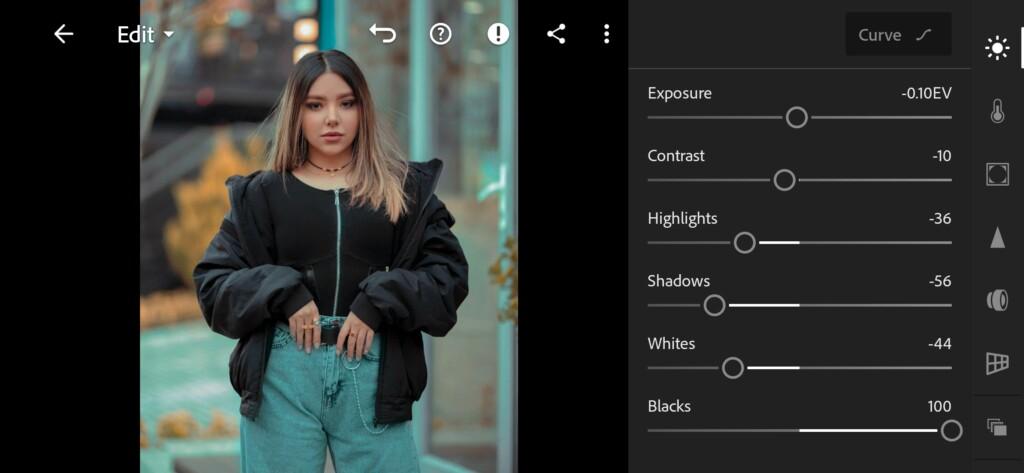

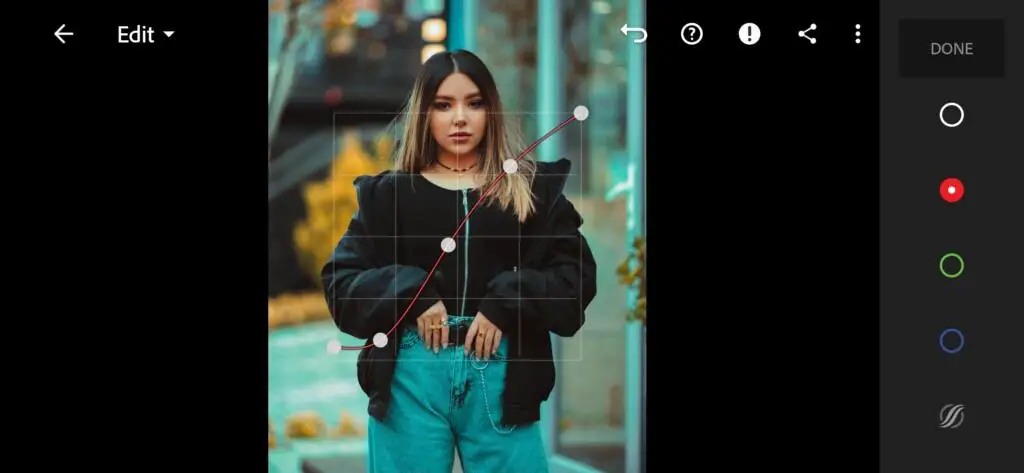
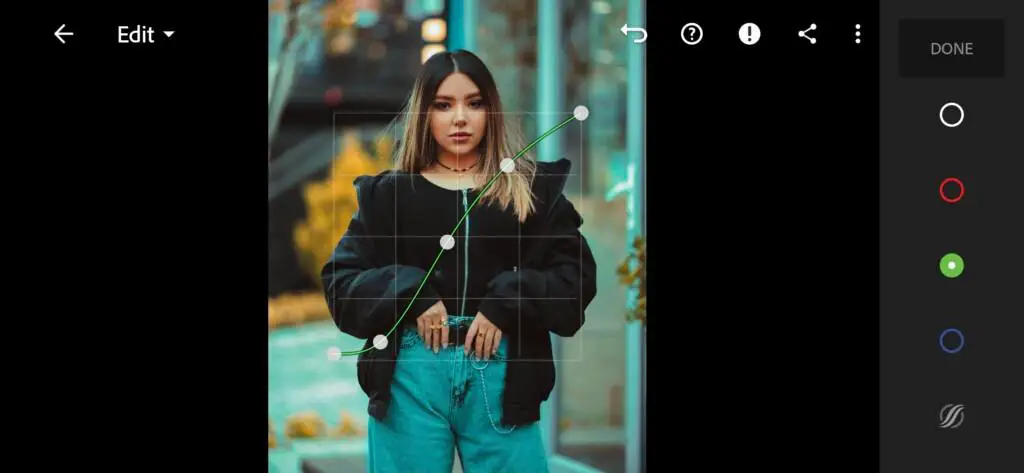
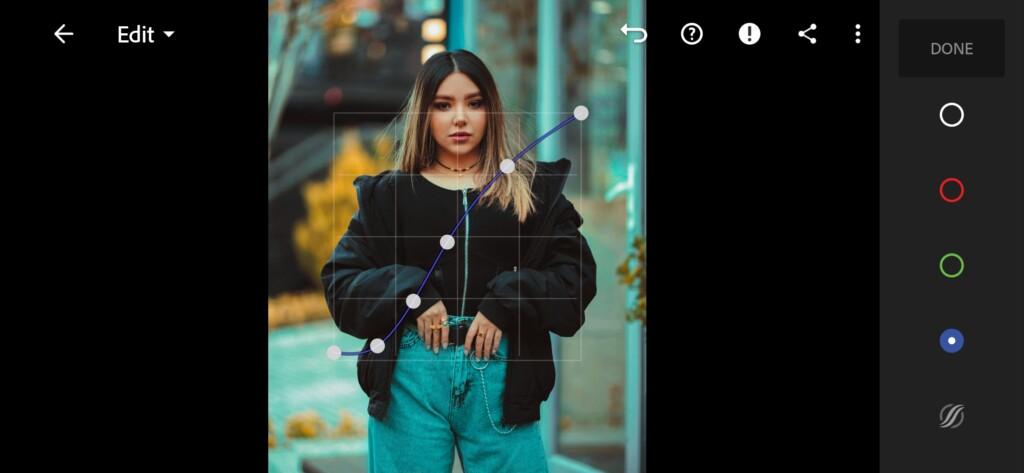
3. Color correction
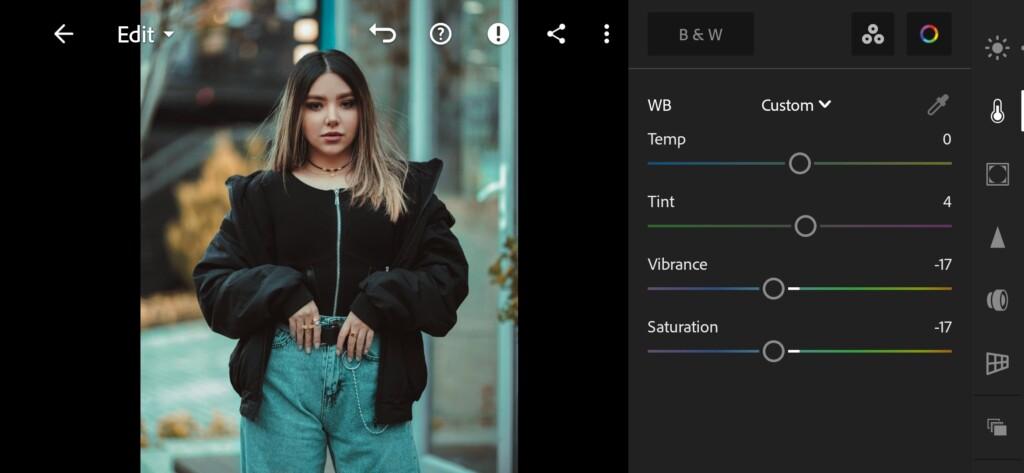
We analyzed the photo of photographer Billy Dinh and now we start setting up the color correction. We try to create an exact copy of the photographer’s preset and we are great at that.
07 Moody Cinematic Lightroom Preset 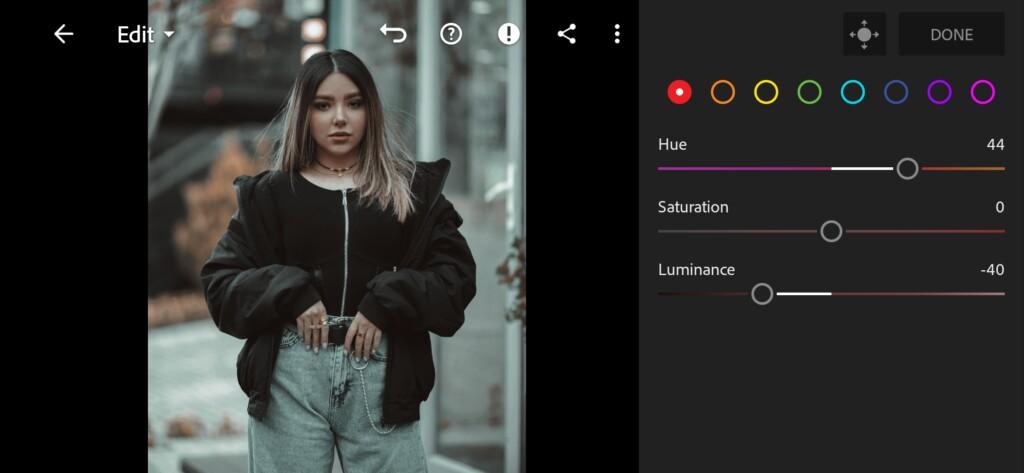
08 Moody Cinematic Lightroom Preset 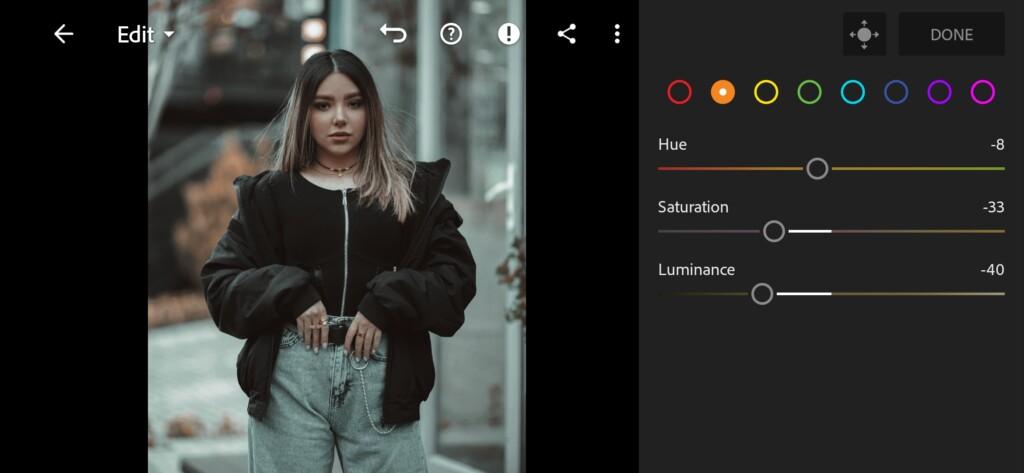
09 Moody Cinematic Lightroom Preset 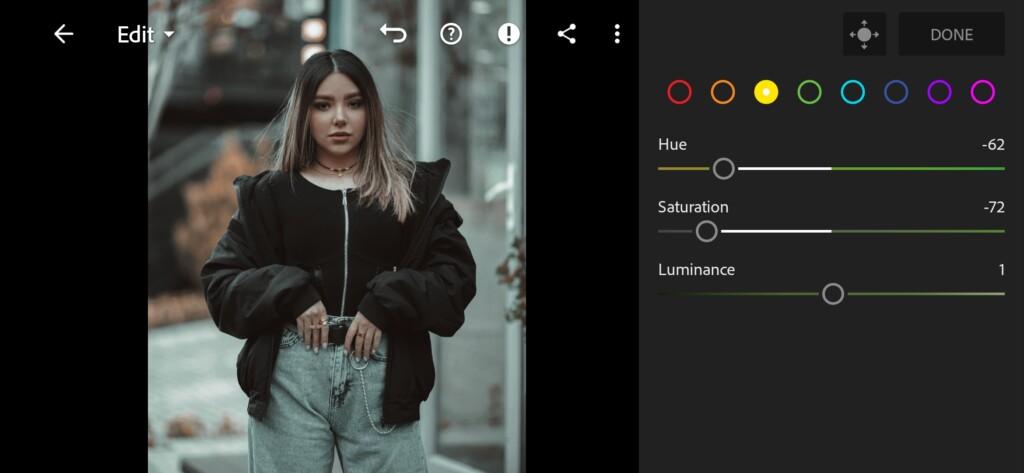
10 Moody Cinematic Lightroom Preset 
11 Moody Cinematic Lightroom Preset 
12 Moody Cinematic Lightroom Preset 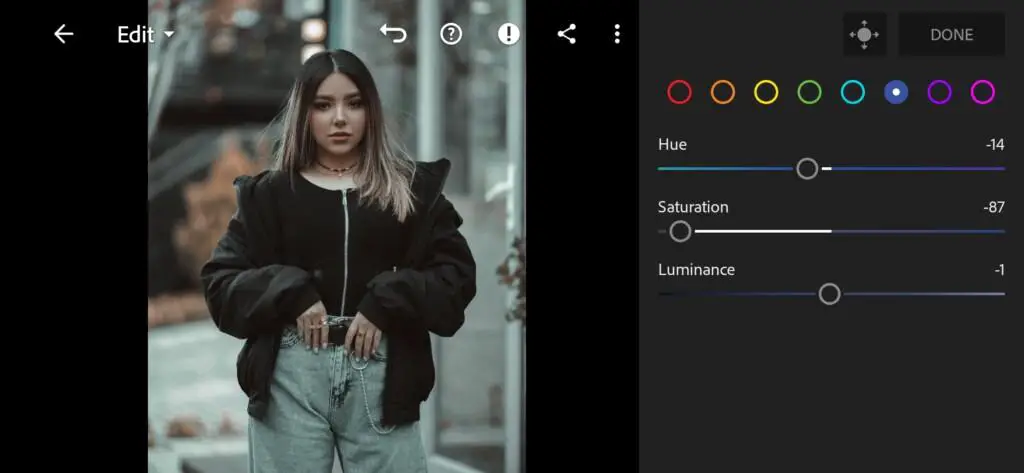
13 Moody Cinematic Lightroom Preset 
14 Moody Cinematic Lightroom Preset 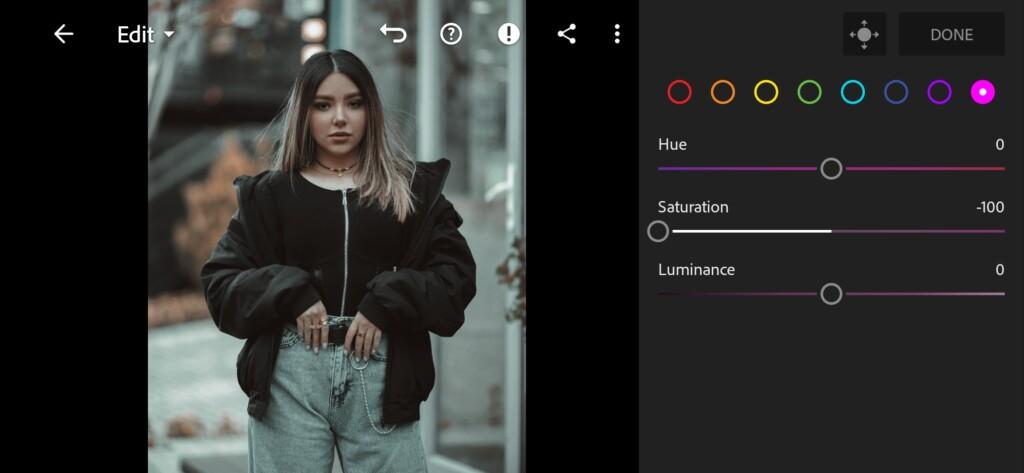
15 Moody Cinematic Lightroom Preset 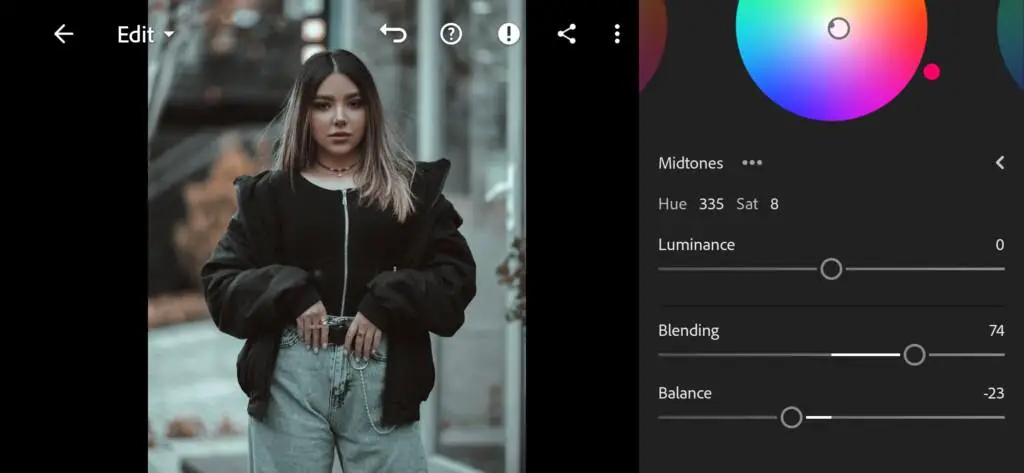
16 Moody Cinematic Lightroom Preset 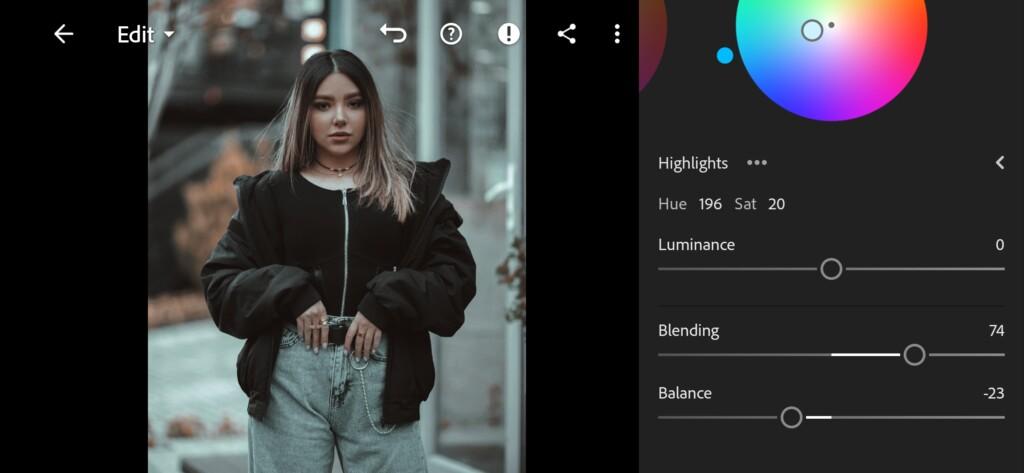
17 Moody Cinematic Lightroom Preset
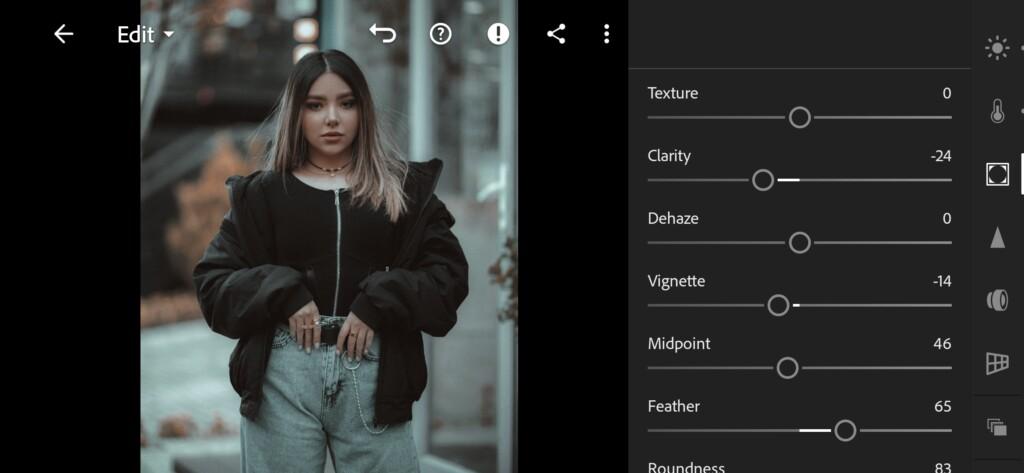
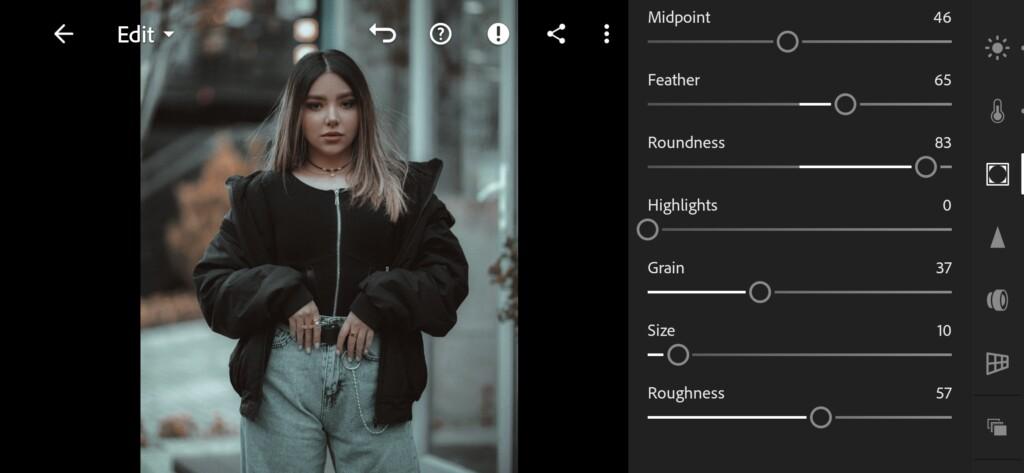
4. Effects editing
Add negative texture and clarAdd negative clarity effect, vignette, roughness, midpoint, feather, grain, size.
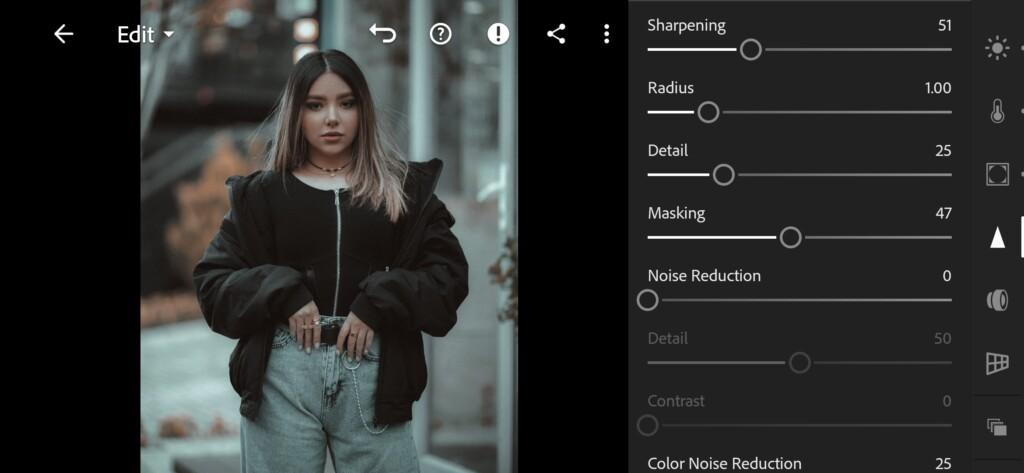
5. Detail correction
Add sharpening, masking, color noise reduction.
20 Moody Cinematic Lightroom Preset 
21 Moody Cinematic Lightroom Preset
6. Preset is ready
MOODY CINEMATIC preset like @BILLYDEEE is ready.

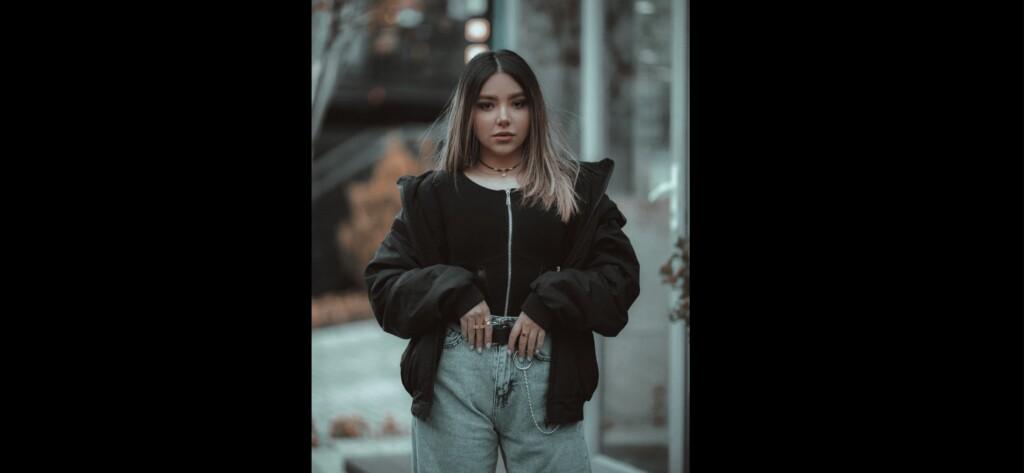
7. Save this preset
If you still don’t know how to save a preset, see this article. If you have any questions, please contact us. We are always happy to help!
We have completed the creation of a preset in the style of the @BILLYDEEE photographer, and we are very pleased with the result. We hope that you have got a great preset with our help. We will be happy to feed your feedback and new requests for the presets of photographers that you like. We select the best queries from you and add them to a weekly vote on Monday, who won the preset we are developing on Saturday, and we share it with you on Sunday.
Watch the video how to create Moody Cinematic Lightroom preset | Tutorial
Download the Preset
To download the Preset for free you need to have a password which appears twice on the top right corner during the video


