Hello! Today we will analyze the delicate, creamy photo correction in Lightroom. As an example, we’ll use a photo in greenery without any correction. We’ll show you every step of color correction and photo retouching in screenshots for TENDERNESS preset. If you wish, you can repeat our photo retouching, or watch a video on our YouTube channel and download four preset options absolutely free. It’s up to you, and we start.

 2 votes
You can choose the option that is better for you below
- You can follow this step-by-step guide to create a preset
- You can edit photos by yourself, watching our videos
- You can download our presets for free, but for this you need to carefully watch the video and remember the password (****) for downloading the preset in DNG format. Attention! The password appears only if you watch the video on YouTube, on this website (only on computer’s browsers) or on YouTube app.
- You can also buy set of presets like this. Look at the items down below


How to create TENDERNESS for mobile Lightroom | Guide
For TENDERNESS preset you can choose any photos
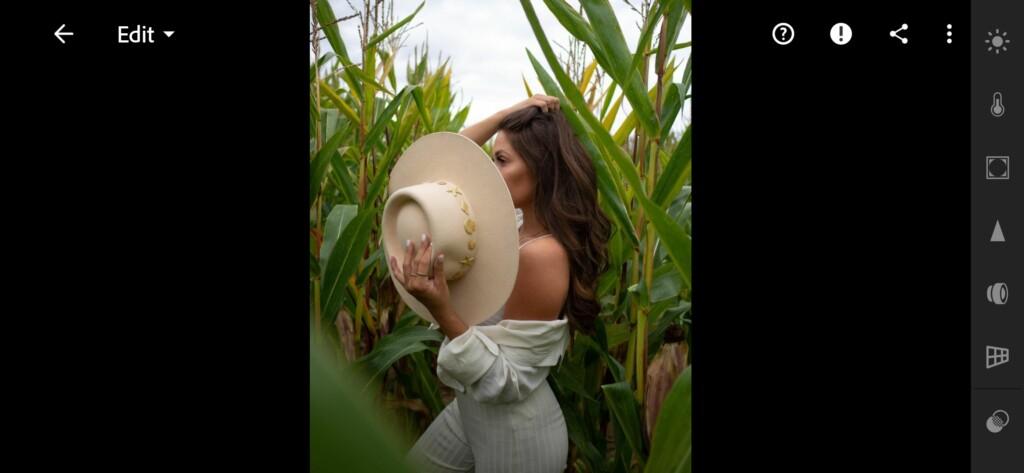
1. Choose your photo for TENDERNESS preset
If you have a similar photograph in green as in our example, it is better to use such a photograph, because the preset will look perfect!
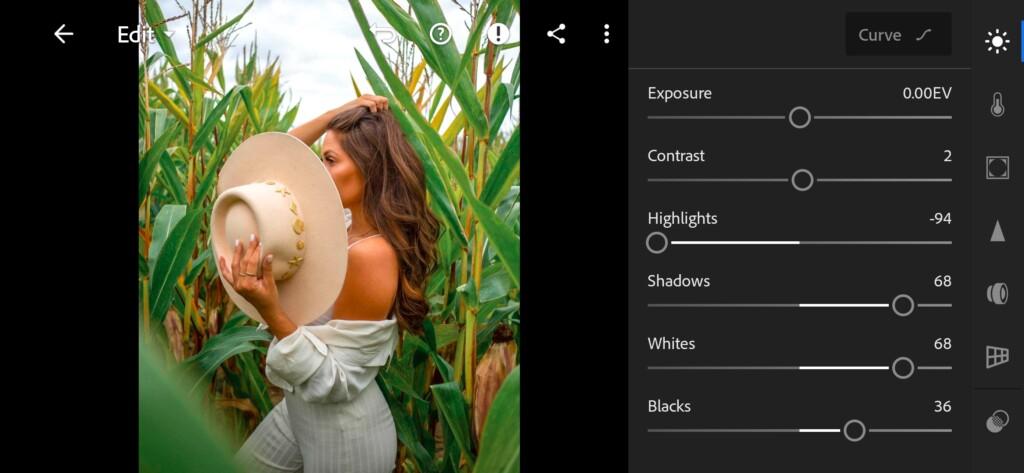
2. Light correction
Let’s start with light correction. Move highlights to minus 94, add contrast to +2, shadows to +68, whites +68, blacks +36. After that, we build four tone curves: white, red, green, blue. Our curves are not very curved, because our preset in a calm and light color scheme.
02 Tenderness Lightroom Preset 
03 Tenderness Lightroom Preset 
04 Tenderness Lightroom Preset 
05 Tenderness Lightroom Preset 
06 Tenderness Lightroom Preset
3. Color correction
We bring the temperature down to minus four, and we take the tint into green to minus 20. After that, we go to the color mix, and adjust our colors in gentle, light shades. To achieve truly beautiful shades, add a lilac tint to our shadows, and add a yellow-orange tint to our highlights, but just a little, it’s important not to overdo it.

07 Tenderness Lightroom Preset 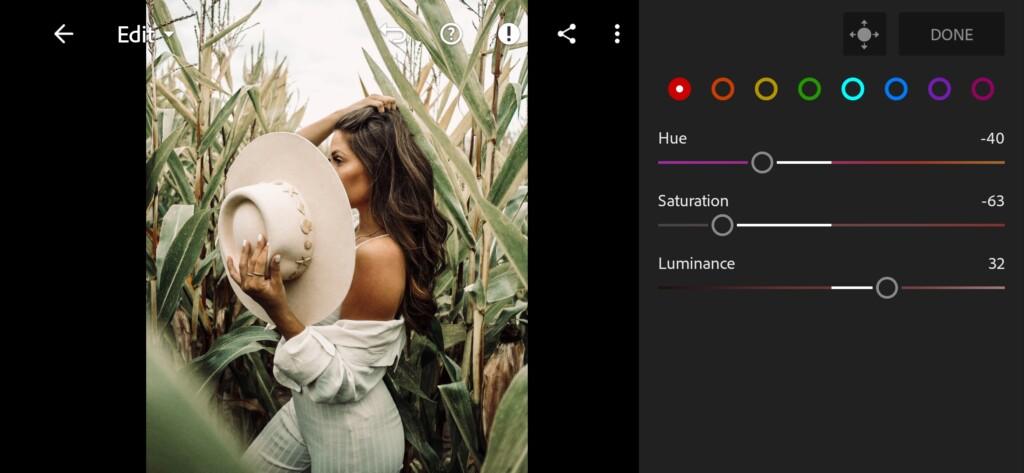
08 Tenderness Lightroom Preset 
09 Tenderness Lightroom Preset 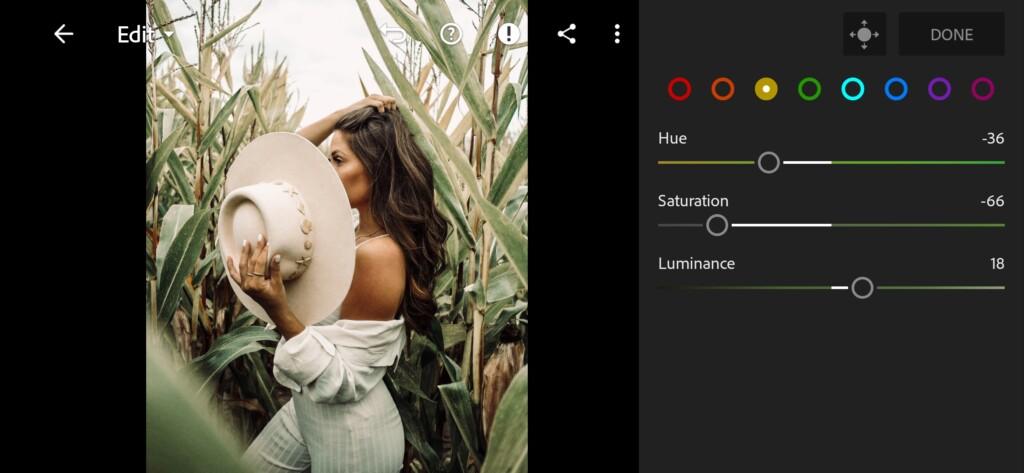
10 Tenderness Lightroom Preset 
11 Tenderness Lightroom Preset 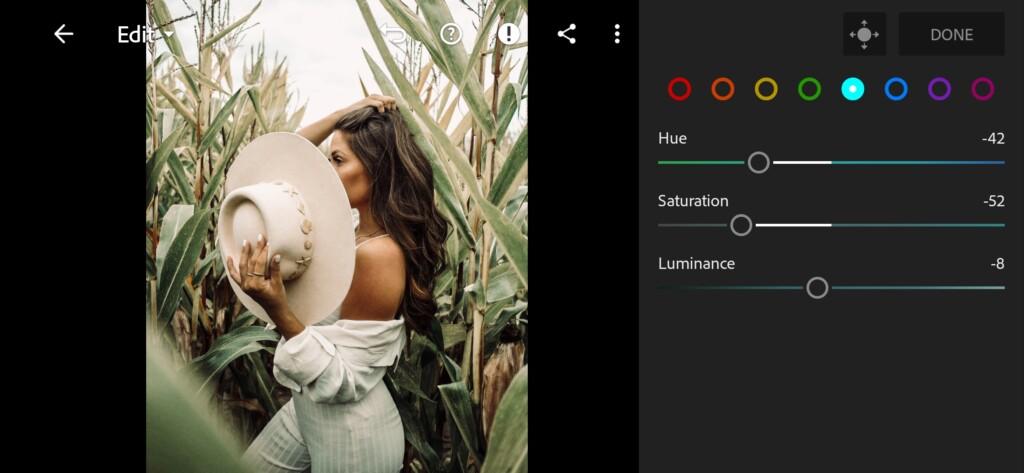
12 Tenderness Lightroom Preset 
13 Tenderness Lightroom Preset 
14 Tenderness Lightroom Preset 
15 Tenderness Lightroom Preset 
16 Tenderness Lightroom Preset 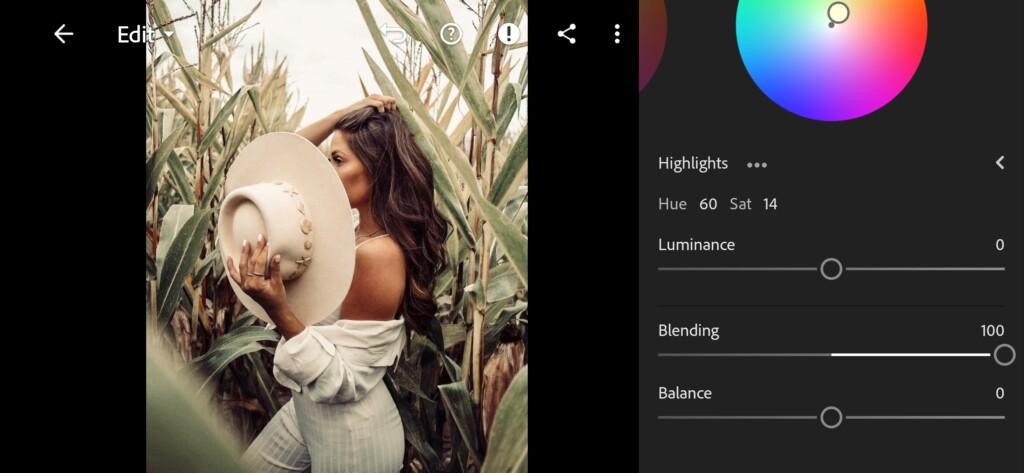
17 Tenderness Lightroom Preset
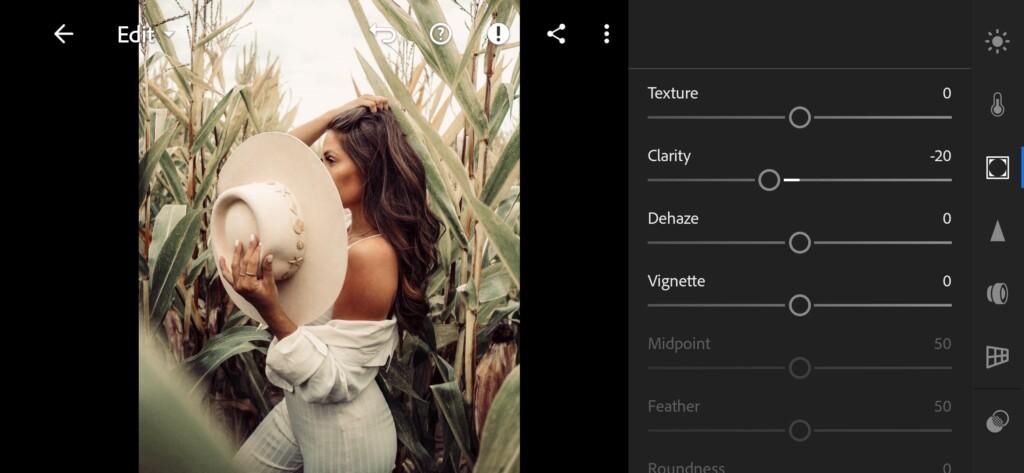
4. Effects editing
Let’s remove the clarity a little.
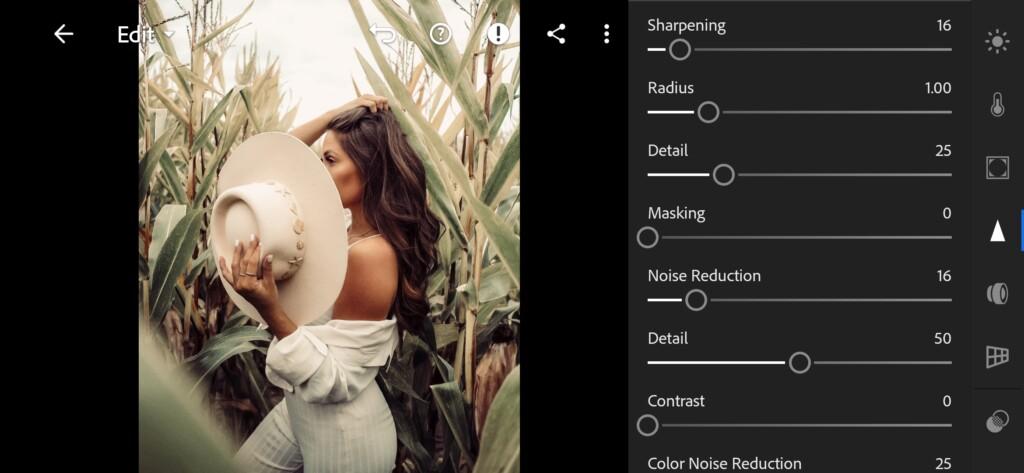
5. Detail correction
Add a little sharpening, noise reduction, color noise reduction. In general, these are the main parameters that we use in almost every photo correction.
19 Tenderness Lightroom Preset 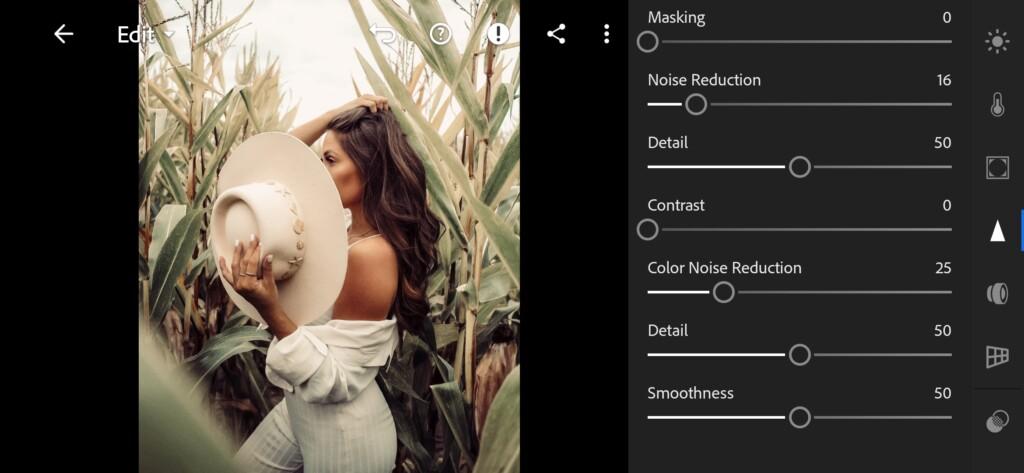
20 Tenderness Lightroom Preset
6. Preset is ready
Our delicate cream preset is ready. Now your photos will definitely go to the next level.

7. Save the preset
If you want to design your Instagram feed in the same style, be sure to save this preset.
If you still don’t know how to save a preset, see this article. If you have any questions, please contact us. We are always happy to help!
Thank you for inspiring us to do beautiful photo editing!
Watch the video how to create Tenderness Lightroom preset | Tutorial
Download the Preset
To download the Preset for free you need to have a password which appears twice on the top right corner during the video